
Artificial Intelligence (AI) has grown by leaps and bounds in recent years, and one of the most practical applications is the AI assistant—an intelligent program that can understand voice or text commands and perform tasks, respond to queries, and enhance productivity. If you’re new to programming or AI, building your own AI assistant can seem daunting. However, with the right tools and step-by-step guidance, it’s an attainable goal even for beginners.
TL;DR
Creating an AI assistant at a beginner level involves choosing the right tools and programming language, setting up basic functions like speech recognition and natural language processing, and then expanding capabilities such as task scheduling and web scraping. Python is the ideal language due to its simplicity and extensive AI libraries. You’ll need libraries like speech_recognition, pyttsx3, and APIs for services like OpenAI or Google. With patience and structured learning, building an AI assistant is not only possible but highly rewarding.
1. Define the Purpose of Your AI Assistant
Before jumping into coding, take a moment to define your AI assistant’s primary objectives. Will it manage your calendar? Answer questions? Control smart home devices? Knowing your goals helps streamline the design and technology choices you’ll make later.
- Productivity-focused: Calendar integration, reminders, email management
- Informational: Answering questions, providing daily updates
- Entertainment: Playing music, telling jokes, running games
2. Choose a Programming Language and Platform
If you’re a beginner, Python is the ideal programming language for this project due to its straightforward syntax and vast ecosystem of libraries. You’ll also need a development environment like:
- Visual Studio Code (VS Code)
- PyCharm
- Jupyter Notebook (for experimentation)
Make sure Python is installed on your computer, along with pip, the package installer for Python.
3. Set Up Your Development Environment
Install the necessary packages to allow your assistant to perform core functions. Start by opening your terminal or command prompt and running the following commands:
pip install speechrecognition
pip install pyttsx3
pip install openai
pip install wikipedia
pip install flask
These libraries allow your assistant to interpret voice input, provide voice responses, interact with APIs, and complete basic web functions.
4. Implement Speech Recognition
Speech recognition is what lets your AI assistant understand audio input. The speechrecognition library in Python makes this process quite accessible.
import speech_recognition as sr

def listen_command():
    recognizer = sr.Recognizer()
    with sr.Microphone() as source:
        print("Listening...")
        audio_data = recognizer.listen(source)
    try:
        text = recognizer.recognize_google(audio_data)
        print("You said: " + text)
        return text
    except sr.UnknownValueError:
        print("Sorry, I did not understand.")
        return ""
This function listens to a voice command and converts it to text using Google’s recognition API.

5. Add Text-to-Speech (TTS)
Once your assistant can understand input, it should also be able to respond. pyttsx3 is a Python library used for converting text to speech.
import pyttsx3

def speak(text):
    engine = pyttsx3.init()
    engine.say(text)
    engine.runAndWait()
Use this function to allow your AI to communicate back to the user, making interactions more intuitive and engaging.
6. Process Natural Language
You want your assistant to not only understand what you’re saying but also figure out what to do in response. For this, you can either write simple if-statements, use the wikipedia API for factual queries, or integrate more advanced models using OpenAI’s GPT.
import openai

openai.api_key = 'your-api-key'

def get_response(prompt):
    response = openai.Completion.create(
      engine="text-davinci-003",
      prompt=prompt,
      max_tokens=50
    )
    return response.choices[0].text.strip()
Replace ‘your-api-key’ with your actual OpenAI API token. This allows your assistant to give intelligent responses to a wide range of queries.
7. Add Useful Skills and Integrations
Here’s where your assistant starts to shine. You can integrate other features such as web search, time checks, email reading, and smart device controls. Here are a few popular options to consider:
- Web Search: Use webbrowser module for opening websites
- Reminders: Use datetime and time modules
- Email Sending: Use smtplib for sending emails securely
- Weather Check: Use APIs like OpenWeatherMap
Each of these features requires additional coding and API interactions, but as you progress, these skills will come naturally.
8. Create a Command Control Loop
To make your assistant listen continually and act accordingly, wrap your logic in a command loop:
while True:
    command = listen_command().lower()
    if 'weather' in command:
        # Call weather function
        speak("Here is the weather update.")
    elif 'time' in command:
        # Call time function
        speak("It's 3:45 PM.")
    elif 'exit' in command:
        speak("Goodbye!")
        break
    else:
        speak("I'm sorry, I didn't understand that.")
This loop sets the groundwork for continuous interaction and real-time assistance.
9. Make It Smarter Over Time
You don’t have to stop once the basics are implemented. With machine learning or neural network frameworks like TensorFlow or PyTorch, and access to AI APIs, you can expand your assistant’s intelligence. Some advanced features include:
- Learning from user interactions
- Sentiment analysis
- Image recognition
- Voice biometrics for user authentication
As technology evolves, so can your AI assistant’s capabilities—turning it from a simple script into a powerful digital companion.
10. Deploy Your Assistant
For accessibility, you can package your assistant as a desktop application using Tkinter or as a web app using Flask. You can also host it on cloud platforms like Heroku or AWS for 24/7 availability.
from flask import Flask

app = Flask(__name__)

@app.route("/")
def home():
    return "Your AI Assistant is running!"

if __name__ == "__main__":
    app.run()
This presents your assistant via a browser and allows for remote interaction.
Conclusion
Building an AI assistant is a wonderful introduction to the world of Artificial Intelligence and programming. By starting small and using beginner-friendly tools like Python and public APIs, you can create a useful, customizable assistant tailored to your needs. Whether it evolves into a full-scale productivity helper or remains a fun project, the experience and knowledge gained will be invaluable.
Remember, the key to mastering AI development is consistent practice and curiosity. With every new feature you add, you’ll improve your skills while staying at the forefront of modern technology.
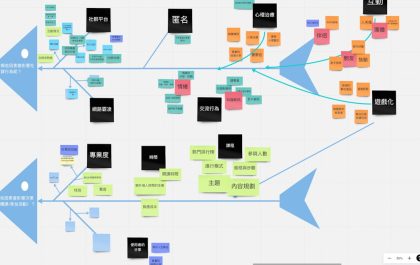
5 Mind Mapping Tools Like XMind That Help You Organize Ideas Visually
Mind mapping has become one of the most powerful ways to untangle complex ideas, plan projects, and spark creativity. While…