Bootable Window 10 Usb
Use “Rufus” to create Bootable Window 10 USB for Legacy BIOS and UEFI.
Download Windows 10
If you have not already, you will need to download a Windows 10 ISO file.
Download Rufus
Download the latest version of Rufus, and save its .exe file to your desktop.
Connect Usb
Connect the USB flash drive that you want to use for bootable.
Launch Rufus
Run the Rufus .exe file, and click on Yes if prompted by UAC.
Creating Bootable Usb
To Create Bootable USB Flash Drive for Installing Windows 10 with Legacy BIOS or UEFI
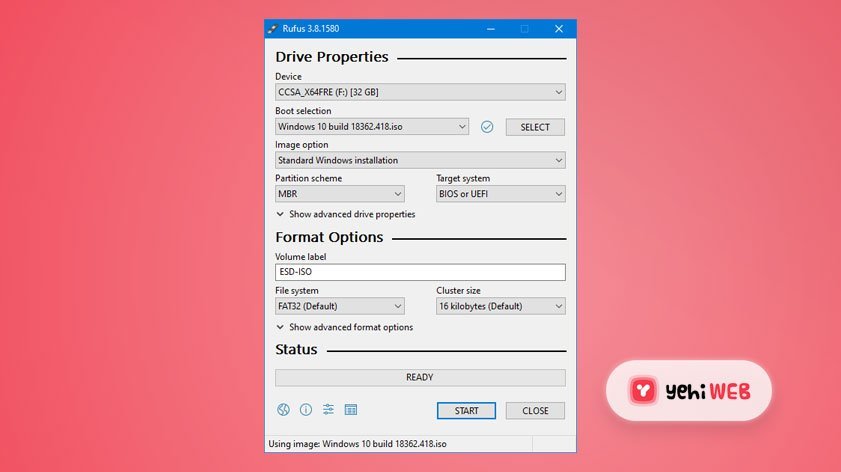
- Under Device, select the USB flash drive you want to format and use.
- Under Boot selection, click/tap on the SELECT button, and navigate to and select your 64-bit Download Windows 10 ISO file.
- Under Image option (if available), select Standard Windows installation.
- Under Partition scheme, select MBR.
- Press the Alt + E keys.
- Under the Target system, select BIOS or UEFI.
- Under Volume label, you can enter any name you like for the USB flash drive, or leave the default name.
- Under File system, select FAT32 (if able). If the file is larger than 4GB, you will only be able to select NTFS.
- Under Cluster size, select the (Default) (ex: 16 kilobytes) it has listed.
With UEFI
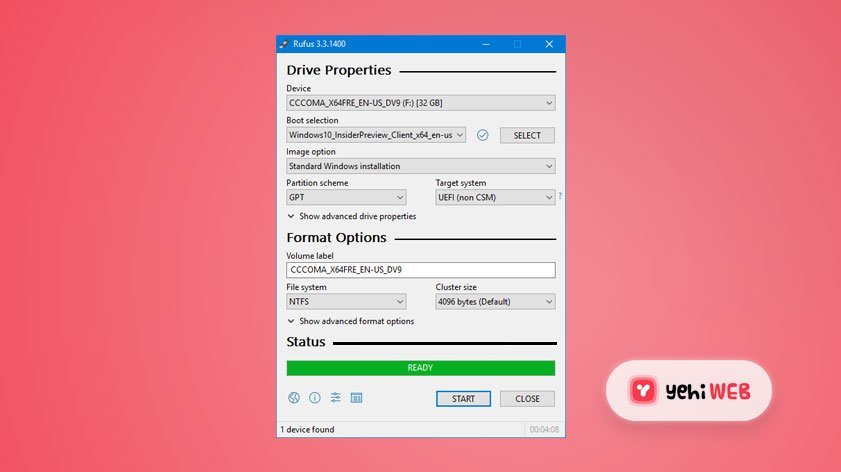
To Create Bootable UEFI USB Flash Drive for Installing Windows 10 only with UEFI
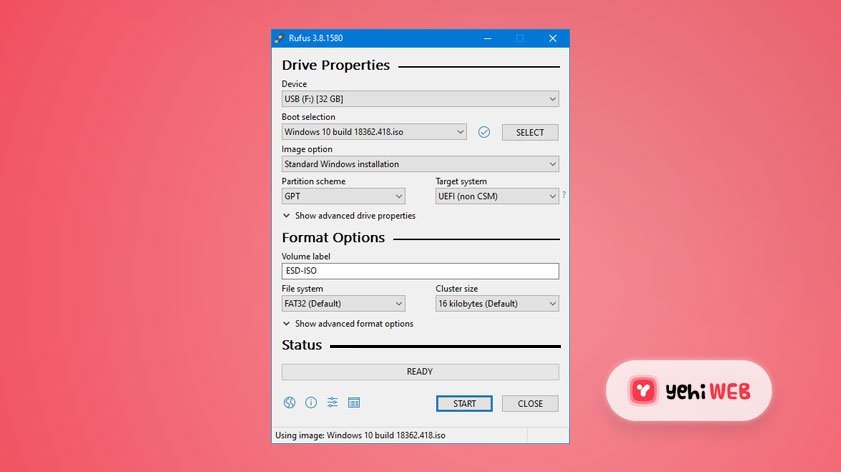
- Under Device, select the USB flash drive you want to format and use.
- Under Boot selection, click/tap on the SELECT button, and navigate to and select your 64-bit Download Windows 10 ISO file.
- Under Image option (if available), select Standard Windows installation.
- Under the Partition scheme, select GPT.
- Under the Target system, select UEFI (non-CSM).
- Under Volume label, you can enter any name you like for the USB flash drive, or leave the default name.
- Under File system, select FAT32 (if able). If the file is larger than 4GB, you will only be able to select NTFS.
- Under Cluster size, select the (Default) (ex: 4096 bytes) it has listed.
Without UEFI
To Create Bootable USB Flash Drive for Installing Windows 10 only with Legacy BIOS (without UEFI).
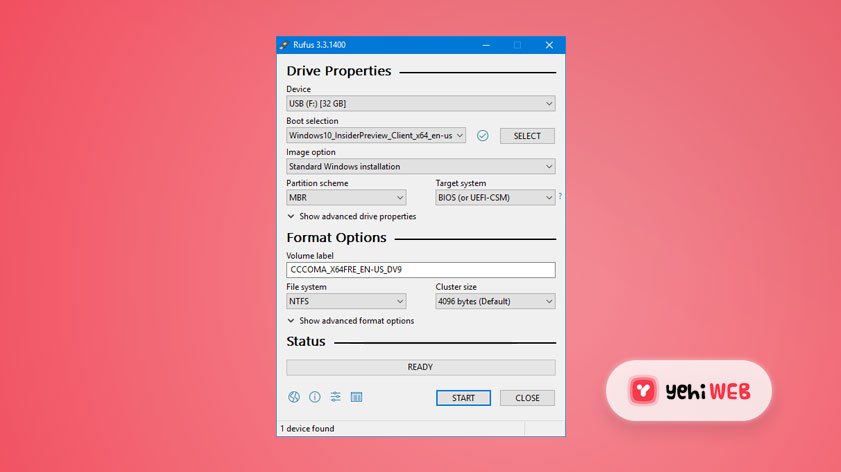
A) Set Rufus using the settings below, click/tap on Start, and go to step 9 below. (see screenshot below).
- Under Device, select the USB flash drive you want to format and use.
- Under Boot selection, click/tap on the SELECT button, and navigate to and select your 32-bit or 64-bit Download Windows 10 ISO file.
- Under the Image option (if available), select Standard Windows installation.
- Under the Partition scheme, select MBR.
- Under the Target scheme, select BIOS(or UEFI-CSM).
- Under the Target system, select UEFI (non-CSM).
- Under the Volume label, You can enter any name you like for the USB flash drive, or leave the default name.
- Under the File system, select NTFS.
- Under Cluster size, select the (Default) (ex: 4096 bytes) it has listed.
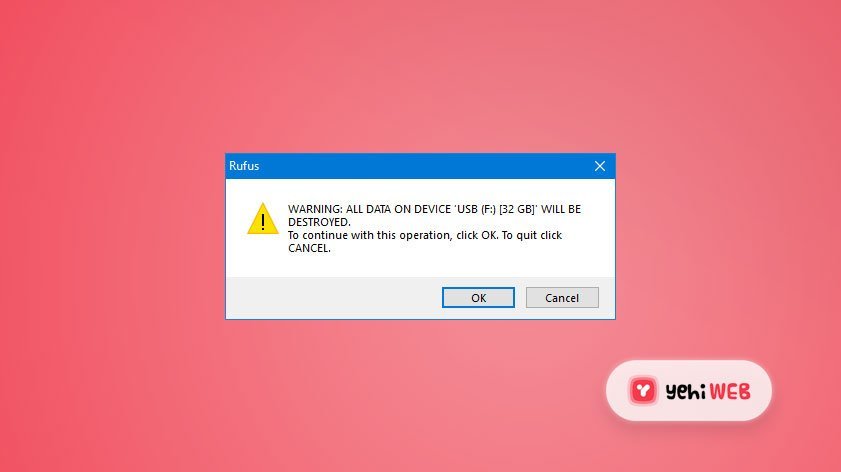
Remove Previous Data
Click on OK to confirm. (see screenshot below)
Start Creating Bootaable Usb
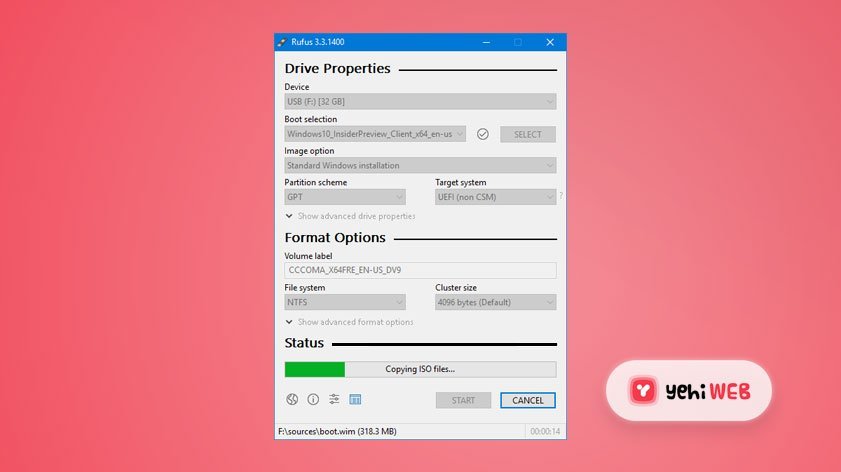
Rufus will now start creating the bootable USB flash drive. (see screenshot below)
Setup Finished
When Rufus is “READY” (finished), you can close Rufus. (see screenshot below)
Bilal Shafqat
Related posts
New Articles
How to Watch Twitch on Fire Stick with Alternate Player
Watching Twitch on a Fire Stick offers a streamlined way to enjoy game streams and live content on a large…

![Use “Rufus” to create Bootable Window 10 USB for Legacy BIOS and UEFI [ Ultimate Guide ]](https://yehiweb.com/wp-content/uploads/2021/02/Rufus-Bootable.jpg)

Comments are closed.