When you try to enter Windows Safe Mode to fix an issue, you may discover that it does not work. You have come to the right place if you are looking for solutions to this issue. We have outlined few solutions as to How To Fix Windows Safe Mode Not Working error in our article. Keep reading and follow the steps mentioned below to resolve the error on your system.
Safe Mode Not Working!
Safe Mode allows you to start Windows in a basic state, with just a few files and drivers loaded. If your computer is having problems, you can enter Safe Mode to troubleshoot them:
- If the problem persists in Safe Mode, the issue is likely due to a third-party application rather than default settings or basic device drivers.
- If the bug reappears in Safe Mode, it indicates that something is wrong with the Windows operating system, which you need to repair.
However, some of you may find that Windows may not start in Safe Mode when you need to troubleshoot a problem immediately. Despite several attempts, Windows is still unable to boot into Safe Mode. Then it would be not easy.
Many of you have complained about Windows failing to boot in Safe Mode. As a result, we believe it is important to advise you about effectively resolving this issue. We have outlined some potential solutions in the following content, which you should try one at a time to find the best solution.
How To Fix Windows Safe Mode Not Working?
The issue of Safe Mode not working can occur in every Windows version. We will use Windows 10 to run the solutions in the following sections. The steps are identical if you are using any Windows operating system.
You should also try these solutions if you are having difficulty with Safe Mode with Command Prompt not working.
Method 1: Perform System Restore
If you have previously created a system restore point, you can use it to restore the computer to a previous good state when Safe Mode was still operational. If no device restore point is available, please proceed to the next solution.
To complete this task, you must:
- In the Search box, type restores and then select Create a Restore Point from the search results. To begin, press the Yes button when you see the User Account Control interface.
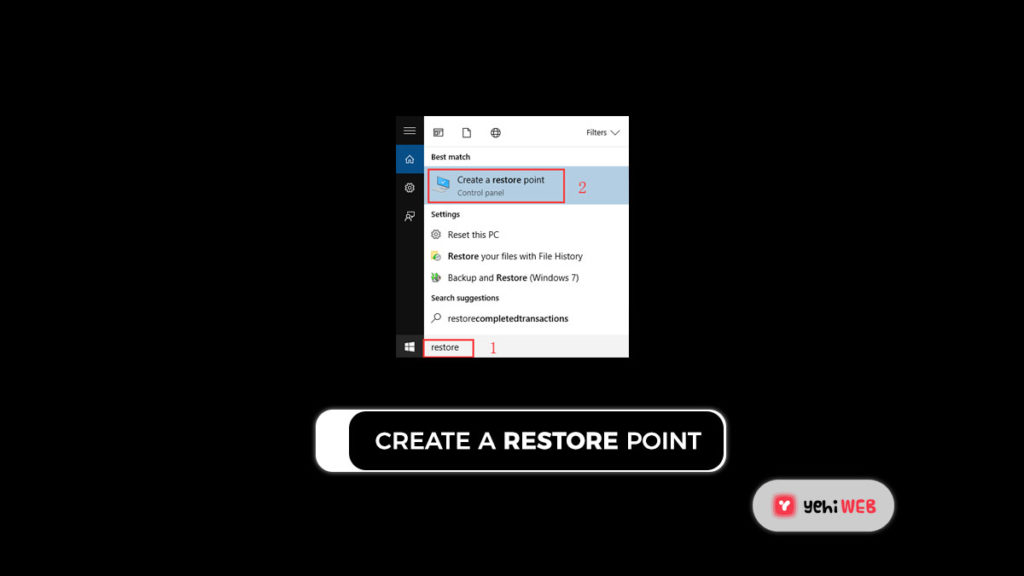
- In the Search box, type restores and then select Create a Restore Point from the search results. To begin, press the Yes button when you see the User Account Control interface.
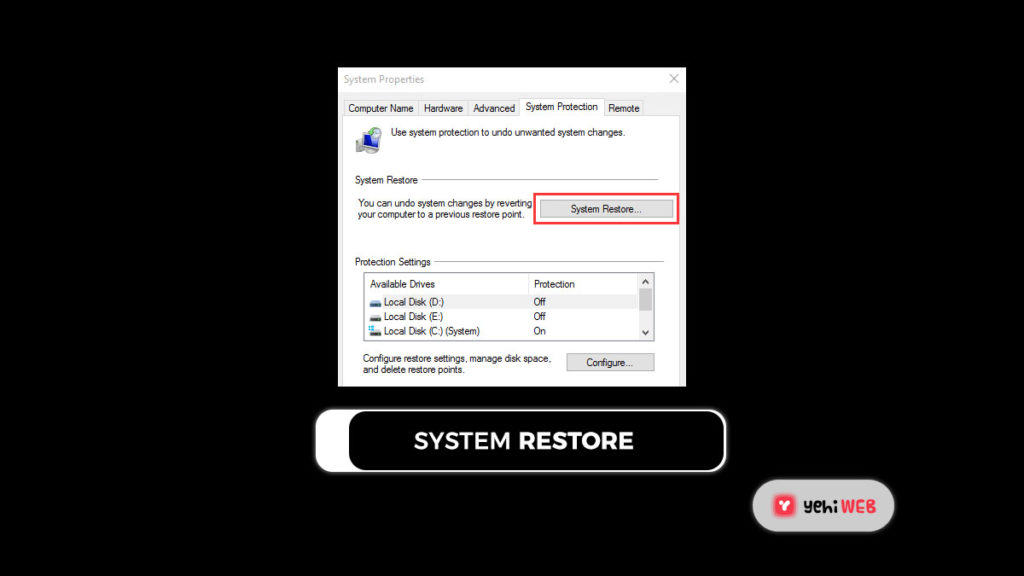
- Enter System Properties Interface as follows. Select System Restore under the System Protection tab.
- The System Restore window will appear.
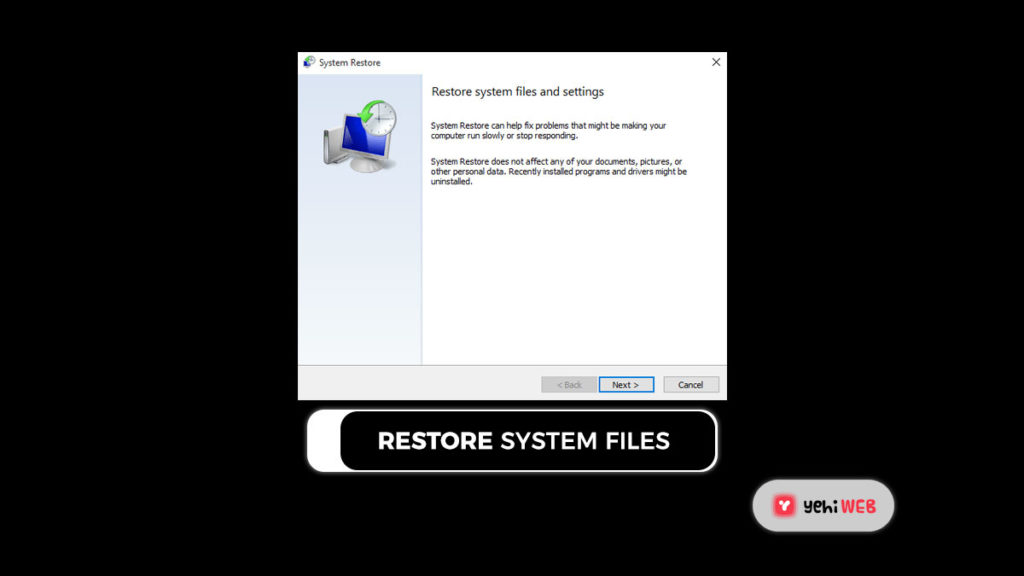
- Then, click the Next button to proceed to the next interface, where you can choose the previously generated restore point. Following the selection of the target item, please click the Next button and follow the wizard to complete the task.
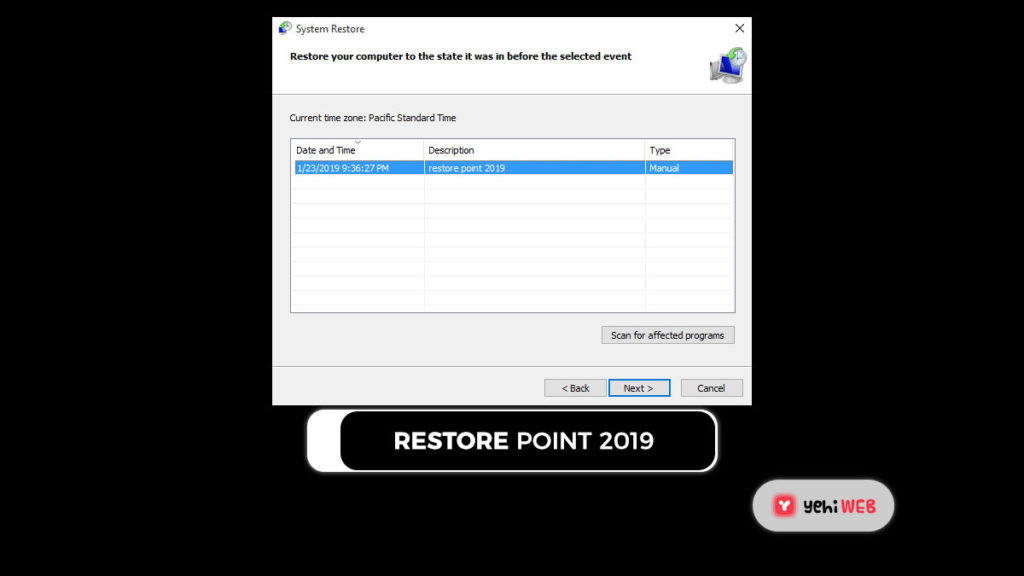
After completing these three steps, restart Windows and see if the Safe Mode not working issue is resolved.
Normally, system restore has no impact on your documents, images, or other personal data. If system restore is accidentally disrupted, the computer can malfunction, resulting in a Black Screen of Death, system restore hanging and other issues.
Since Safe Mode is not working in this situation, you would not be able to fix the computer. The most common approach, in this case, is to reinstall Windows. There should, however, be some important files on the disk. It would be best if you restored them to a safe location before reinstalling Windows to keep them safe.
Method 2: Run sfc /scannow in Command Prompt
Corrupted or damaged Windows system files may also cause the Safe Mode not working issue. Although sfc.exe, or System File Checker, can search and recover infected Windows system files. It would help if you used it to see how it can help you get Safe Mode to work again. To so follow the steps mentioned below:
- Press Windows + R short key to open Run Window
- Type CMD and Press CTRL + SHIFT + ENTER to open CMD as Administrator
- In Command Prompt, execute the following command:
sfc /scannow
- Once the process is complete, Type Exit in CMD and hit Enter to exit.
- Now Restart your PC and attempt to boot in safe mode to check if the issue is resolved.
Method 3: Reset PC
Note: Before resetting the machine, we recommend backing up your data to an external drive as an extra precaution.
To Reset your PC, Follow the steps mentioned below:
- Go to Settings > Recovery, then select Get started under Reset this PC.
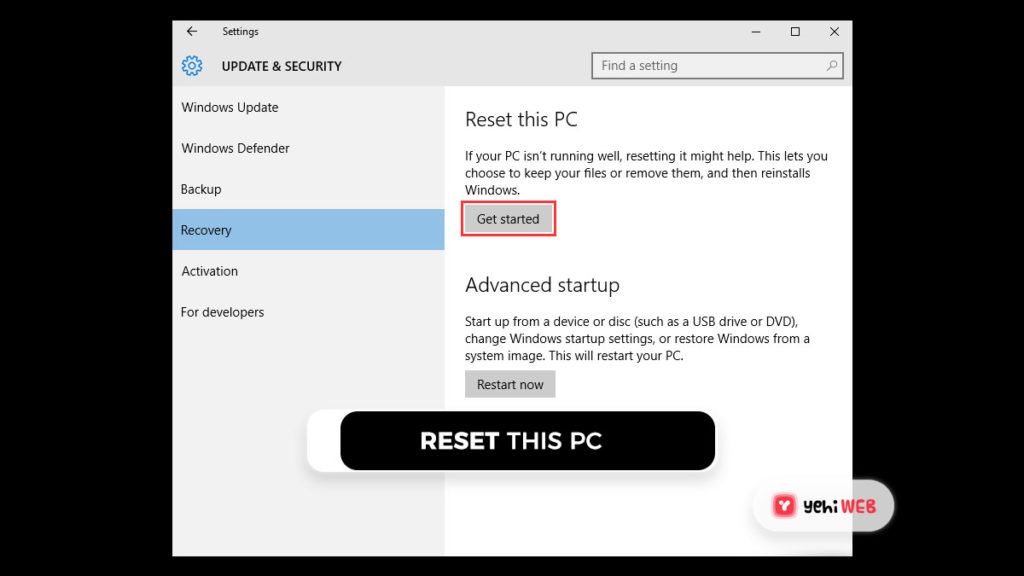
- After that, you will have 2 options: Keep my files or Remove everything. Please choose one that best suits your needs and then follow the rest of the wizards to reset your computer.

The reset process will take some time to complete, and the computer will reboot a few times.
Method 4: Force Windows To Boot In Safe Mode
You can actually force Windows to Boot in Safe Mode through system configuration utility if safe mode does not work conventionally. And to do so, follow the steps mentioned below:
- In the Windows 10 Search box, type MSConfig and press Enter. The System Configuration interface will appear after that.
- You can find some Boot options under the Boot tab. Check Safe boot and Minimal in that order. After that, click Apply and OK to save your changes.
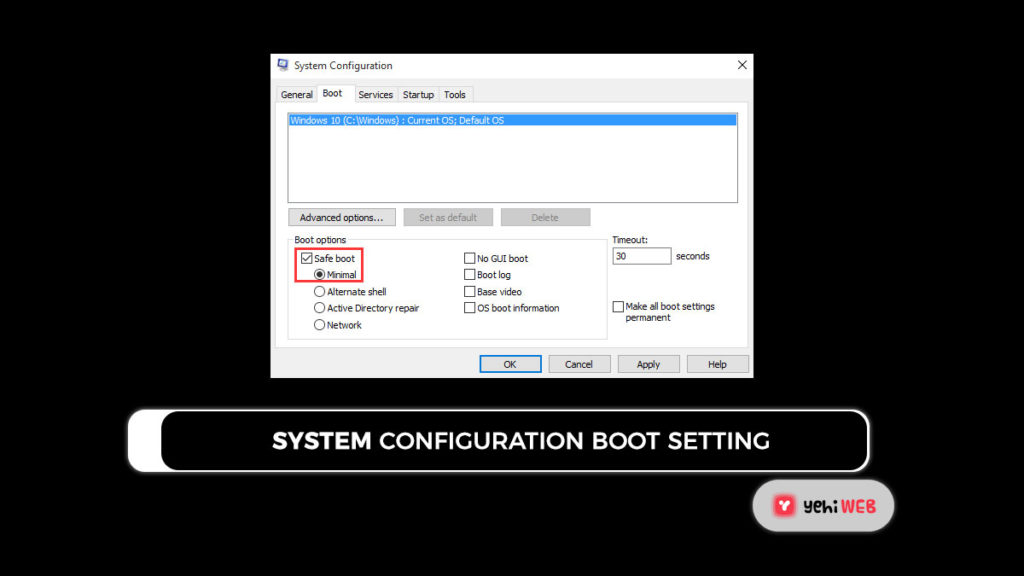
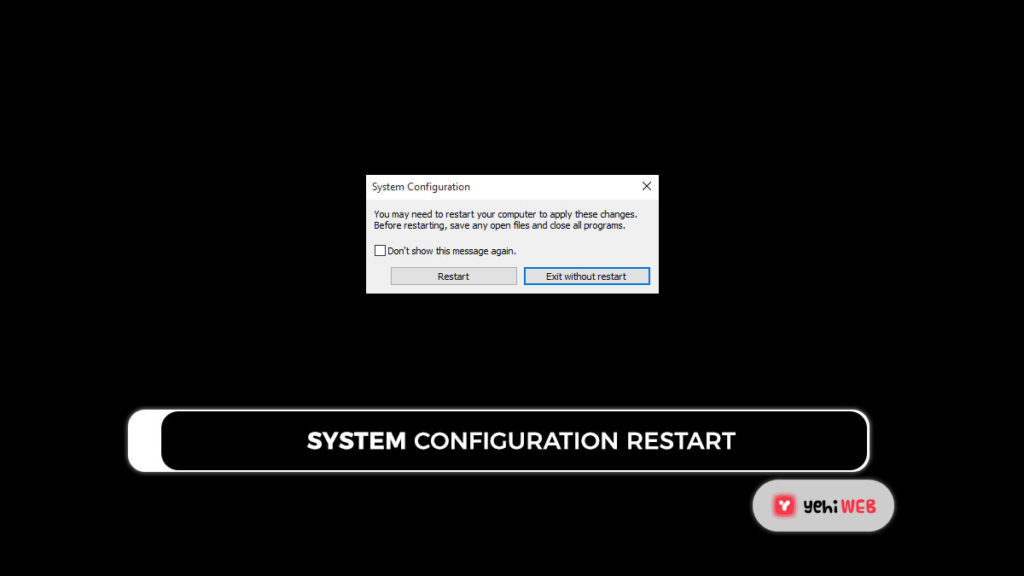
- After that, a prompt window will open. Click restart to enter safe mode successfully.
- If Safe Mode is now working, you can finish your activities in Safe Mode before returning to MSConfig to remove the checkmark from the Safe Boot option.
Simultaneously, creating a desktop shortcut to the System Configuration utility is a convenient way to access it:
- Choose Shortcut from New by right-clicking on the desktop.
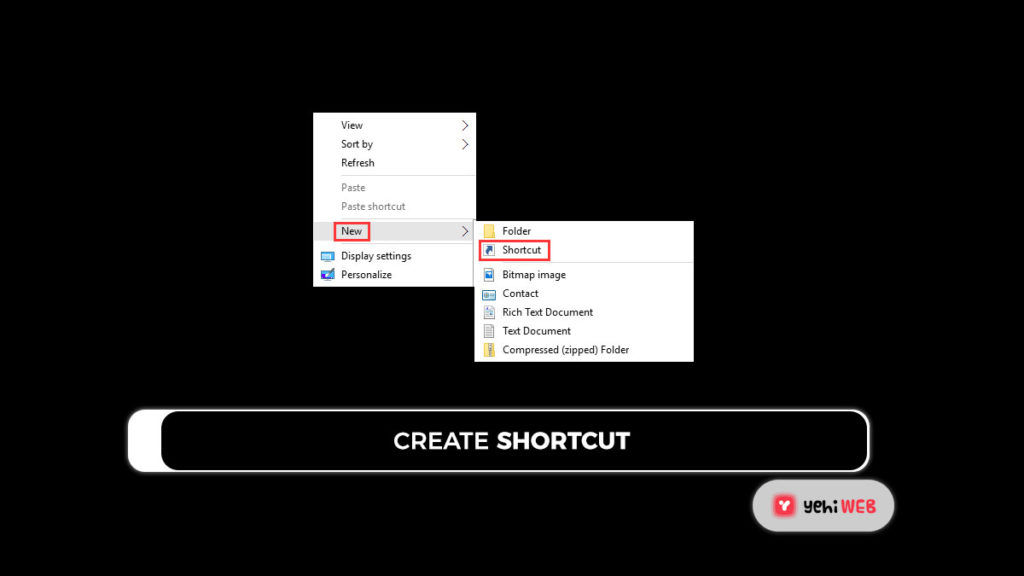
- Please copy and paste the following path into the black box when you see the first Create Shortcut interface:
C:\Windows\System32\msconfig.exe -2
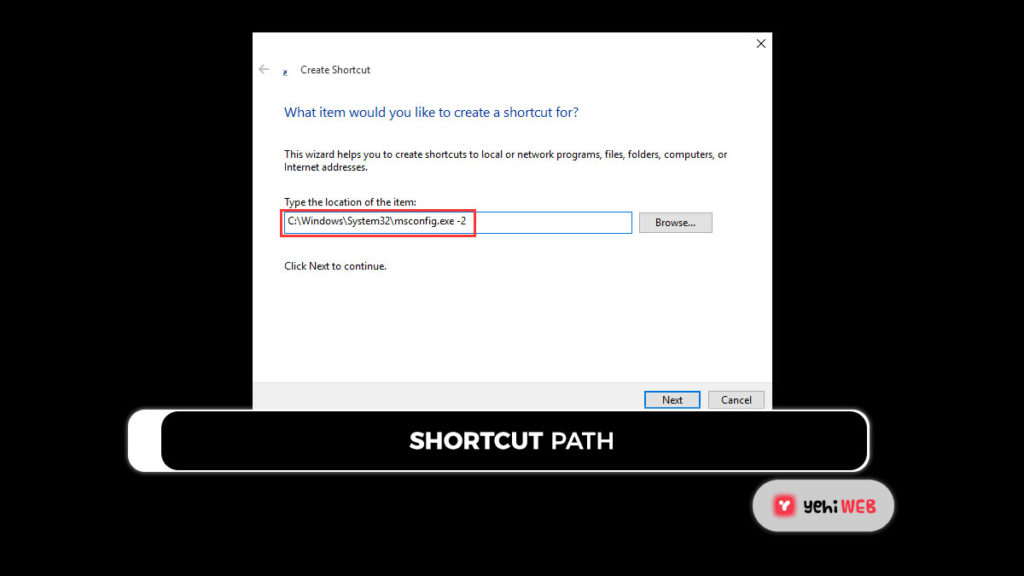
- Then, to continue, press the Next button.
- You can type a name for the shortcut in the second Create Shortcut interface, such as Restart options. Finally, click the Finish button to finish the operation.
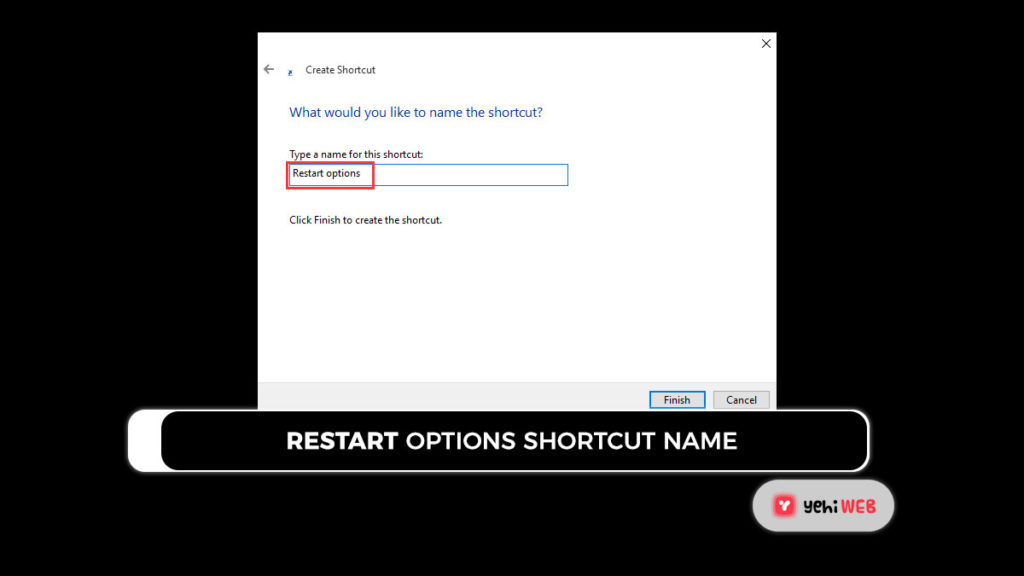
The shortcut has been created. If you need to force your Windows to boot in Safe Mode, use the shortcut to open the System Configuration utility and make the necessary changes. However, you should be aware that doing so can result in a Windows reboot loop, as well as the failure to boot into Safe Mode. So, please use this method if you know what you are doing, and it is your last resort if Safe Mode is not working for you.
Fix: F8 Not Working on Windows 10/8
Why F8 Not Working?
When you look up why Safe Mode is not working on the internet, you can see many people asking why F8 is not working in Windows 10/8? If you are using Windows 7, press the F8 key before starting Windows to enter Safe Mode. In Windows 10/8, however, this has changed.
What is the reason for this? Microsoft has reduced the time interval for the F8 key to almost zero, which is less than 200 milliseconds. That is to say, you almost will not be able to use the F8 key in such a brief amount of time, and Windows will not be able to detect the F8 key being used to access the boot menu and then enter Safe Mode.
If you are fortunate, you will be able to enter the Safe Mode boot options screen by pressing the F8 key repeatedly at the start of the computer’s boot process. Still, much of the time, your efforts are futile because you can not beat Windows 10/8 startup time. However, this would not rule out the possibility of F8 not working in Windows 10 or Windows 8 in the future. With the Boot Configuration Data (BCD) Edit command, you can re-activate this function.
How To Re-enable F8 on Windows 10/8?
BCD Edit is a snap-in tool for Windows that allows you to monitor how the operating system starts. To quickly re-enable the F8 boot menu, do the following:
- In the Windows Search box, type cmd, right-click Command Prompt in the search result list and select Run as administrator from the popup menu. Then, in the pop-out window, press the Yes button to confirm.
- Please copy and paste the following text into the Command Prompt interface, then hit Enter:
bcdedit /set {default} bootmenupolicy legacy
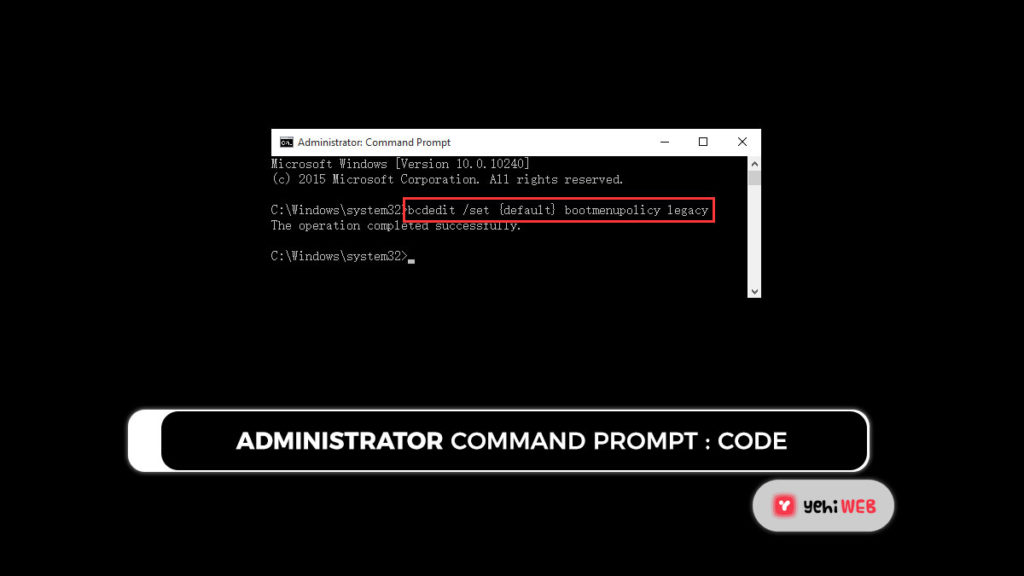
- Then restart your computer to see if you can enter Safe Mode by pressing the F8 key.
Conclusion
Saad Shafqat
Related posts
New Articles
How to Separate Audio Into Instruments Using Filmora
Have you ever listened to a song and wished you could remove everything except the piano? Or maybe just keep…

![How To Fix Windows Safe Mode Not Working [ Ultimate Guide ]](https://yehiweb.com/wp-content/uploads/2021/05/How-To-Fix-Windows-Safe-Mode-Not-Working-Ultimate-Guide-Yehiweb-1200x675.jpg)
