Facebook and other social media sites walk a thin line between being useful and wasting your whole life. If your screen time notification indicates that you have spent an exorbitant amount of time on your phone today, or you do not feel the need to share any aspect of your life on a news feed, it might be time to end your online life and delete your account temporarily… or permanently.
Table of Contents
How to deactivate or delete?
While deleting your Facebook account seems to be easy, it is actually very difficult. Since social media sites make money off you, the last thing they want is for you to stop scrolling and sharing.
But do not worry: we have put together an easy, step-by-step guide on How to deactivate or delete your Facebook account so you can get out from under them for good — or only long enough to allow yourself a break before diving back in.
How To Delete Your Facebook Account?
About the fact that I spent the majority of my teenage years begging my parents for a Facebook account, I now find it difficult to justify keeping my account active. If like me, you have had a Facebook account for less than a decade, you have either spent far too much of your time online — or you are sick of everything that’s being shared on it.
You can delete your Facebook account in two ways. The first is to ‘deactivate’ your profile, which allows you to reactivate it at any time. People will not see your Facebook timeline or even search for you until then. While some material, such as the direct messages you have previously sent, may remain accessible.
The other option is to delete your Facebook account… permanently. If you prefer the more permanent option, Facebook will hold off on deleting your account for a few days after you submit your request. If you log in at this period, the deletion process will be halted and your account reinstated (it does not want you to leave).
There is no way to reactivate your account after it has been permanently deleted. Also, the data saved in Facebook’s backup system will take up to 90 days to be erased, so you will not be able to access it during that period.
MORE Article
Facebook Dark Mode
Steps To Take: Permanently Deleting your Facebook Account
As much as we do not want to admit it, permanently deleting your Facebook account is a significant step that can affect how you communicate with distant relatives and socialize with friends.
To permanently delete your Facebook account:
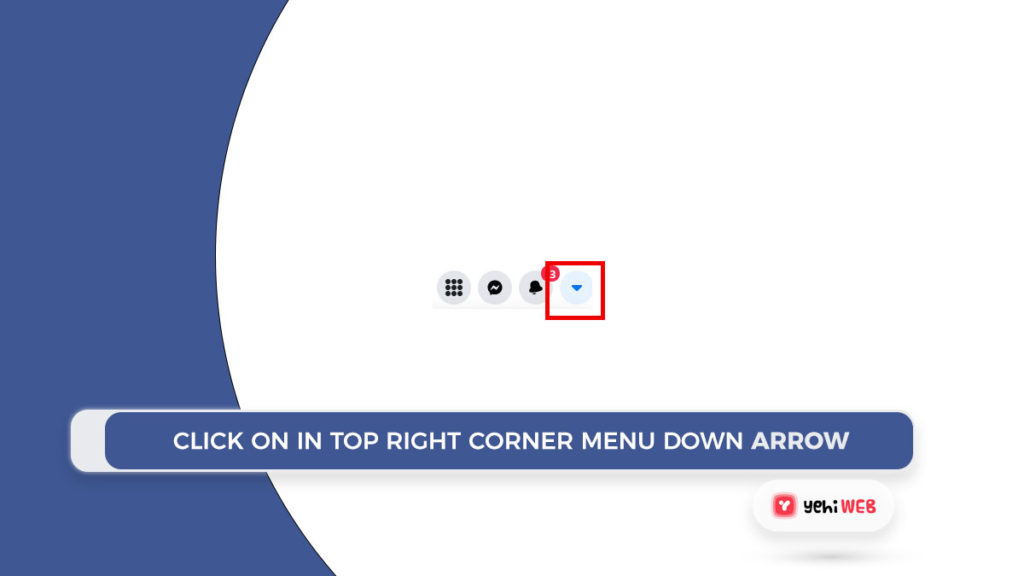
- In the top right corner of Facebook, click the account menu down arrow.
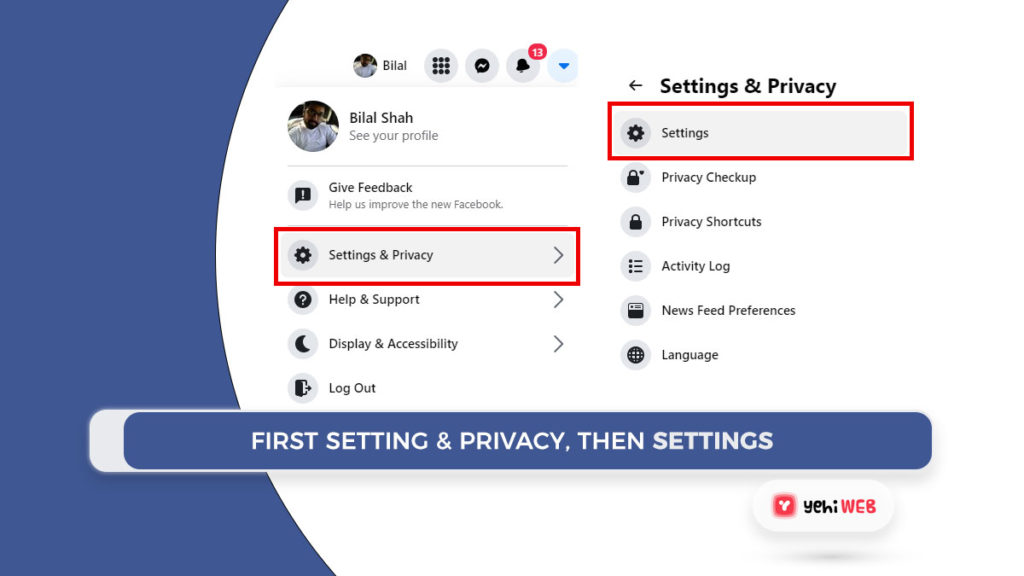
- Then, under Settings & Privacy, select Settings.
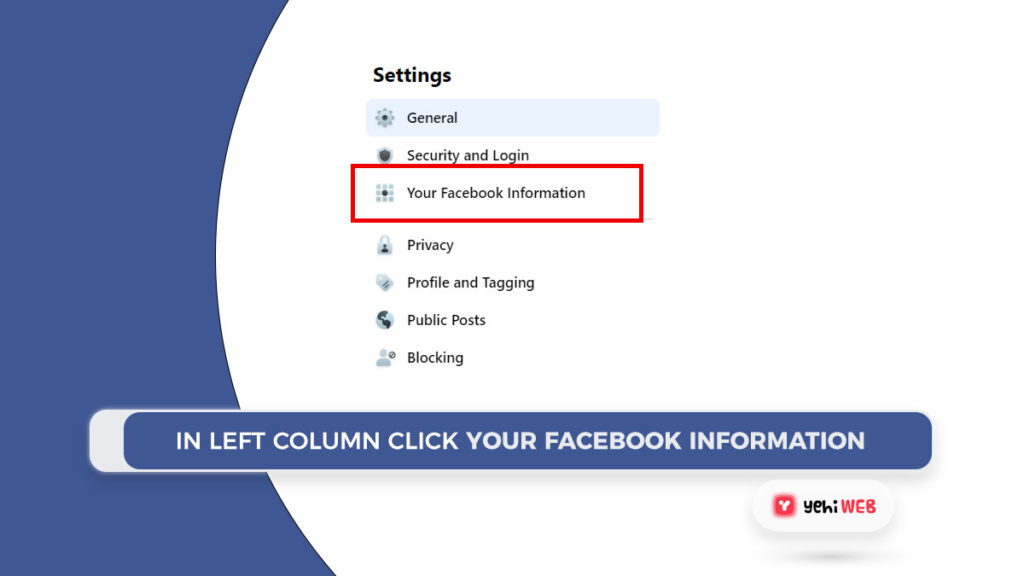
- In the left column, click Your Facebook Information.
- Select Deactivation and Deletion.
- Select Permanently Delete Account, then click Continue to Account Deletion.
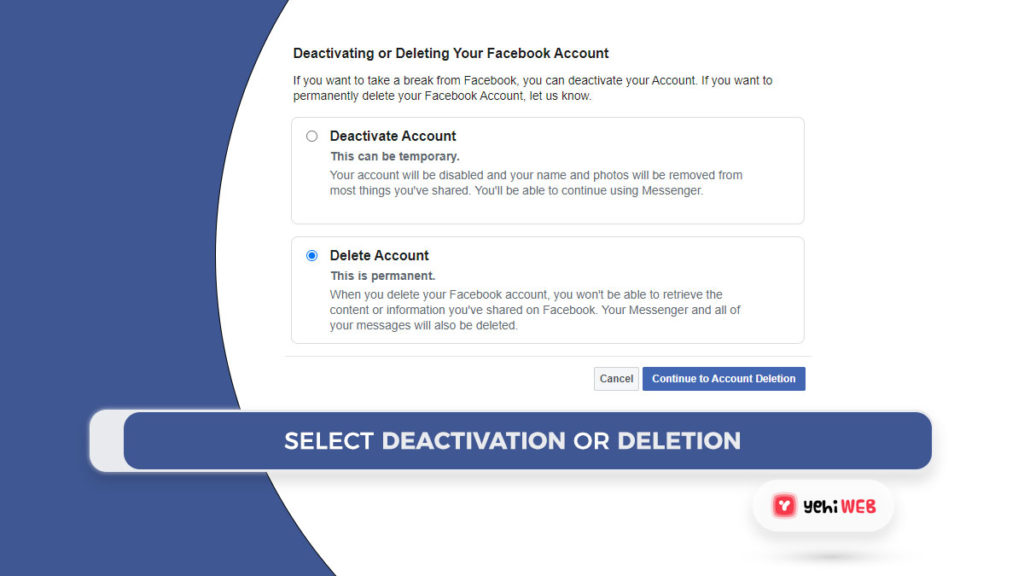
- Click Delete Account, then type your password and click Continue.
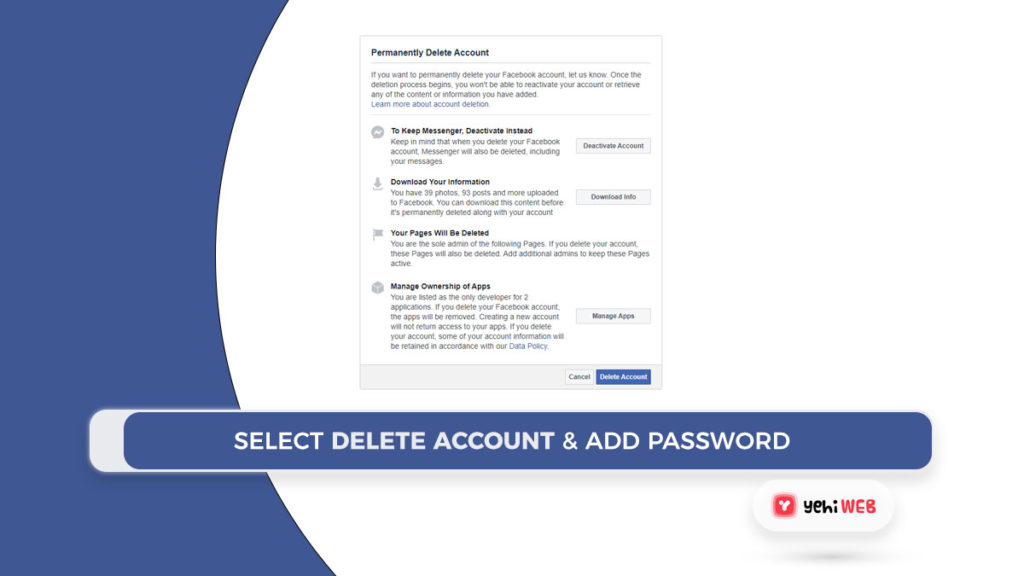
Alternatively if following these steps are too much of a hassle for you, you can follow the method mentioned down below:
It is as easy as clicking this link and choosing ‘Delete Account’ — BUT WAIT!
It is worth downloading your Facebook data before permanently deleting your account; this includes photos and posts you have already uploaded. Follow these simple steps to save your data:
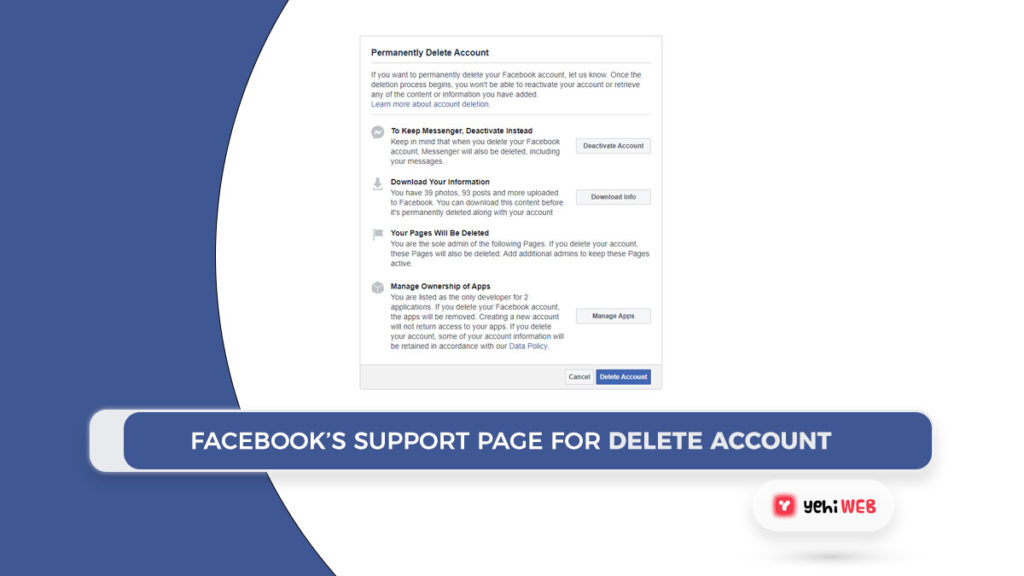
- When you are logged in on your desktop, go to this link (Facebook’s support page for deleting your account).
- In your web browser, click the account menu down arrow at the top right of any Facebook page.
- At the bottom of your General Account Settings, click “Download a copy of your Facebook data.”
- Select “Start my Archive”
Simply press ‘Delete Account’ after you have saved your data or decided you do not want to keep it, and you are done.
But again, in some cases, some users might want to cancel the deletion process. If you are wondering as to how you can do that. Follow the method mentioned down below.
MORE Article
Facebook Avatars
How to Cancel Facebook Account Deletion?
You can revoke your account deletion if it has been less than 30 days since you started it. Your account and all of your information will be automatically deleted after 30 days, and you will not be able to retrieve it.
It can take up to 90 days to delete everything you have posted after you start the deletion process. During the Deletion Process, other users on Facebook will not be able to see your posts or content you have shared.
Cancelling the Deletion process of your Facebook account is as easy as logging back in your Facebook account within 30 days after you submitted the request for deletion process. And simply Selecting ” Cancel Deletion “.
Now that we have covered everything related to how you can delete your Facebook account and how to cancel the deletion process. In some cases, you might want to only deactivate your Facebook account to take a break from social media and dive back in later. In that case, follow the method mentioned below as to how you can do that.
How to Deactivate your Facebook Account
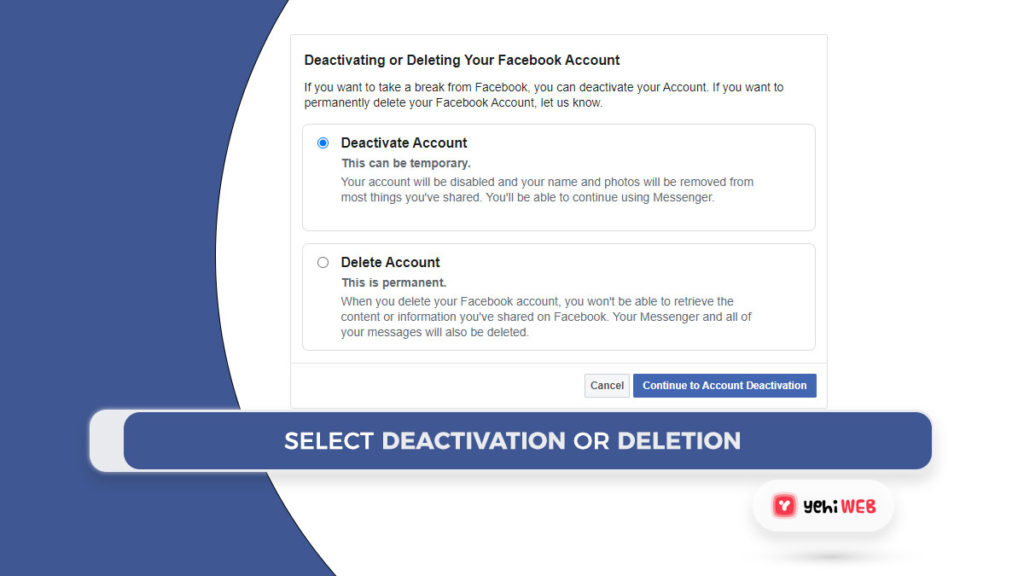
At this point, if you are here now, we can assume that you have chosen the less-terrifying option. To temporarily deactivate your Facebook account, log into your profile on a desktop computer and follow the steps below:
- In your web browser, click the account menu down arrow at the top right of every Facebook page.

- Choose ‘Settings & Privacy ’ then Setting

- In the left column, choose ‘Your Facebook Information’.

- Click ‘Deactivate your account,’ then confirm your decision.
Conclusion
There are a lot of social networking sites out there, but the majority of them make it easy to delete your account permanently. If you are unsure how to delete your account from any social media site, look at their FAQs page or Google for a simple guide. If you are also not sure if you want to delete the account or not, you may think twice. Because once you have deleted your account you may not be able to get your account back and also it takes a lot of effort to build one account. There are many users who buy comments and replies just to boost their accounts. So if you have a good follower count, rethink about deleting your account.
Good luck living life without updating Facebook every five minutes.
Share on facebook
Share on twitter
Share on linkedin
Share on pinterest
Share on reddit
Share on vk
Share on tumblr
Share on whatsapp
Share on stumbleupon
Saad Shafqat
Related posts
New Articles
How Indie Game Designers Use 6 Alternative Design Tools for Faster Prototyping
Independent game designers thrive on speed, experimentation, and creative freedom. Unlike large studios bound by corporate pipelines and layered approval…

![How to deactivate or delete your facebook account. [ Guide ]](https://yehiweb.com/wp-content/uploads/2021/05/How-To-Deactivate-Or-Delete-Your-Facebook-Account.-Guide-Yehiweb-1200x675.jpg)
