Several users have contacted us with concerns after being increasingly irritated by the fact that their microphone adjusts itself without user interference. The microphone levels either go up or down without any visible cause, according to the majority of affected users. Multiple applications are said to be affected by the problem (built-in or 3rd party).
What causes Windows 10’s Microphone Levels to Auto-Adjust?
We looked at this issue by looking at a variety of user reports as well as the most common repair solutions for Windows 10. As it turns out, there are a number of possible causes for this problem:
Skype adjusts the microphone automatically – If your Skype (UWP or desktop version) is set to boot at the device startup, you’re probably the one who’s causing the automatic microphone changes. You should be able to fix the problem by removing the automatic microphone adjustment settings in this situation.
Steam can change the microphone automatically – Similar to Skype, Steam can adjust the microphone automatically if it is programmed to boot at every system startup. If this scenario applies to you, you should be able to fix the problem by going to the Friends List settings and turning off Automatic Volume/Gain Control.
Another possibility is a different application that is permitted to take exclusive control of the recording system and change its level automatically. In this case, you should be able to find the source of the problem by disabling exclusive mode or booting in clean mode.
The microphone level is not set manually – Windows has a toggle that should allow you to circumvent any program that might be automatically adjusting the microphone level. Several affected users have stated that by following this protocol, they were able to permanently fix the issue.
Microphone driver that is out of date or corrupted – This particular microphone issue may also be caused by an improper driver. If it turns out, an out-of-date driver has the potential to cause this (the same goes for a corrupted driver). In this case, replacing the existing microphone driver with the most updated one available could fix the problem.
Malware infection – Malware that is capable of shutting down the microphone or setting the volume to the highest level at all times may trigger this problem. Several affected users have confirmed that after running a Malwarebytes search, they were able to locate the virus and remove it.
If you’re having trouble resolving this error, this article will walk you through a few different troubleshooting options. Below you’ll find a list of approaches that other people in a similar situation have used to effectively fix the microphone problem on Windows 10. At least one affected user has verified that each of the possible fixes mentioned below is accurate.
READ MORE
2021’s Top Cloud Computing Trends
How to stop microphone auto adjusting windows 10.
We recommend that you implement the strategies in the order that they are provided for the optimal outcomes, as we organized them by quality and severity. Regardless of who is to blame for the problem, one of them will undoubtedly fix it.
1. Preventing Skype from tuning the microphone automatically (if applicable)
If you have Skype open the majority of the time, it’s possible that the VoIP client is changing the microphone settings without your knowledge. Skype, it turns out, is set up to enable it to change the volume of your attached microphones by default. This is true for both the laptop and the Universal Windows Platform versions of Skype.
Several impacted users have confirmed that they were able to permanently fix the problem by going through Skype’s configuration and removing the client’s ability to change microphone levels. Here’s a step-by-step guide on how to do it:
- Open Skype UWP and select the action button (top-left corner of the screen) (three-dot icon). Then choose Settings from the context menu.
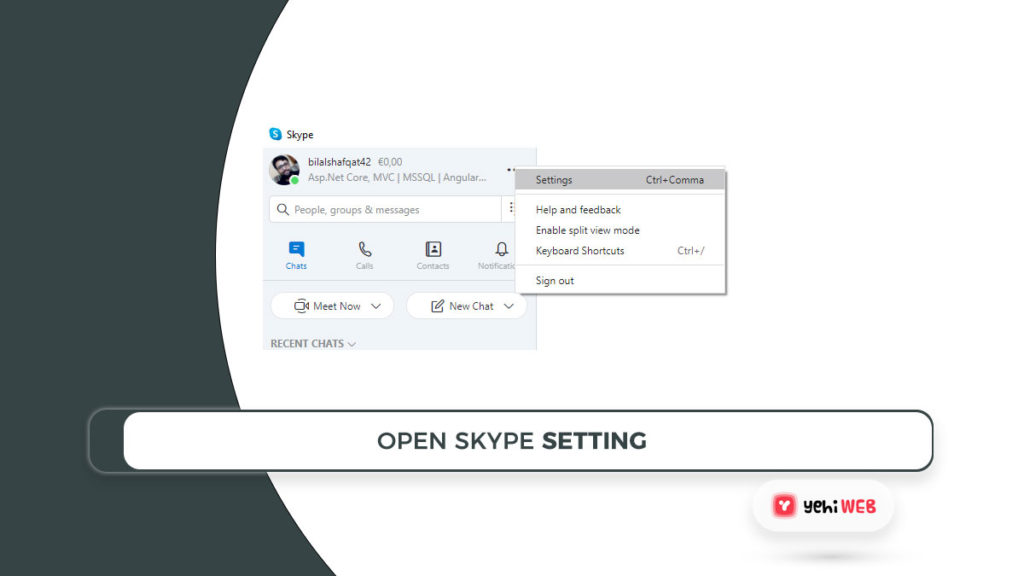
Note: If you’re using the web edition of Skype, go to Tools > Options from the ribbon bar at the left.
- Select the Audio & Video tab from the vertical menu on the left until you’re within the Settings tab.
- Scroll down to the Microphone section (under Audio) on the Audio & Video column, and uncheck the box next to Automatically change microphone settings.
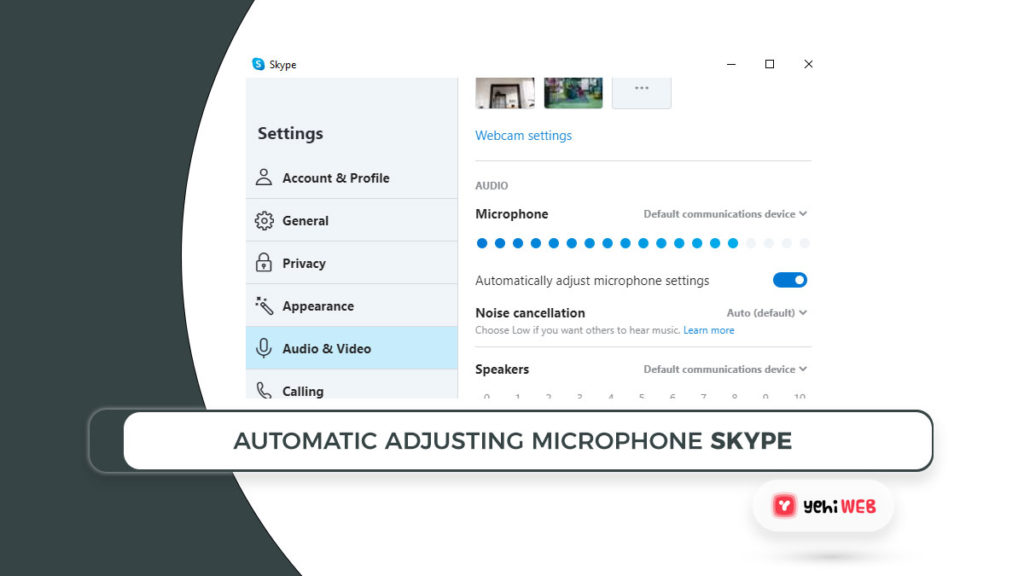
Note: If you’re using the desktop edition of Skype, uncheck Automatically change microphone settings under Audio Settings.
- Check if the auto microphone adjustments are always happening while you use your machine normally. If the problem persists, proceed to the next procedure mentioned below.
2. Preventing Steam from adjusting the microphone volume automatically (if applicable)
Steam, it turned out, is yet another application on a Windows 10 system that could be triggering automatic microphone level adjustments. If you have Steam activated and set to launch automatically any time your computer boots up, it’s likely that it will adjust your microphone volume.
Several affected users claim they were able to fix the problem by going to the Steam client’s Friend List settings and removing the Automatic volume/gain control setting from the Automatic Settings menu.
Here’s how to stop Steam from automatically changing the microphone level while you’re in the Friend’s list window:
- Open the Steam app, log in with your password, and go to the bottom-right corner of the screen to the Friends & Chat button.
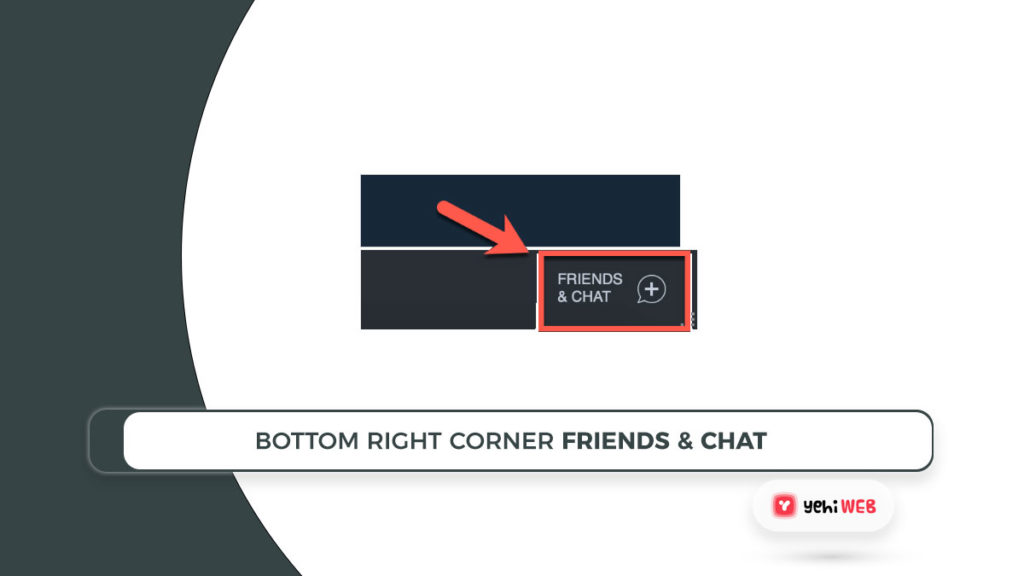
- To enter the Settings menu from inside the Friends & Chat window, press the gear icon in the top-right corner of the page.

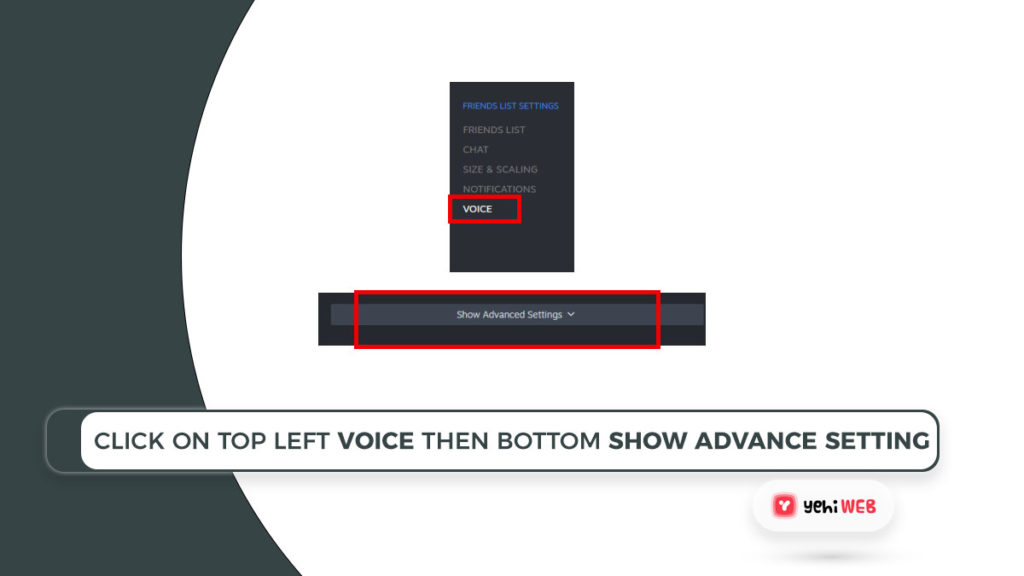
- When you’re in the Friends List Settings, choose the Voice tab from the left-hand vertical menu, then switch to the right pane, swipe to the bottom of the screen, and select Show Advanced Settings.
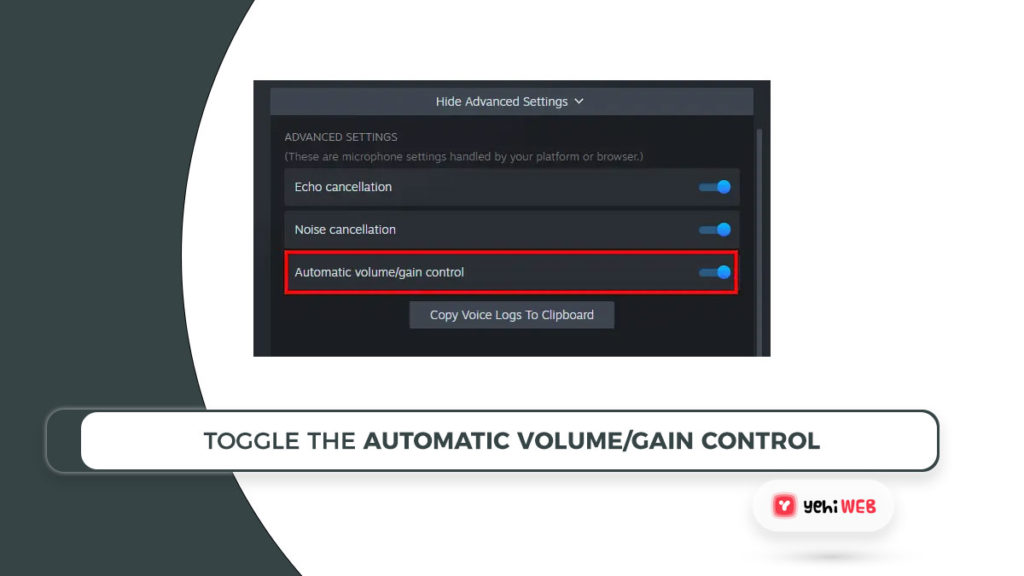
- Disable the toggle associated with Automatic volume/gain control in the Voice tab’s Advanced configuration menu.
- Check if the automatic volume changes are still happening after restarting Steam.
If this solution didn’t work for you, scroll down to the next choice.
3. Preventing apps from having complete control of the microphone
Several affected users have reported that re-configuring the MIcrophone settings to prevent any application from taking exclusive control of the system solved the problem. This procedure is simple to follow and essentially prevents any third-party interference from causing automated microphone level changes.
However, bear in mind that this procedure can cause certain voice features to stop working properly. Only keep this in mind until you go ahead and execute it, and if any feature is lost, reverse engineer the procedure below:
To open the Run dialogue box, press Windows key + R. Then, in the text box, type mmsys.cpl and press Enter to bring up the Sound pane.
Select the recording tab from the horizontal menu until you’re within the Sound pane. Then, select the microphone that’s giving you trouble and go to Properties.
Select the Advanced tab from the recording device’s Properties menu, then go to the Exclusive Mode section and uncheck the box marked Allow applications to take exclusive control of this device.
To save the changes, click Apply, then restart your system to see if the problem has been fixed on the next device reboot.
If the problem persists, proceed to the next procedure mentioned below.
4. Manually adjusting the microphone value
You can probably override whatever is automatically changing your microphone level by setting a default value for your microphone level via Control Panel if you’re looking for a fast fix. This procedure, according to some users, has the ability to override a number of level adjustments that are caused by third-party applications.
However, bear in mind that this approach will not allow you to locate the root of the problem and will circumvent any microphone levels set by most third-party applications.
Here’s how to manually change the microphone value in Windows 10 to correct the auto-adjustment of the microphone:
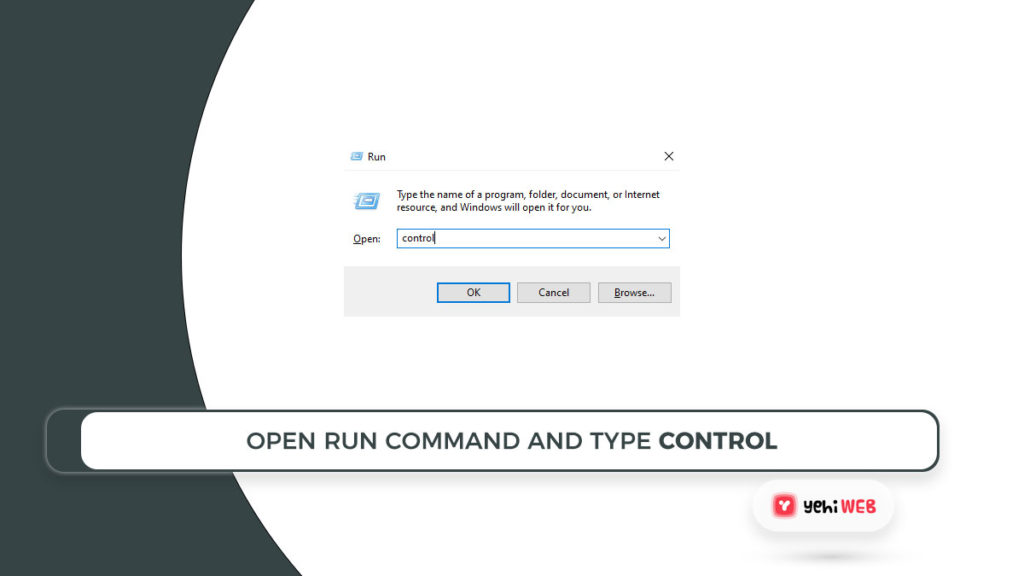
- To open the Run dialogue box, press Windows key + R. Then, in the text box, type “control” and press Enter to bring up the classic Control Panel GUI.
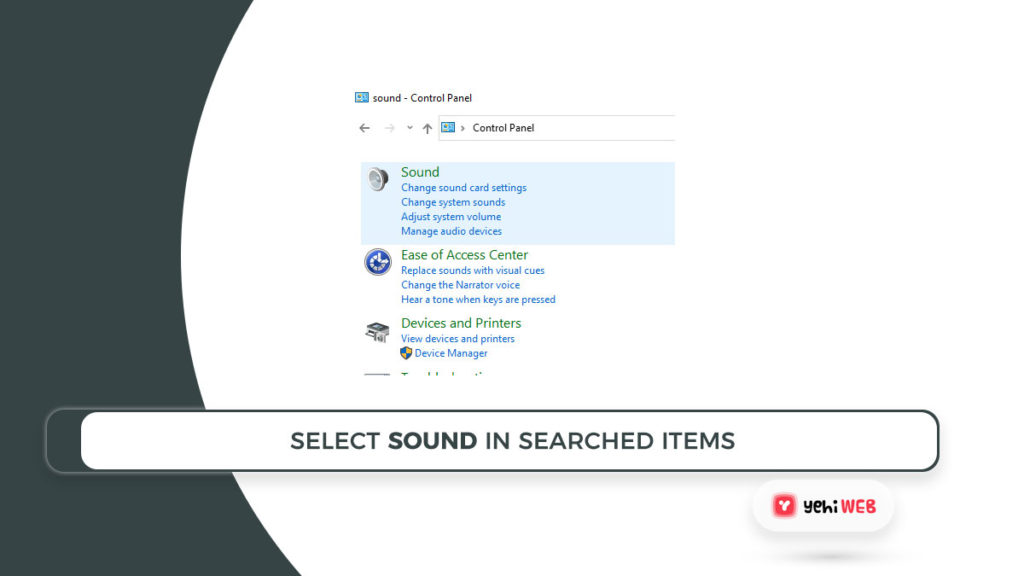
- Using the search button in the top-right corner of the screen to look for the word “sound” until you’re inside the traditional Control Panel GUI.
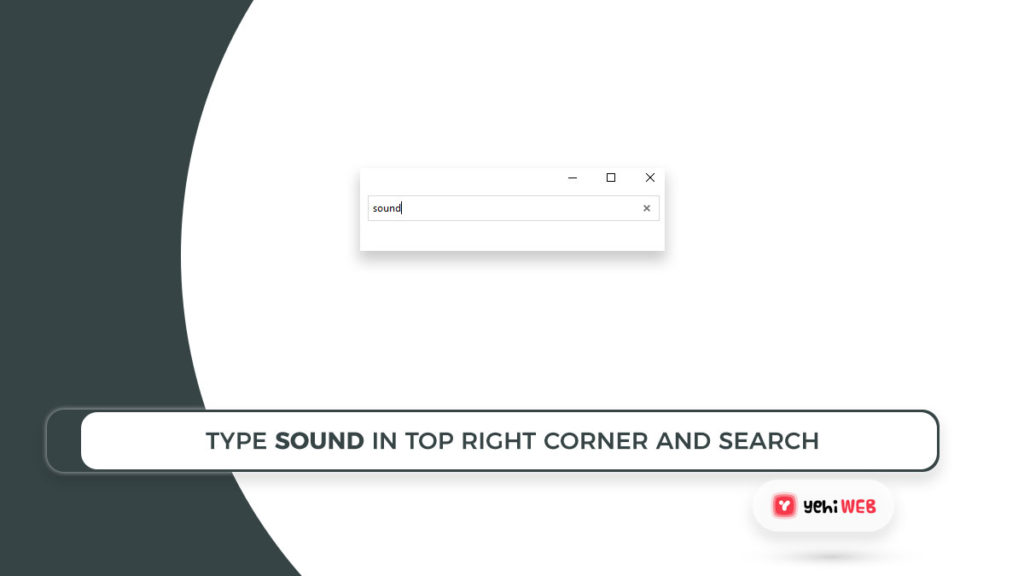
- Then, from the list of results, select “Sound“.
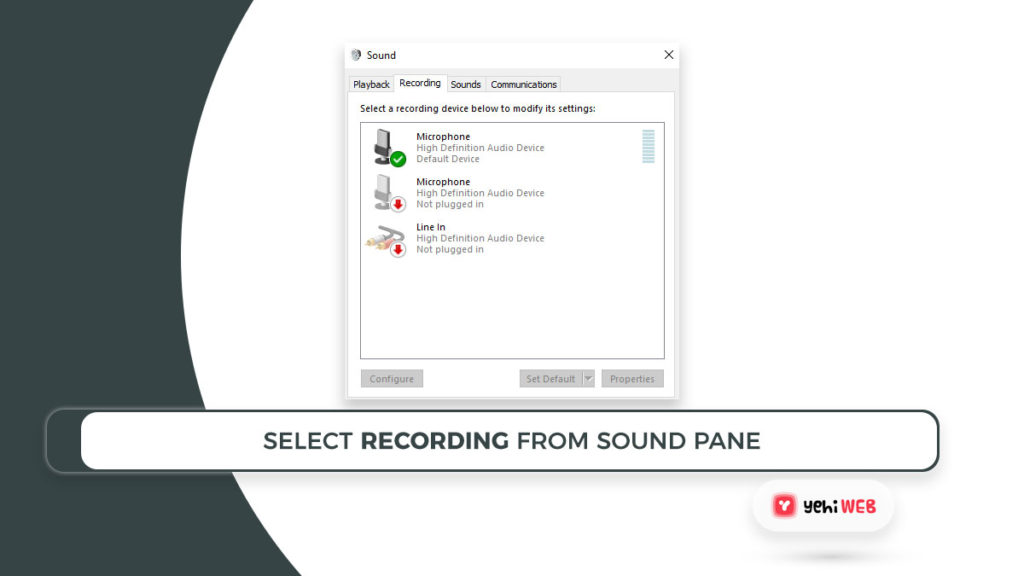
- Select the Recording tab from the Sound pane, then select the microphone/headset that is currently working and press the Properties button.
- When you’re in the Properties of the recording system you choose in step 4, go to the Levels tab and use the slider to change the value of your microphone level. To save the change, click Apply.
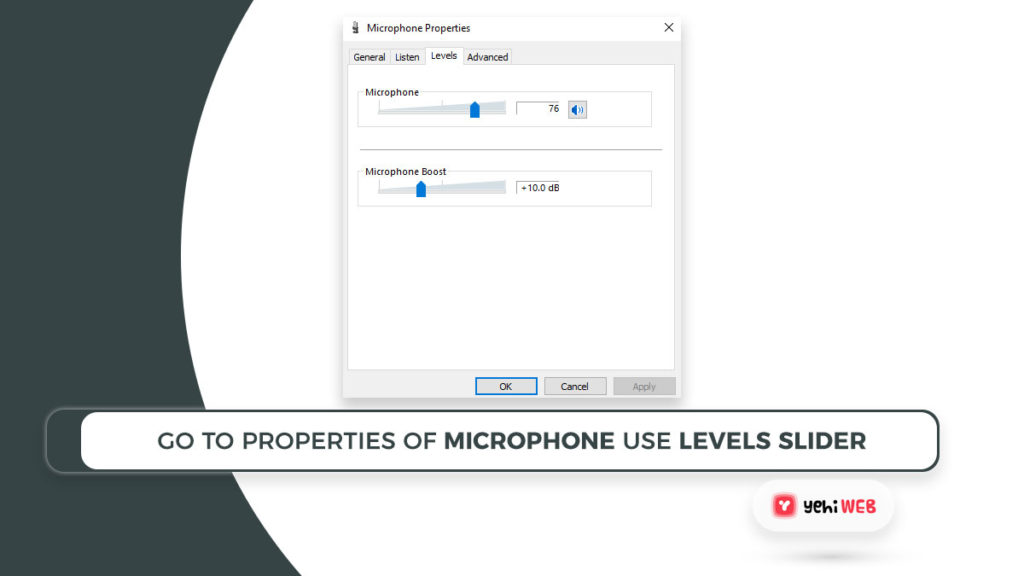
- This should mean that the microphone value stays constant in the future, regardless of how the third-party software wants to change it.
If this procedure didn’t work for you or you’re looking for a new solution, scroll down to the next option.
5. Make sure the microphone driver is up to date
Inconsistent levels can also be caused by the microphone drivers. You may be able to fix the problem by updating your microphone drivers or uninstalling the existing driver and requiring Windows to load a new recording device driver.
Several affected users indicated that this procedure permanently fixed the problem for them. Here’s a short guide to updating your microphone driver with Device Manager:
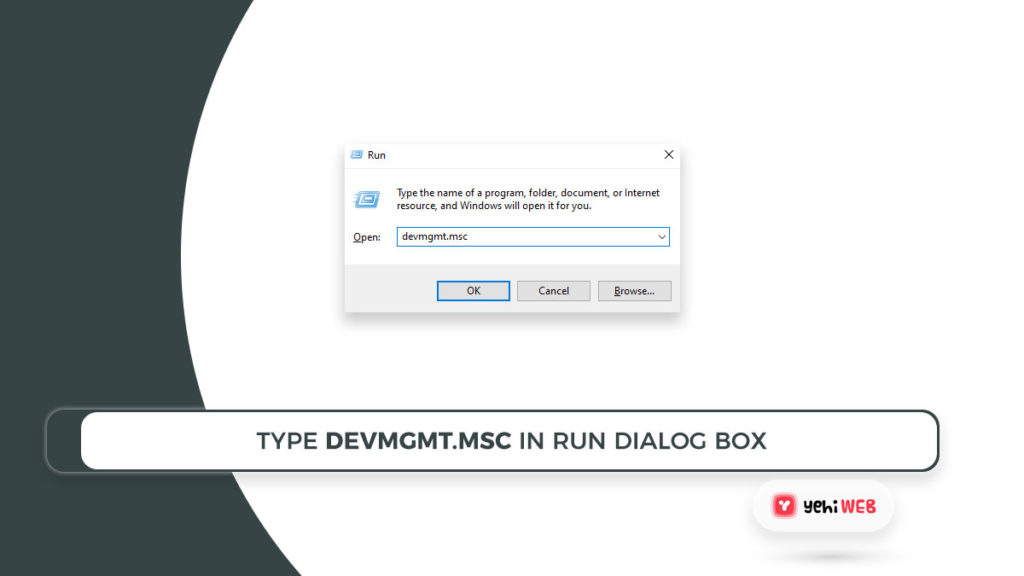
- To open the Run dialogue box, press Windows key + R. Then, in the text window, type “devmgmt.msc” and press Enter to launch Device Manager.
- When you’re in Device Manager, extend the tab for Sound, video, and game controllers by scrolling down the list of available devices.
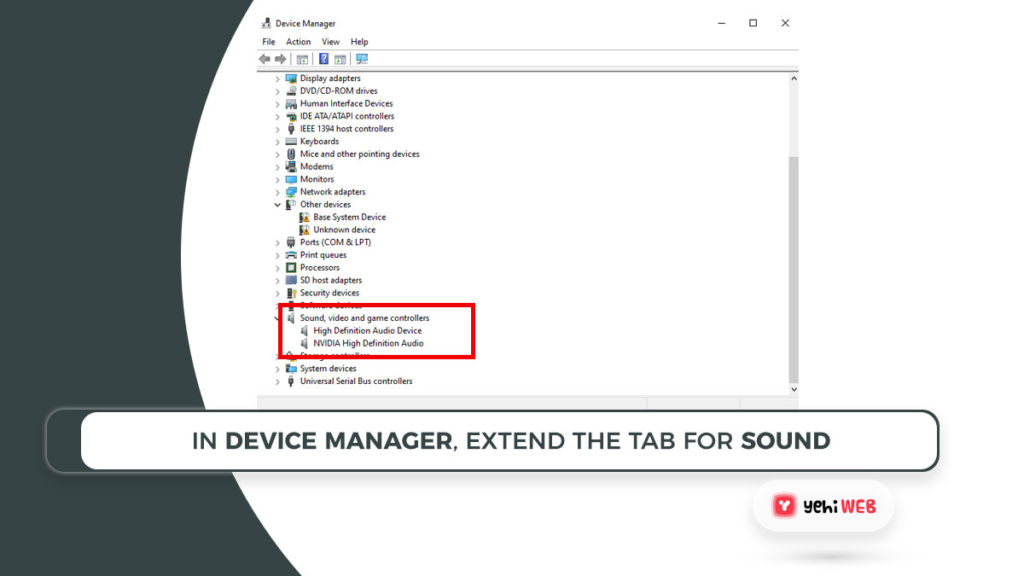
- Choose Properties from the context menu when you right-click on the recording device that’s giving you trouble.
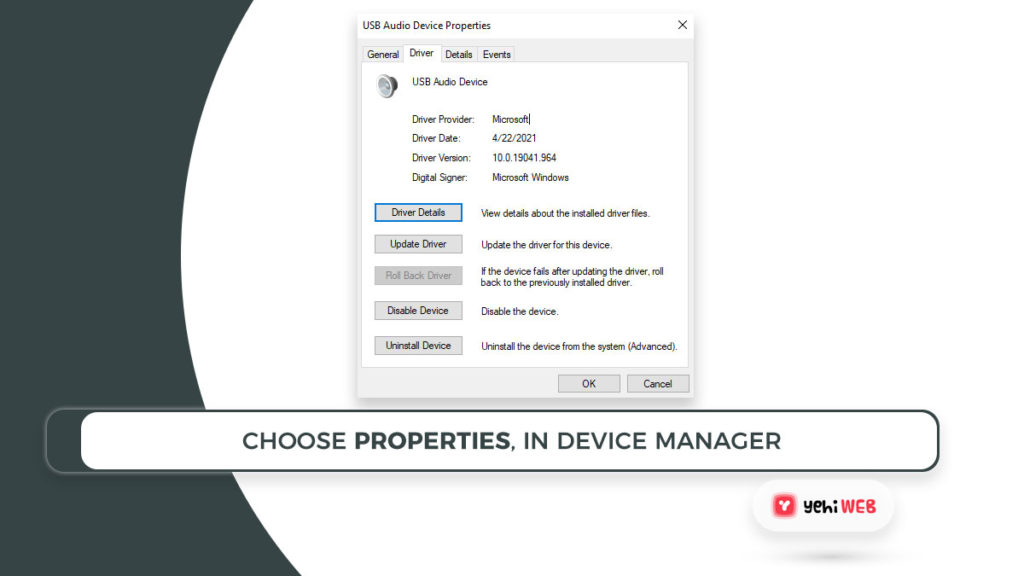
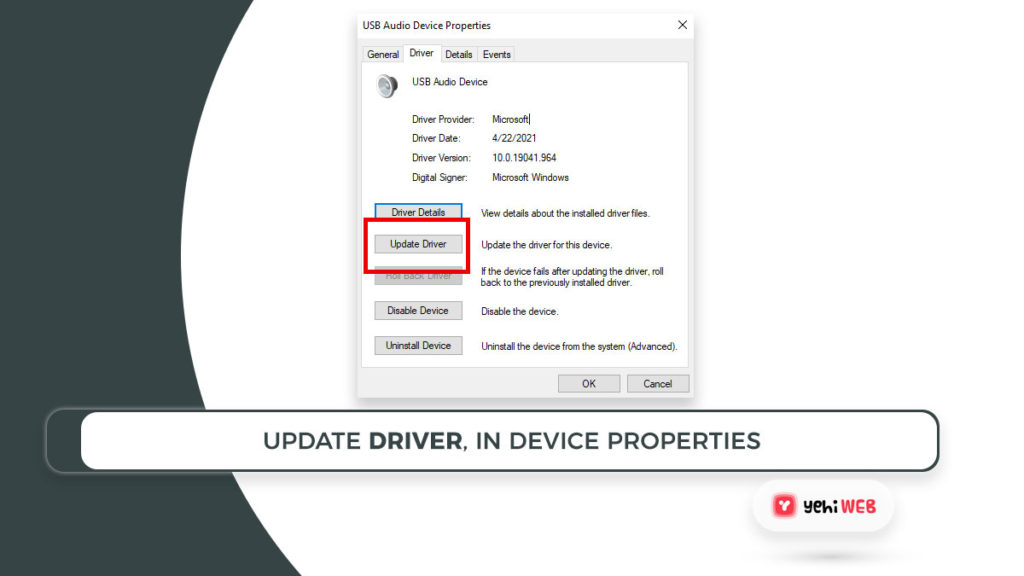
- Pick the Driver tab from the properties screen of your recording device and begin by clicking Update Driver.
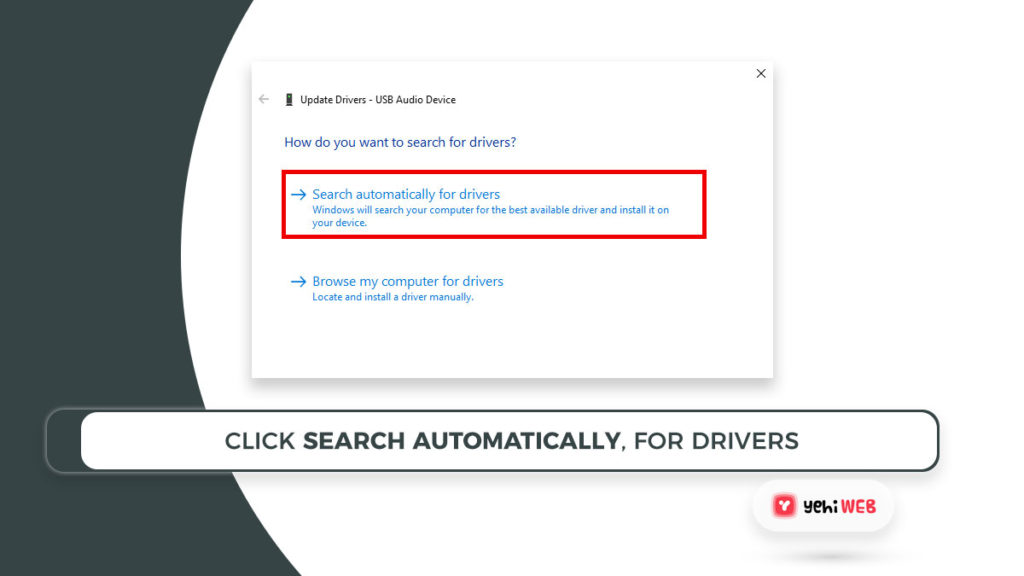
- Then, on the following screen, select Search automatically for updated driver software and wait to see if the utility is effective in locating a new driver version for the driver.
- Restart the computer after the process is over to see if the automatic microphone level adjustments are still happening. Continue with the measures below if they aren’t, or if Device Manager can’t find an updated version of the driver.
- Return to the Driver tab of your Recording device by repeating steps 1–3, except this time select Uninstall Device instead of Update Driver. Then, at the confirmation prompt, press Uninstall once more and wait for the process to end.
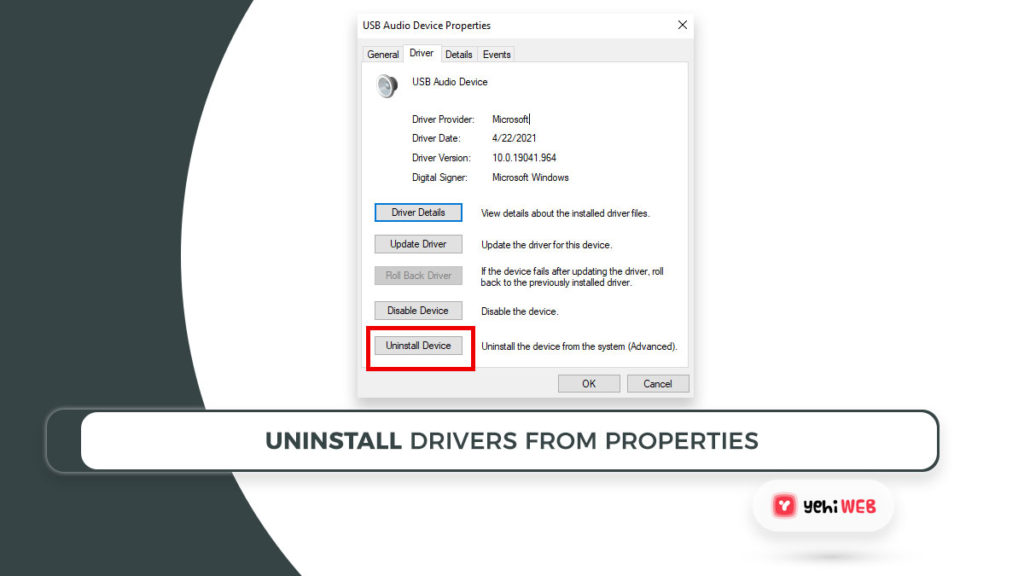
- After you’ve uninstalled the recording driver, restart your computer to allow Windows Update to load a fresh driver in place of the one you just removed.
Check to see if the microphone auto adjustments are still happening after the startup sequence is completed.
If the problem persists, proceed to the next method below.
6. Getting Rid of the Malware
As it turns out, malware capable of automatically shutting down the mic or adjusting the volume may also trigger this issue. When doing a security check, some affected users claimed that Windows Defender and a few other 3rd party clients failed to detect the malware.
However, most users who have faced this problem have indicated that Malwarebytes helped them locate, isolate, and quarantine the malware. In the majority of instances, malware entered the device from a catcher application or extension. If you suspect malware is to blame, follow the instructions in this article (here) to install Malwarebytes and run a deep scan. If the virus scan found no signs of a virus infection, proceed to the next steps below.
7. Carrying out a Clean Boot
If you’ve been this far and still haven’t found a solution, it’s likely that the problem is being triggered by a third-party application with admin control. If the source of the issue is not obvious, a clean boot should be used to see if a third-party app is to blame.
Several affected users have indicated that following this procedure allowed them to confirm that the problem was triggered by a third-party app interference. They removed all possible culprits before they were able to isolate the program that was causing the error until they confirmed that an application was causing the automated microphone adjustments.
Here’s a short guide to performing a clean boot to figure out the app is triggering the automated microphone adjustments:
- To begin, make sure you’re using a Windows account with administrative privileges.
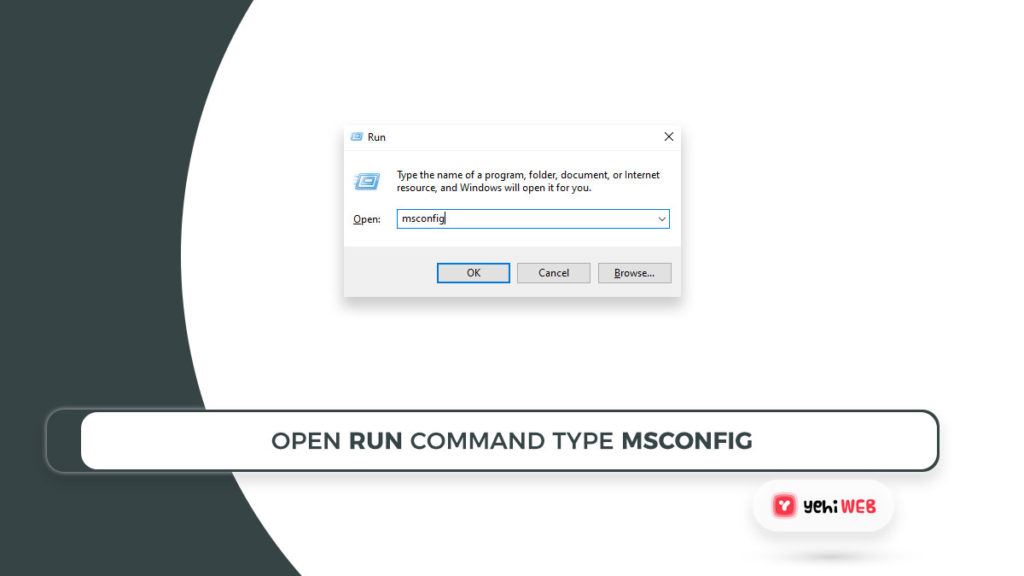
- To open a Run dialogue box, press Windows key + R. To open the System Configuration pane, type “msconfig” into the Run command’s text box and press Enter. As the UAC (User Account Control) prompts you, choose Yes to give the System Configuration window administrative rights.
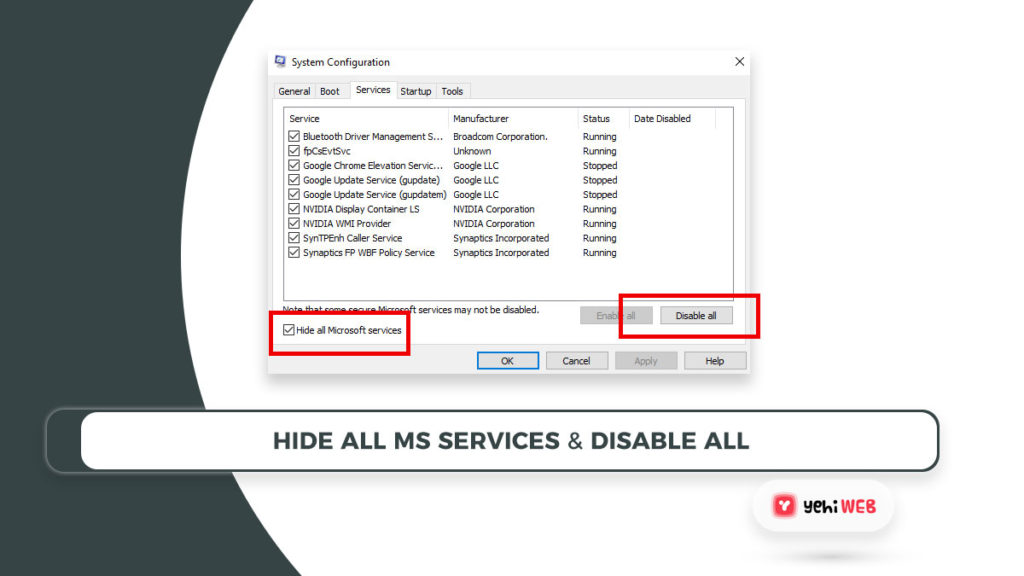
- Pick the Services tab from the ribbon bar at the top of the System Configuration window once you’ve gotten inside. Start by checking the box next to Hide all Microsoft services. When you’ve done it, move on to the other services. To avoid any 3rd party services from intervening with the microphone levels at runtime, click the Disable all tab.
- Apply Changes, then go to the Startup tab and pick Open Task Manager.
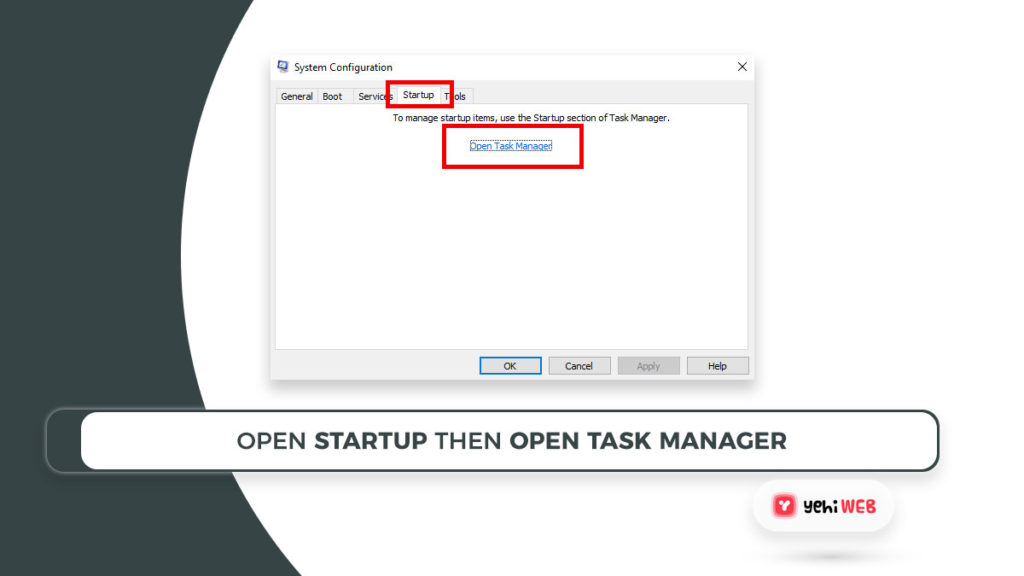
- Select each service individually in Task Manager’s Startup tab and disable it to prevent it from running at the next system startup.
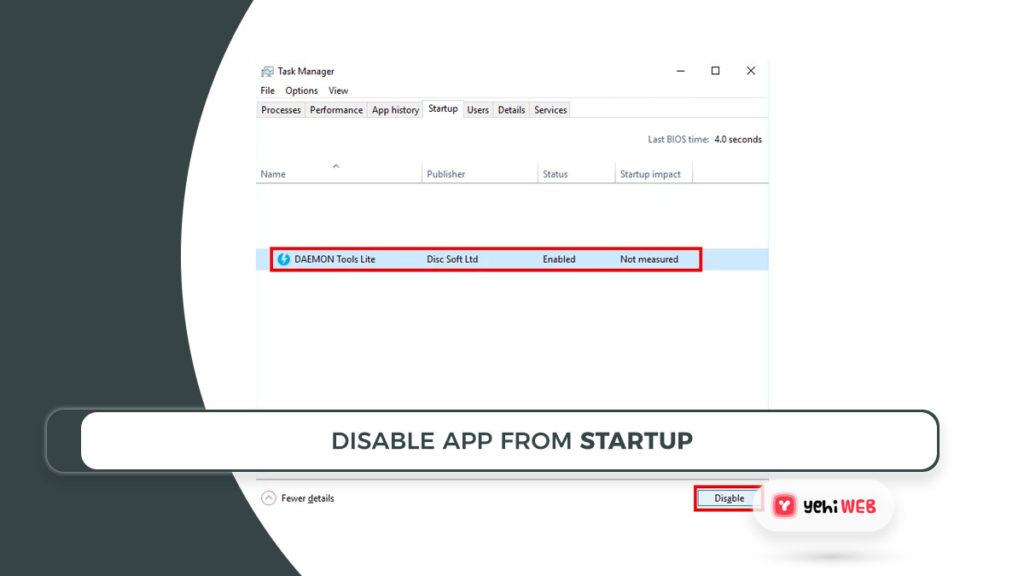
- Close the Task Manager window you just opened and restart your computer to boot up into a Clean Boot State until all necessary items and services have been disabled.
- After the next initialization sequence is complete, use your computer usually and see if the automatic microphone changes are still present. If you aren’t, go back to step 3 and re-enable all startup items and services that you disabled, then reboot to see which one is causing the problem.
When you’ve found the source of the problem, make sure it’s turned off.
8. Turning Off Microphone Enhancements
In certain cases, microphone audio enhancements may be a problem; it’s likely that the microphone is self-leveling due to these enhancements. To switch off the Audio Enhancements on your microphone, follow these steps: –
- To open the Run program, hold down the Windows key and then press the R key.
- Now type “mmsys.cpl” and hit enter.
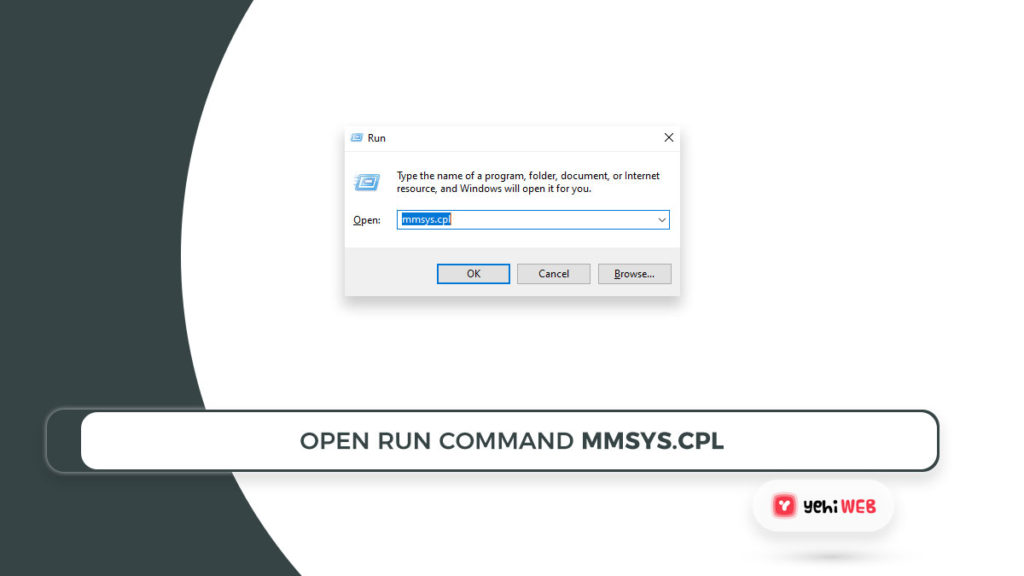
- Go to the “Recording” tab, then right-click on your Microphone and select “Properties” from the drop-down menu.
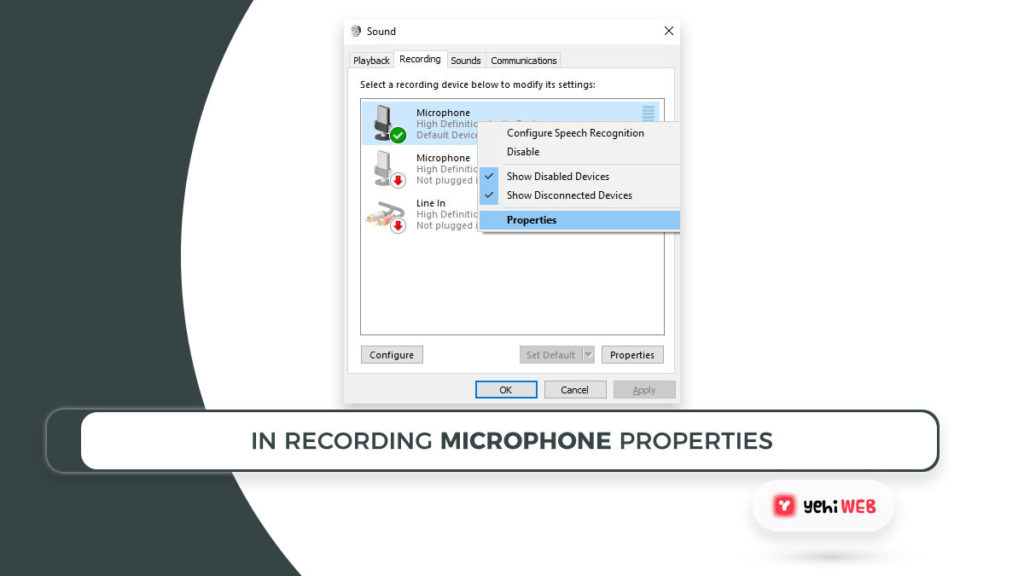
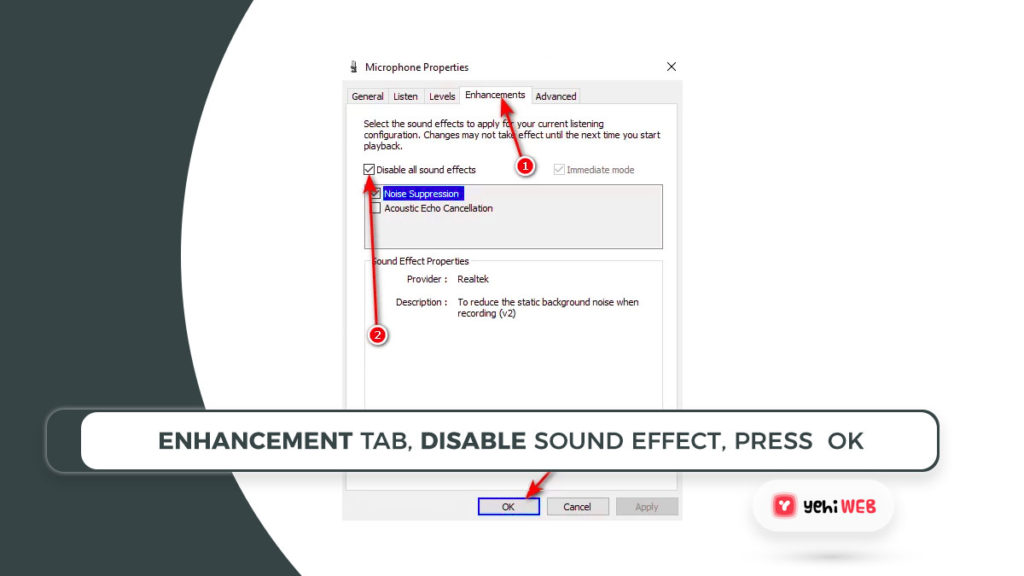
- In your Microphone Properties, go to the “Enhancements” tab.
- Check the box next to “Disable all enhancements.”
9. Registry Fix
The problem can often be traced back to the microphone level registry configuration. Windows may have stored a value for your Microphone level in the register, which may take precedence over the manual value you choose from the Sound Control Panel. This value can be adjusted by:
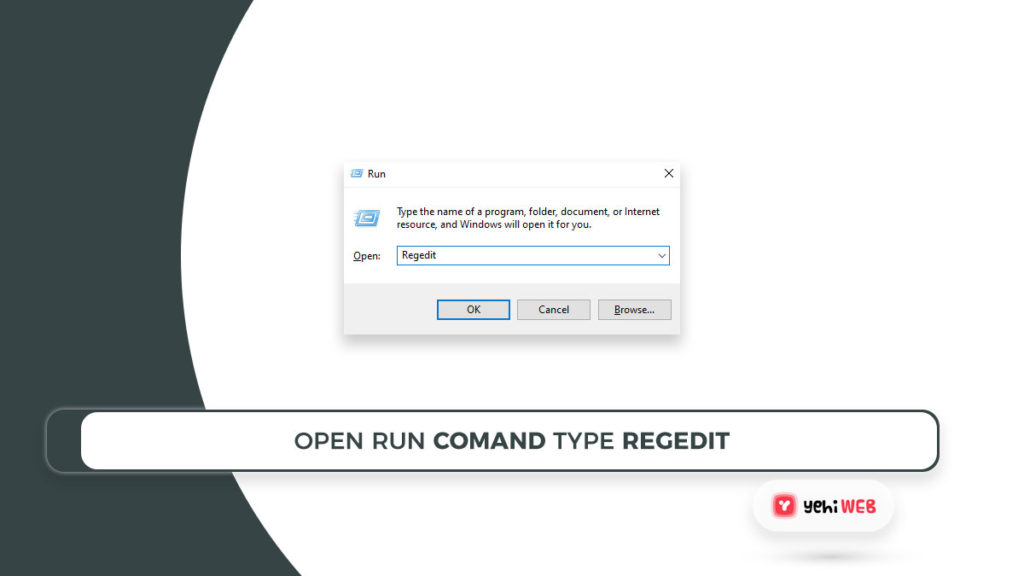
- To open the run prompt, press “Windows” + “R,” then select “Regedit” and press “enter.”
- Proceed to the following address.
HKEY_CURRENT_USER\Software\Microsoft\Speech\RecoProfiles\Tokens\{95CF724E-B3B5-4D94-A4FB-36AE77A88FE0}\{DAC9F469-0C67-4643-9258-87EC128C5941}\Volume - Double-click the value that follows.
HKEY_LOCAL_MACHINE\SOFTWARE\Microsoft\Speech\AudioInput\TokenEnums\MMAudioIn\{0.0.1.00000000}.{e4e24557-c9f8-46f6-8486-50981fcf3cc5} - Set the value to the desired Microphone level. For instance, 8888 represents 88 percent and 2222 represents 22 percent.
- Check to see if the problem still exists.
Saad Shafqat
Related posts
New Articles
What is the difference between FMWhatsApp and GBWhatsApp?
In the world of messaging apps, WhatsApp reigns supreme as one of the most popular platforms for connecting with friends…

