Due to incompatibility with the latest Windows updates, the DCFWinService may show high CPU usage. When a user’s machine gets excessively slow (with heavy fan noise) and opens Task Manager, he finds that the DCFWinService is taking up a lot of CPU space (sometimes above 90 percent ).
High CPU Usage
You can remove Dcfwinservice by performing a clean boot or disabling the service (as described below). First, ensure that you are running the latest release of Dell Foundation Services (check the Dell website for the latest version).
Clean Boot Your System to Stop DCFWinService Launching at System Startup
If you add Dell Foundation Services to your system’s start-up items, these services may appear in Task Manager (using CPU). Clean booting your system to stop this service at system startup may solve the problem in this case.
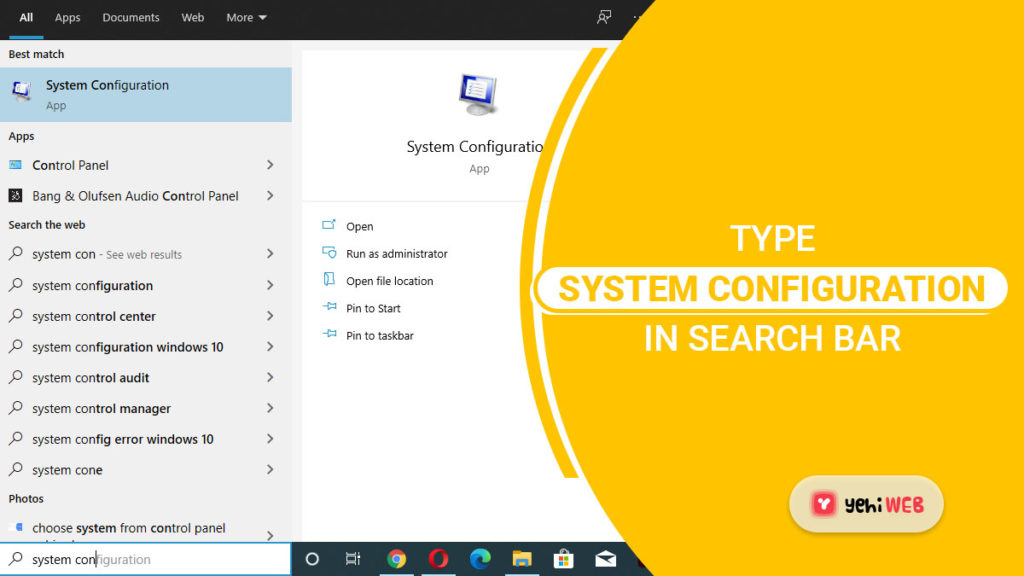
- Open System Configuration by clicking the Windows button and typing in System Configuration.
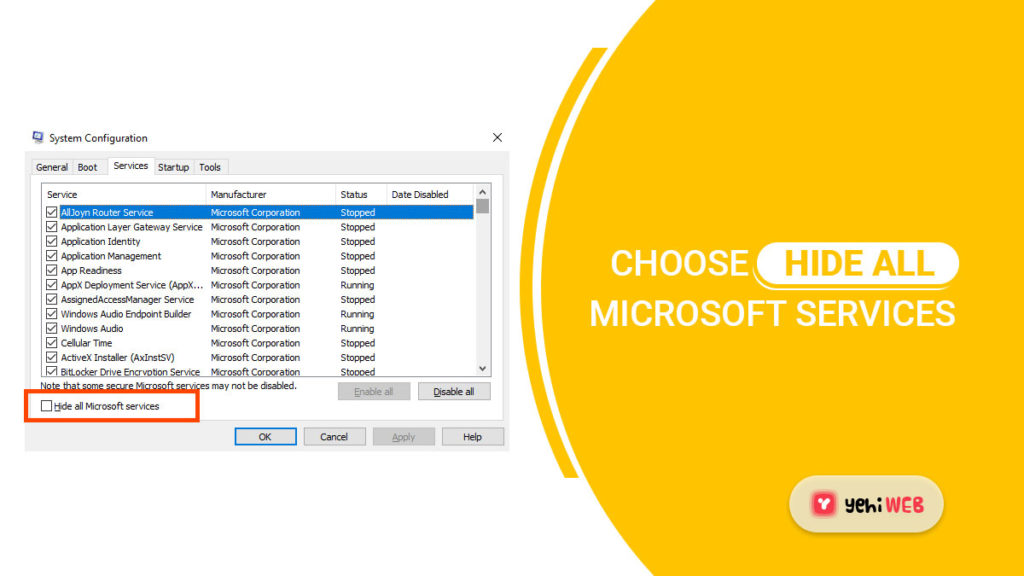
- Go to the Services tab and choose to Hide All Microsoft Services.
- Then uncheck DCFWinService and any other Dell services (if not required).
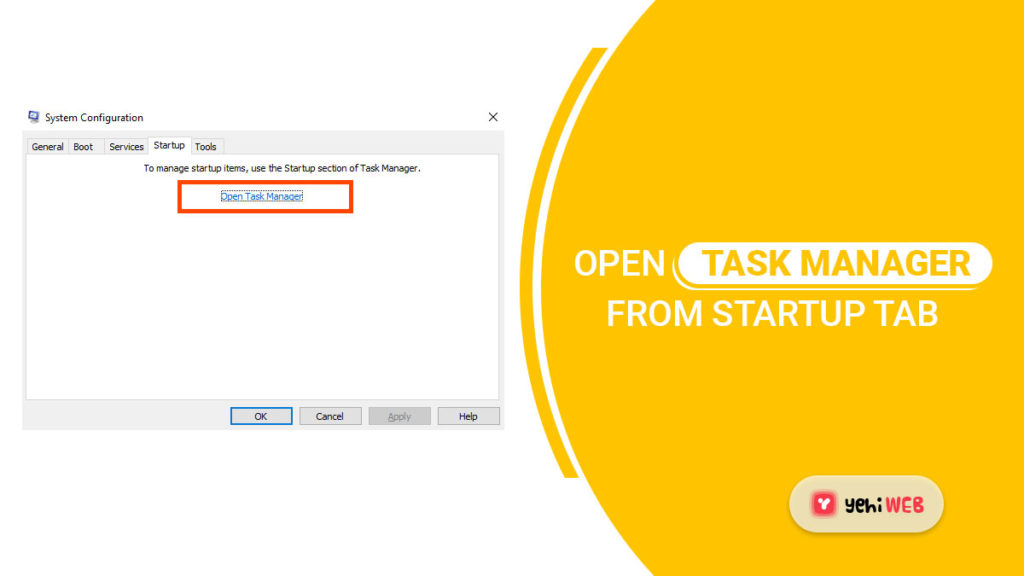
- Now go to the Startup tab and select the Open Task Manager link.
- Then, disable all Dell-related processes and close all active windows (after applying the changes).
- Check if the high CPU usage by DCFWinService has been normalized after rebooting your PC.
Disable the DCFWinService Via Service Manager
If clean booting the system does not work, you may need to disable the DCFWinService in your system’s Services manager.
- Right-click on Windows Button and select Task Manager.
- Now select DCFWinService from the Services tab and right-click it.
- Now select Stop and right-click on DCFWinService once more.
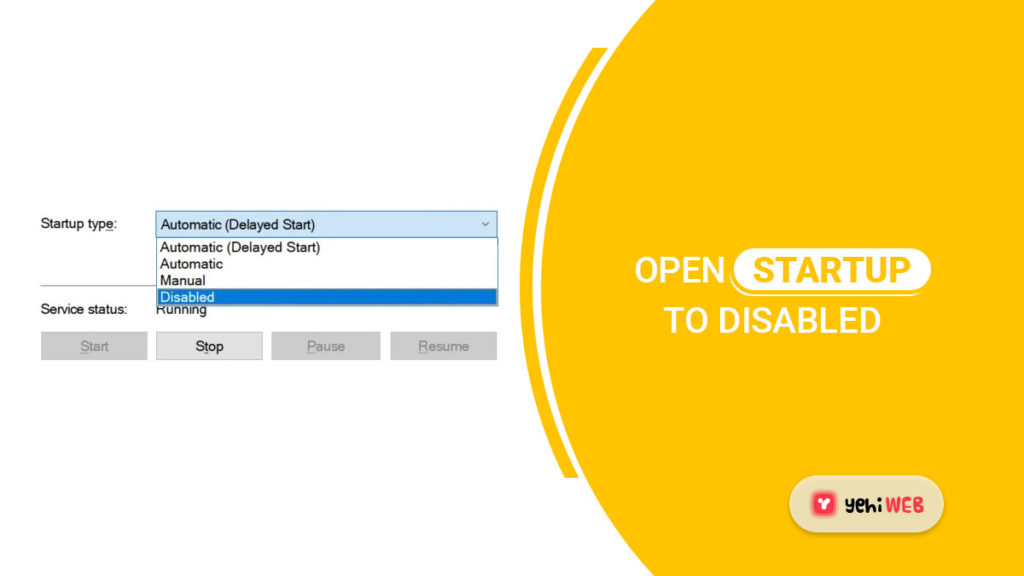
- Double-click on DCFWinService in the Open Services window.
- After that, change the Startup Type to Disabled and save your changes.
- Now restart your computer to see whether the high CPU usage caused by DCFWinService has subsided.
If you’re working in a corporate setting, you may need to change DCFWinService’s Startup Type to Manual and then Stop it (so that you can utilize different corporate utilities by Dell).
Uninstall The Dell Foundation Services Via Apps & Features
If disabling the DCFWinService service does not resolve the high CPU usage, you may need to uninstall the Dell Foundation Services via Apps & Features.
- Right-click on the Windows Button and select Apps and Features.
- Select Dell Foundation Services and then click Uninstall.
- Then confirm that you want to uninstall Dell Foundation Services and wait for it to finish.
- Now restart your computer, and the high CPU usage of the DCFWinService should be back to normal.
If the problem remains, see if removing any Dell-related applications (such as Dell Support Assistant) from your system’s Apps & Features addresses the high CPU usage issue.
FAQs
Bilal Shafqat
Related posts
New Articles
What is the difference between FMWhatsApp and GBWhatsApp?
In the world of messaging apps, WhatsApp reigns supreme as one of the most popular platforms for connecting with friends…

