Everywhere you look, someone is urging you to stay away from the Registry. While I agree with the advice to some extent, I’ve come to realize that the Registry is involved in a lot of what we do, whether we know it or not.
You’ll have to deal with the Registry at some time if you want to personalize your Windows Operating System. If you’re a beginner, you might want to start with this guide to Windows Registry Basics – but keep in mind that this guide is for advanced users, and you should always back up the Registry before making any changes.
I would never recommend messing about with the Registry if you feel uncomfortable doing so. Suppose you enjoy personalizing your Windows Operating System. In that case, the fact is that whether you do so manually or with the help of freeware software, it all involves the Registry and is inescapable.
I hope that this list of Tips & Features for the Windows Registry Editor can alleviate some of your agonies and make it a little bit easier to manage. But keep in mind that if you’re unsure, it’s best to avoid it.
Access Windows Registry Editor
The Windows Registry files reside in the system32/config folder, but you should use the built-in registry editing utility called Regedit to work with them, which you can get at the following locations:
- Start > Run > type Regedit into the search box and press Enter.
- Open Task Manager, go to File > New Task, type Regedit into the search box, and hit enter.
- Type Regedit in a Command Prompt and hit Enter.
Tip: Windows 10 users may utilize the Address Bar to navigate directly to any registry key or change the Font.
Create a shortcut to the Windows Registry on your desktop
If you want, you can create a shortcut to Regedit on your desktop by following these steps:
Right-click on a blank area of the desktop, select New and then Shortcut. For Location, type Regedit, click Next, give your shortcut a name, and click Finish.
Registry files (.reg extension)
Have you downloaded a file with the .reg extension but aren’t sure what it does? You can see the location of the Registry key. It will change by right-clicking the file and selecting Edit or Open in Notepad.
When you open the following reg file in Notepad, it will appear like this, with the location in bold and the values beneath.
- [HKEY_CURRENT_USER\Software\Microsoft\InternetExplorer\Main\WindowsSearch]
- “Version”=”6.1.7600.16385”
- “User Favorites Path”=”file:///C:\\Users\\Lee\\Favorites\\”
- “UpgradeTime”=hex:fe,27,f3,41,02,91,cc,01
- “ConfiguredScopes”=dword:00000005
- “LastCrawl”=hex:3e,26,a3,a1,cd,90,cc,01
- “Cleared”=dword:00000001
- “Cleared_TIMESTAMP”=hex:23,9d,94,80,24,48,cc,01
Backup before making changes to Windows Registry
If you’re working in Regedit, there are a few things you can do to keep the Registry from being messed up.
- It is usually a good idea to set a System Restore Point before making changes to the Registry, as this will allow you to go back to the previous state before you made the modifications.
- If you want to create a Registry key backup or share it with someone else, right-click it and select Export, give it a name, and choose .reg as the format. You may also use the freeware Regback or ERUNTgui to back up the Registry.
Rename, Change or Add keys in Windows Registry
- If you want to alter the settings of a Registry key, Double-Click the value you want to change and make the desired modifications.
- You can rename Registry keys by right-clicking the key or value and selecting rename.
- Right-click on a key to add it. Select New Key for the key you want to add as a subkey, and the same for the values.
Take Ownership of your Registry keys
If you try to edit a Registry key and get an error saying you don’t have the authorization to do so, right-click the key and choose Permissions. Almost every time you do this, you’ll need to first take the Registry key’s Ownership before granting yourself elevated rights.
To take ownership of a Registry key, click Advanced Owner while in the Registry key settings window. If your username isn’t displayed, choose Other Users or Groups and type your username in the text field.
After that, click Check Names to double-check that you’ve provided the correct username. After that, you can modify permissions by clicking OK. Learn how to gain complete control of registry keys.
One thing to keep in mind: if you’re going to restore ownership and permissions, make a record of who the previous owner was and what rights they had. The default owners list to utilize when selecting an owner in Other Users or Groups is as follows:
- Trusted Installer: Type NT SERVICET\rustedInstaller, then click Check Names and OK.
- System: Type System, then click Check Names, then OK.
- Administrators: Type Administrators, then click Check Names, then OK.
- Your Username: Type in Your Username, then click Check Names and OK.
- Users: Type Users, then click Check Names, then OK.
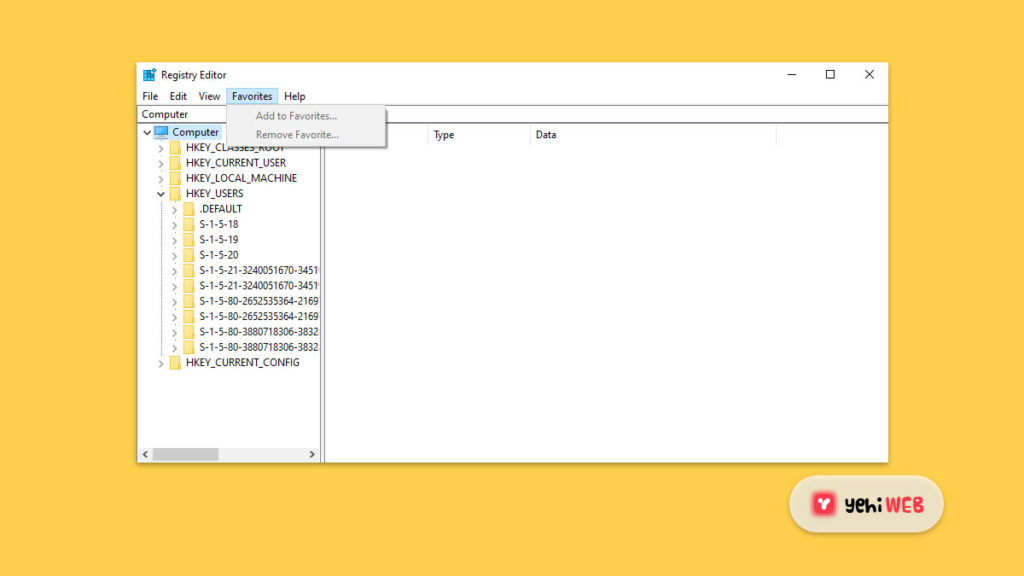
Add your Registry Keys to Favorites
Favorite is a feature of Regedit that I like. Because I often work in the same sections of the Registry, adding the keys to Favorites makes it easier to access them fast.
To add a Registry key to Favorites, go to the top menu and select Favorites\Add to Favorites from the drop-down menu.
When done, you’ll notice an entry under Favorites that you can click to access that Registry key.

Select Edit > Find and type the location to rapidly go to the Registry key if you know the Registry key you’re searching for and don’t want to go via Regedit.
Use Command Prompt to modify the Registry
If you prefer to work in a Command Prompt, you can use the following commands to modify the Registry:
- Reg add: This command adds a new subkey or entry to the Registry.
- Reg compare: Compares the registry subkeys or entries specified.
- Reg copy: Copies one subkey to another.
- Reg delete: Deletes a subkey or registry entry.
- Reg export: Creates a copy of the given subkeys, entries, and values in REG (text) format.
- Reg import: Merges into the Registry a REG file containing exported Registry subkeys, entries, and values.
- Reg load: Writes the saved subkeys and entries saved in hive format back to a different subkey.
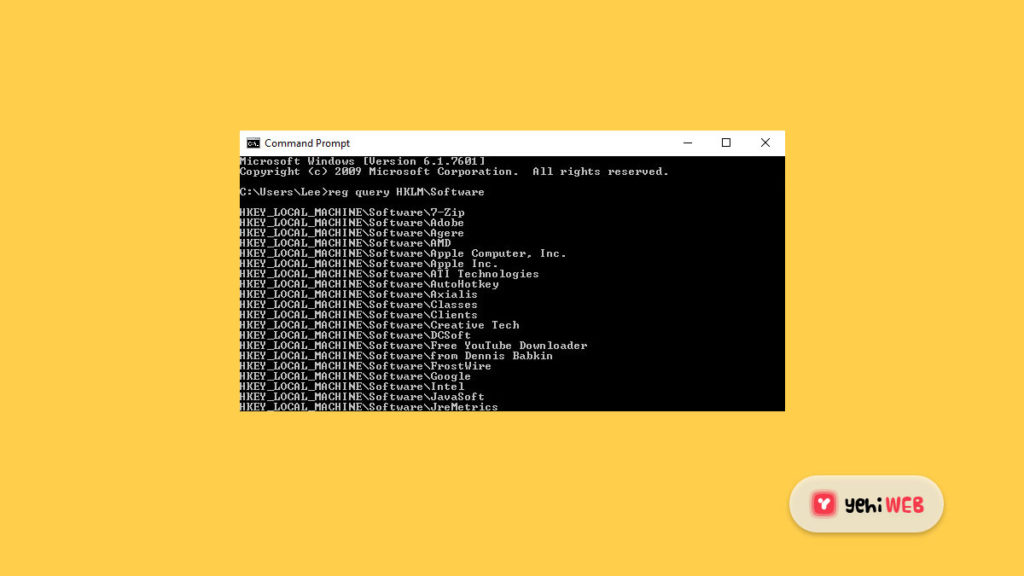
- Reg query: Displays the data in the form of a subkey or a value.
- Reg restore: Writes the saved subkeys and entries saved in the hive format back to the Registry.
- Reg save: Saves a copy of the Registry’s specified subkeys, entries, and values in hive (binary) format.
- Reg unload: Removes a Registry section loaded with reg load.
Example: Reg query HKLM\Software command will return a list of all subkeys.
If you type Reg /? in a Command Prompt. It will show a list of all available commands.

There are a few more built-in Command Line tools in Windows for more advanced users, such as Regini, but I’ll save that for another time and stick with this for now. By the way, if you’ve ever wondered where the Windows Registry files get stored on the hard drive, go here to learn more!
Tools that make managing Registry keys simple for users who don’t have a lot of experience:
- SetACL: A command-line tool that simplifies the process of changing Registry key permissions and ownership. It’s on the more advanced side, but it’s pretty simple to use after understanding the instructions.
- Registrar Registry Manager: Registrar Registry Manager is a free registry manager for Windows.
TIP: In Windows 10, instead of using regedit.exe, you can use Reg.exe to edit the Windows Registry.
Bilal Shafqat
Related posts
New Articles
Android Not Opening PDFs – Causes and Easy Fixes
Imagine settling down for a cozy evening, ready to dive into that important PDF document you’ve been meaning to review….


