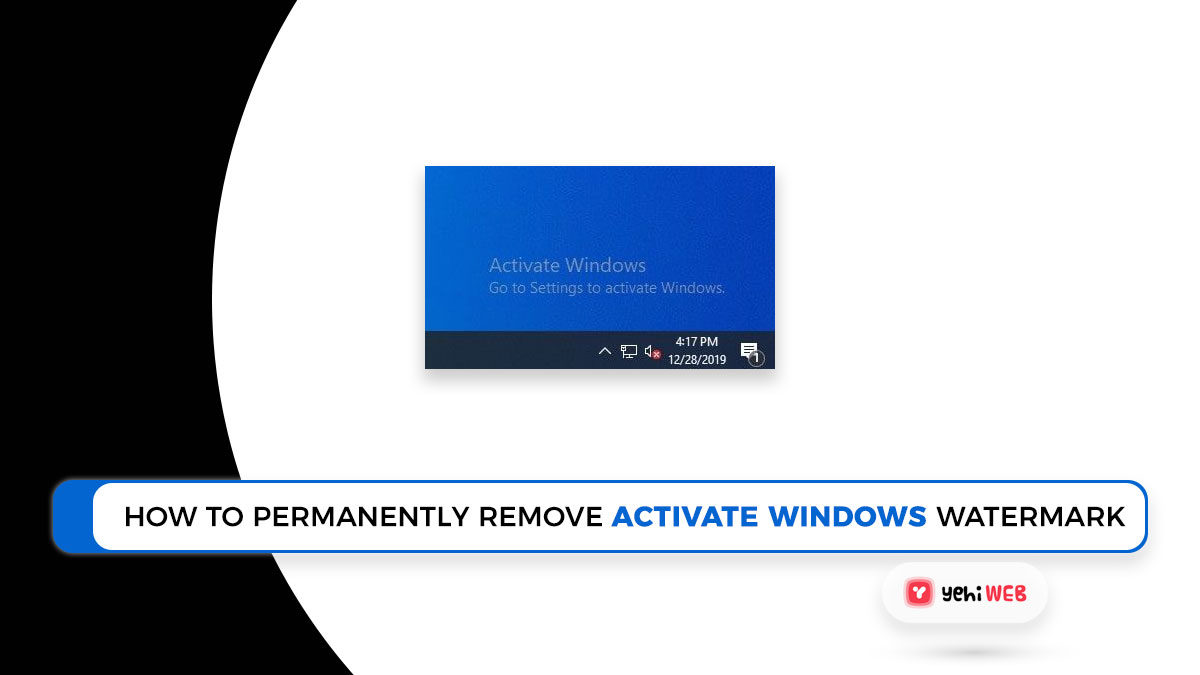
If your Windows 10 is not activated, a watermark will appear in the bottom right corner of your screen. The watermark “Activate Windows, Go to Settings to activate Windows” appears on top of any open windows or applications.
Want to remove the “Activate Windows – Go to Settings to Activate Windows” watermark from your Windows 10 desktop? As stated above, the Activate Windows watermark means that your Windows license has expired, so you have come to the right place.
With a valid Windows 10 product key, you can Activate Windows 10 and remove the Activate Windows Watermark. However, if you do not have a genuine Windows key, a quick registry tweak can help you permanently remove or hide the activate windows watermark on Windows 10.
Using A Registry Tweak to Remove the Activate Windows Watermark
Here’s a simple registry tweak for removing Activate Windows 10 Watermark without a genuine product key.
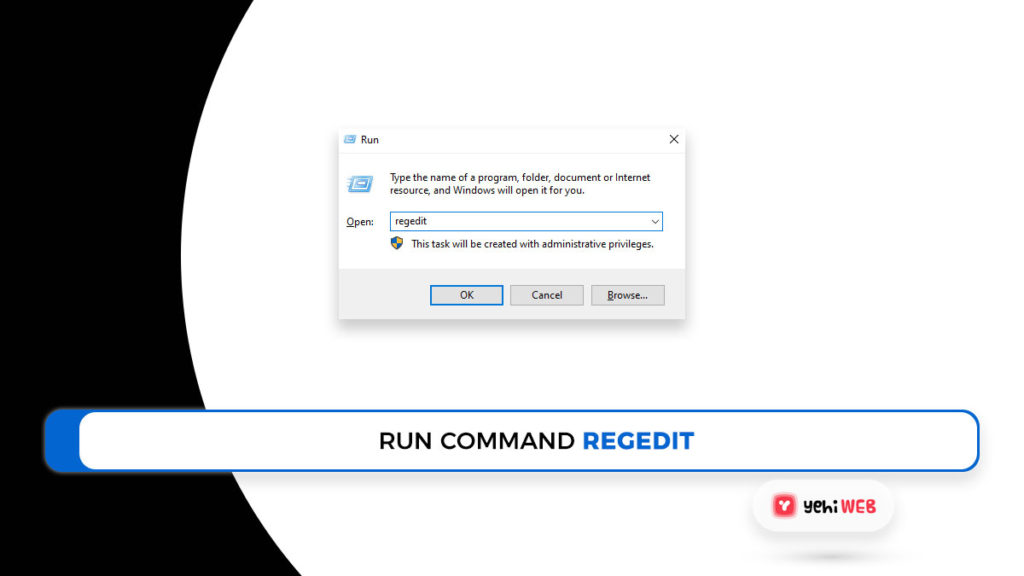
- Press a Windows + R keyboard shortcut, Open the Run dialog box.
- Open Windows Registry Editor, type Regedit in the Run box, and press Enter.
- After backing up the registry database, navigate to the following key:
- Computer\HKEY_CURRENT_USER\Control Panel\Desktop
- Look for the PaintDesktopVersion Dword key on the right panel.
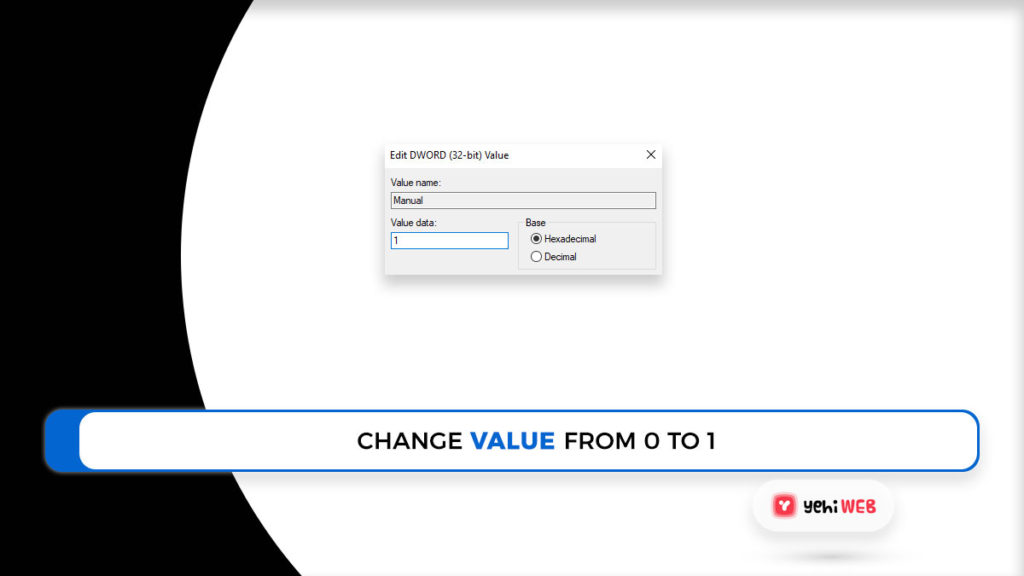
- Double-click the “PaintDesktopVersion” value. And, change the value “1” to “0”
- To save your changes, click “OK.” Restart the computer after closing the registry editor.
- Check your desktop to see if the activate windows 10 watermark has disappeared.
The watermark for Activate Windows 10 should be gone right away. This is not a long-term solution; the watermark may reappear in a short time.
Fortunately, the procedure outlined above is repeatable. If the watermark reappears, follow the same guidelines to get it removed.
Permanently Remove the Watermark By Killing The Process
Without activating Windows 10, there is a way to remove the “Activate Windows, Go to Settings to activate Windows” message. A basic notepad trick has been discovered by users that removes the text from the desktop. Notice that this process would not unlock any functionality you will not use without first activating Windows 10.
If you want to use features like personalizing your computer, you would need to purchase Windows 10. You would need a local user with administrator permissions for this method. To permanently remove the watermark on Windows 10 without activating the system, follow these steps:
- Launch the Notepad application. You will do this by double-clicking its icon or typing Notepad into the Windows search bar.
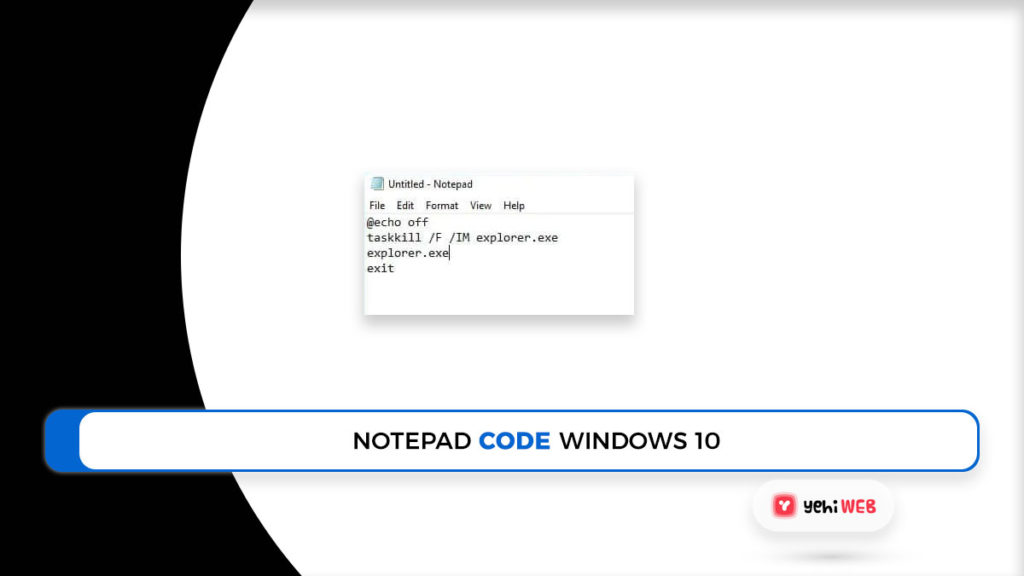
- In an empty notepad, copy and paste the following text:
- @echo off taskkill /F /IM explorer.exe explorer.exe exit
- Select Save as from the File menu. Alternatively, you can open the same option by simultaneously pressing the Control, Shift, and S keys.
- Rename the file remove.bat and change the file type to All Files (*.*).
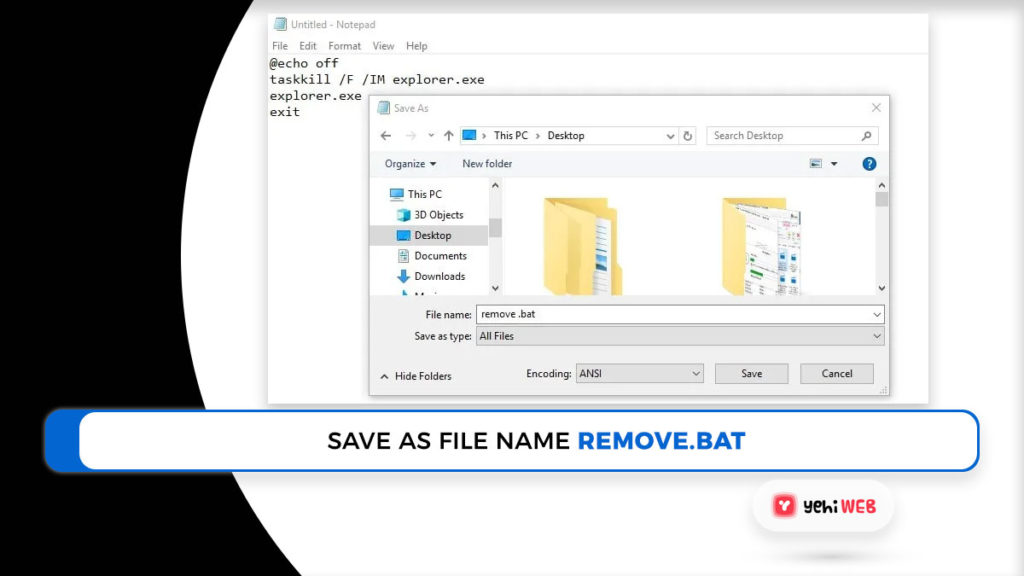
- Save the file on your desktop or your preferred Documents folder so that you can access it easily.
- Now o to the location where you saved the file, right-click it, and choose Run as administrator.
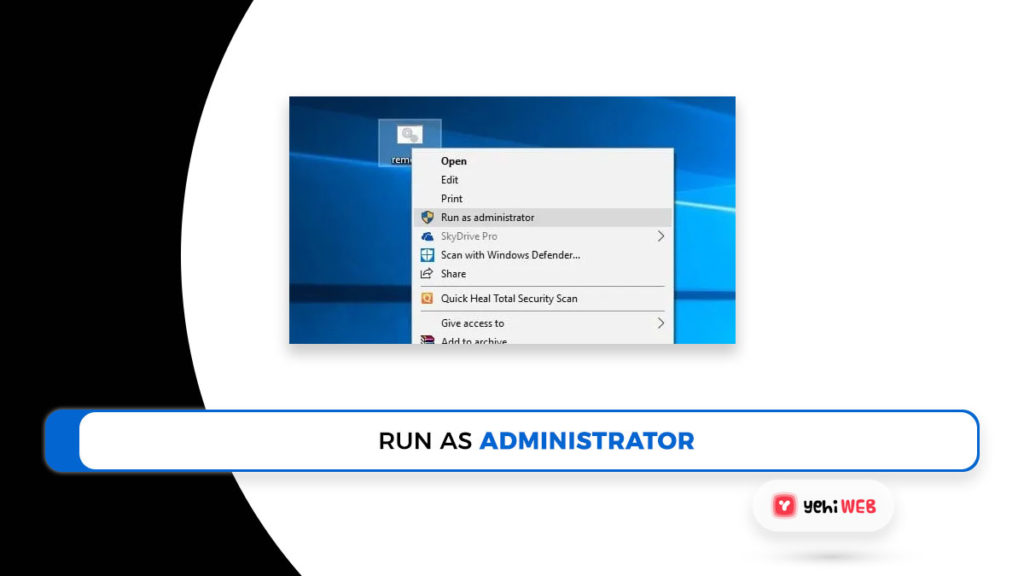
- A command prompt will open and close automatically. Please restart the computer after it closes.
You may be looking for something other than how to remove or disable the watermark without having Windows 10 activated. This part of the article is for those who have or want a genuine, activated copy of Windows 10.
Activating Windows 10 To Remove Activate Windows 10 Watermark
This intended method of removing the watermark from your screen is to activate your copy of Windows. Aside from that, you can gain access to locked features, personalize your PC, and get frequent Microsoft updates. You can either have a 25-character product key or a digital license, depending on how you got Windows 10. To help you figure out which activation process you may need, here’s a list from Microsoft’s support page:
- Digital license:
- Upgrading an eligible device to Windows 10 for free.
- Purchasing a Microsoft Store upgrade to Windows 10 Pro.
- Being a Windows Insider.
- Product key:
- Purchasing a copy of Windows 10 from an authorized retailer.
- Purchasing a digital copy of Windows 10 from an authorized retailer.
- Having a Windows 10 subscription and a Volume Licensing agreement.
- Purchasing a new or refurbished Windows 10 device.
- Either one:
- Purchasing a genuine copy of Windows 10 via the Microsoft Store. Check the email confirmation you got after purchasing Windows 10.
Once you have determined which method to use, you can use one of these two guides to activate Windows 10. Please keep in mind that you cannot substitute a product key and a digital license for each other.
How to Use a Digital License to Activate Windows
If you upgrade to Windows 10 from an eligible device or buy a genuine copy of Windows 10 or Windows 10 Pro, your computer will receive a digital license.
- Select Settings from the Start menu (gear icon above the Power icon). You can use the Windows + I shortcut to launch the app.
- Select Update & Security.

- Choose the option to go to the Microsoft Store. If you still can not find it, type Microsoft Store into the Windows search bar.

- It should direct you to the Windows 10 page. Use the Windows Store’s search function to find it if it does not open automatically.
- On this page, you can see one of two messages:
- If you see Install, click it to install Windows 10 or Windows 10 Pro with a digital license on your screen.
- If Buy appears, you will need to repurchase Windows 10 or Windows 10 Pro. Try signing in to the Microsoft account you used to buy Windows 10 initially.
- Your device will be activated after you have finished installing your preferred Windows 10 version.
How to use a product key to activate Windows
Product key is a 25-Character code which is used to activate Windows 10 on a system. Following is an example of product key: XXXXX-XXXXX-XXXXX-XXXXX-XXXXX (Only alphanumeric characters are included in the product key.) You can find the product key in one of three places, depending on how you got Windows 10:
- You can find it in your inbox.
- On the website of the retailer where you bought Windows 10.
- On a piece of physical paper or a sticker.
Follow the steps below to activate Windows after you have found your product key. Keep in mind that you would need to have an active internet connection to complete the activation.
- Select Settings from the Start menu (gear icon above the Power icon). You can also use the Windows + I shortcut to launch the app.
- Select Update & Security.

- From the left-side menu, select the Activation tab.

- Select the Change product key option.
- Click the Next button after entering your product key.
- Wait for the process to complete before clicking Activate. You can press the Close button once you see the Windows is activated text and enjoy your operating system.
READ MORE
How to Download Microsoft Word For Free
We hope you were able to remove the watermark “Activate Windows, Go to Settings to activate Windows.” Alternatively, if you don’t have either Product Key and Digital License, you can permanently remove the Activate Windows 10 Watermark. But again, as stated above, removing the watermark without having the windows activated won’t give you access to locked features. So if you still want to remove the watermark, follow the method mentioned below:
Permanently remove the activate Windows watermark.
The simplest and Permanent solution
- Right-click on the desktop and select Display Settings.
- Navigate to Notifications & actions
- Two options should be disabled there. “Show me windows welcome experience…” and “Get tips, tricks, and suggestions…”
- Restart your computer and verify that the Windows watermark is no longer visible.
Did you find this guide to be helpful? Please do let us know in the comments section below and read.
Saad Shafqat
Related posts
New Articles
What is the difference between FMWhatsApp and GBWhatsApp?
In the world of messaging apps, WhatsApp reigns supreme as one of the most popular platforms for connecting with friends…

