While Windows 10 includes many settings that you can customize, Microsoft manages them through the Windows Registry. Every parameter on Windows has a setting, which in turn has a registry entry. However, we would caution that Registry settings should not be changed by anybody unfamiliar with them.
Access the Registry Editor
However, if you have an administrator account and know how to manage the Registry, you can launch the Registry Editor or REGEDIT on Windows 10.
Launch the Registry Editor in Windows 10
On a Windows machine, you can use the following methods to launch the Registry Editor, often known as REGEDIT:
- Via Windows Search Box in Start Menu.
- Via Desktop Shortcut.
- Via Keyboard Shortcut to launch Registry Editor.
- Via Command Prompt or PowerShell.
- Via Run Dialog Box.
Before you begin, keep in mind that the Group Policy Editor is only available in Windows 10 Pro, Windows 10 Enterprise, and Windows 10 Education editions. Users must use the Registry Editor to make changes in Windows 10 Home.
1. Via Windows Search Box in Start Menu
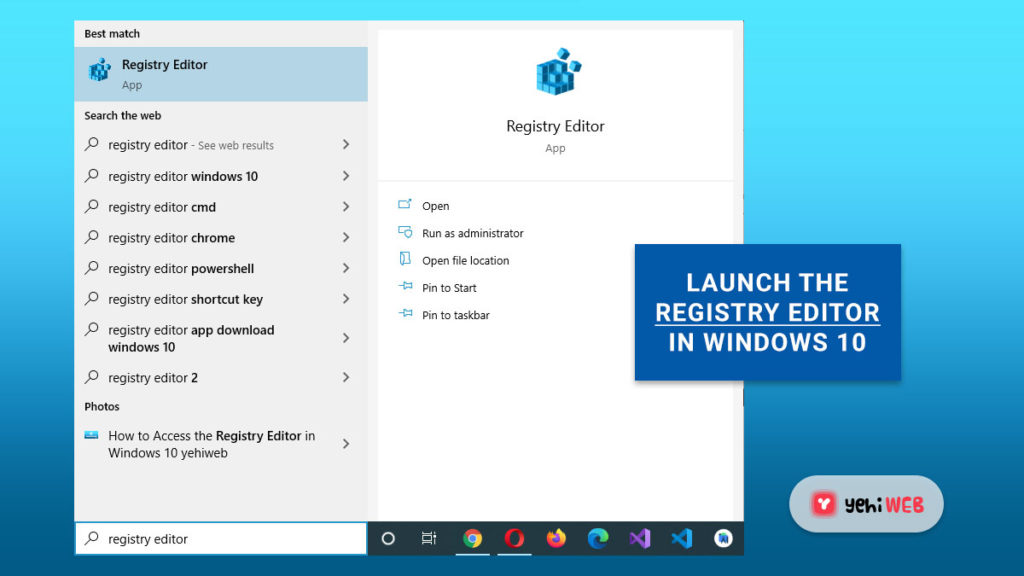
- Click on the Windows Start button to access the Start Menu
- Type “Registry” in the search bar
- The Registry Editor app should be at the top of the search result
- Click on the Run as administrator button in the right-sidebar to launch the Registry Editor as an administrator.
This allows users to run Registry Editor as an administrator.
2. Via Desktop Shortcut
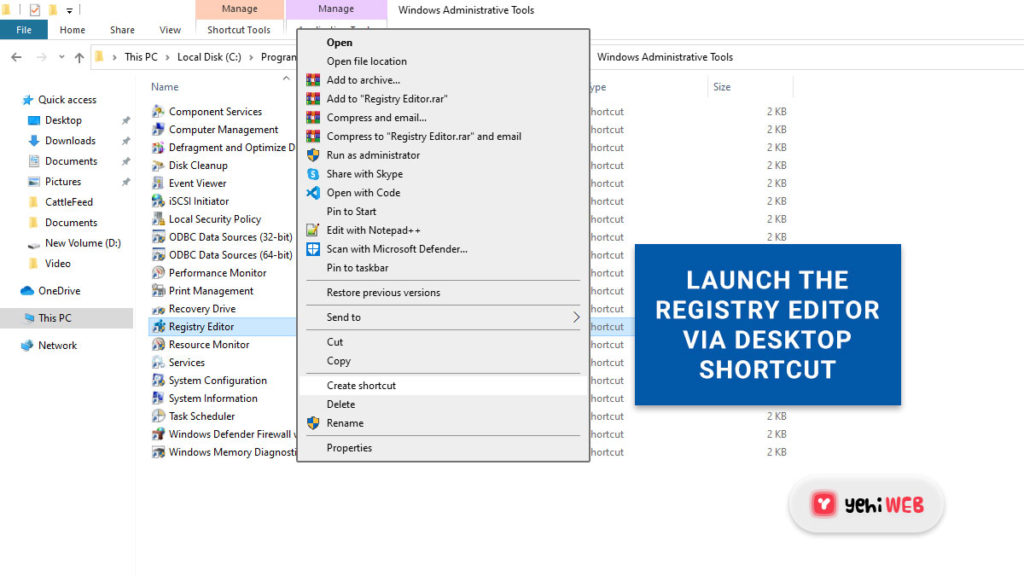
It is best to create a shortcut on the Desktop if you use it frequently.
- Press Windows + R keys to launch Run Dialog Box
- Copy and paste the following path in the search bar and hit enter:
- Find and right-click on the program “Registry Editor” and select the option “Create Shortcut.”
- Save the shortcut in your preferred location. Double-clicking on the shortcut you just created will launch the registry editor.
3. Via Keyboard Shortcut to launch Registry Editor
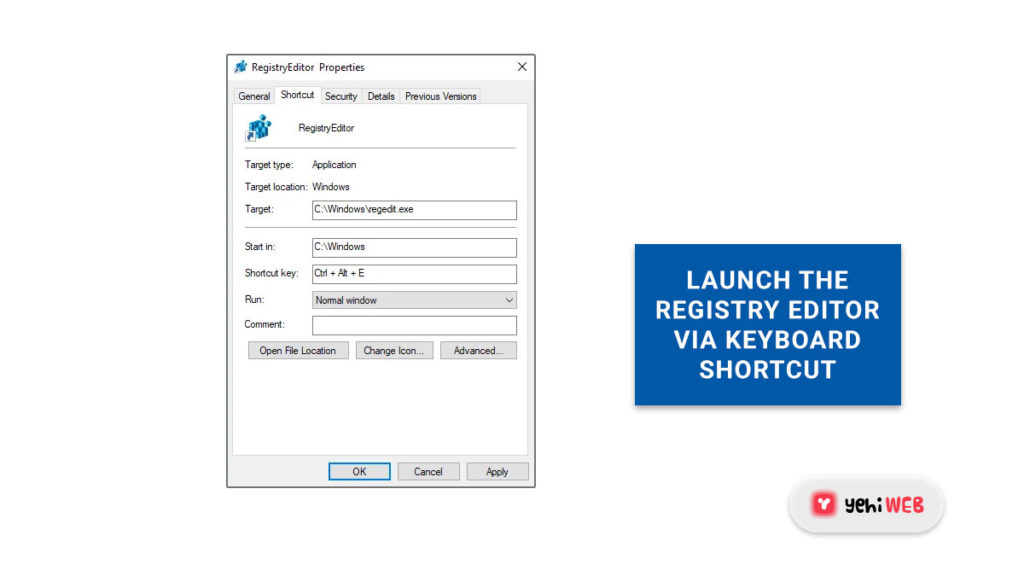
You can also use a keyboard shortcut to launch the Windows Registry Editor.
Locate the newly created Registry Editor shortcut on the desktop to do so. Right-click it and choose Properties. Navigate to the Shortcuts tab.
Click on the Shortcut key’s blank text field. To assign the shortcut’s sequence, press any key. Remember that whichever key you pick, CTRL+Alt will be prefixed to it.
For example, if you select the key ‘Y,’ the sequence Ctrl +Alt + Y is created as a Registry Editor shortcut key.
You can also give the Registry Shortcut administrator rights.
4. Via Command Prompt or PowerShell
- To launch Registry Editor, open Command Prompt (Admin) from the WinX Menu.
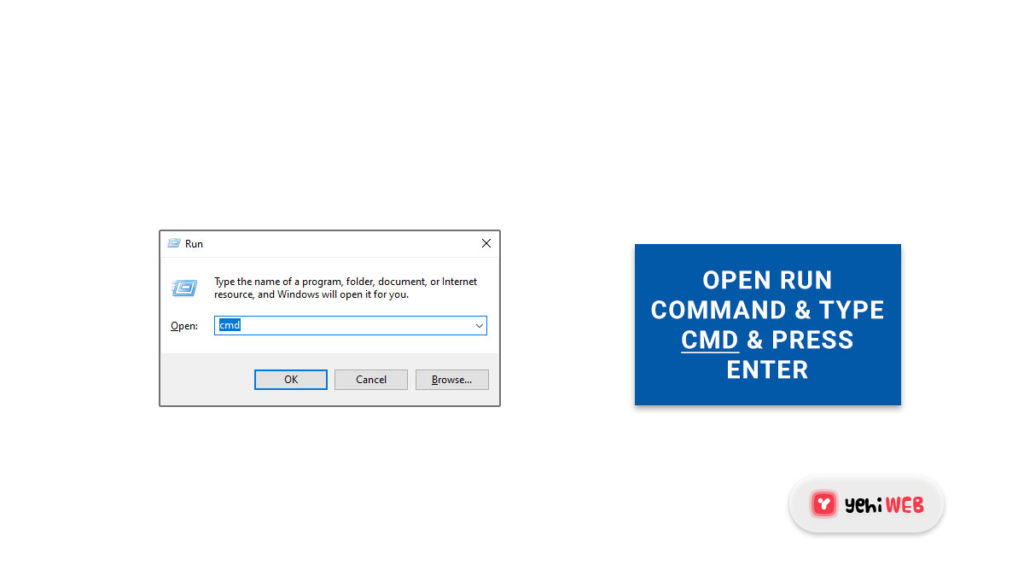
- Type Regedit and click Enter.
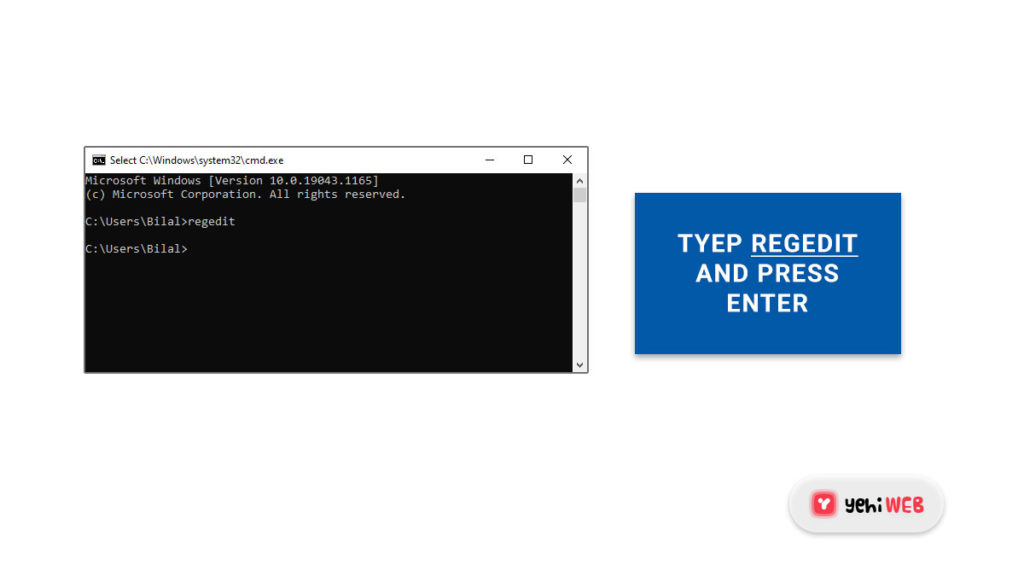
Alternatively, you can change the WinX Menu to show PowerShell rather than Command Prompt, then type regedit and press Enter to launch it.
5. Via Run Dialog Box
This is perhaps the simplest and most popular approach.
- Press Windows + R keys to launch Run Dialog Box
- Type Regedit in the Dialog box’s search bar and hit enter.
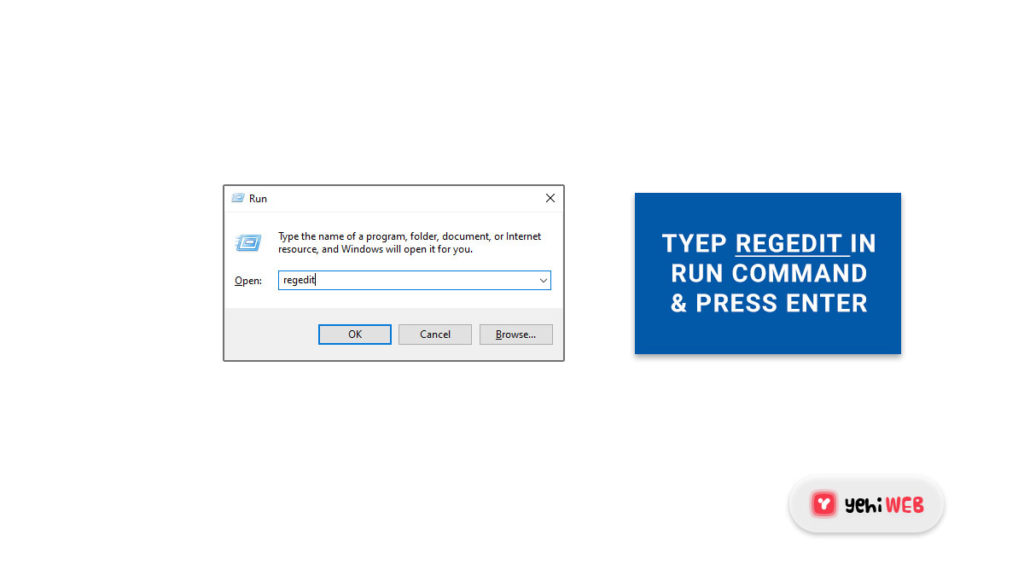
- You could be prompted by the UAC prompt.
- Click on Yes to launch the Registry Editor Program.
So that’s how you can launch the Registry Editor in Windows 10 in a variety of ways.
It is usually a good practice to back up the Registry before making any changes.
Bilal Shafqat
Related posts
New Articles
How Much Do Shipt Shoppers Make in 2025?
Thinking about becoming a Shipt Shopper in 2025? You’re not alone. More and more people are looking for flexible side…


