This annoying bug is troubling many Apple iPhone and iPad users. When you send a response (accepted or rejected) to a calendar invitation, and the response cannot be received due to an error, the error message “Calendar Invitation– Your response to the Invitation Cannot be sent- Ok” appears on the Apple iOS Calendar App; as a result, you will continue to get the notification. This error is very aggravating because it occurs repeatedly.
Table of Contents
Almost all iPhone models, including the iPhone 8/ 8 Plus, iPhone 7/ 7 Plus, iPhone 6/ 6s, and iPhone X, iPhone XR, have been afflicted with this pop-up error notification. And after clicking the Ok button, it continues to appear every five to six minutes. For some users, this causes their iPhone to hang or freeze.
Note
Method 3 appears to be working for the majority of users. So try solution 3 first, and if that doesn’t work, move on to the following method.
We’ve included a troubleshooting guide below. As a result, you should be able to resolve this issue. If you’re experiencing the same problem, this article will assist you in determining it:
Fix: Calendar Invitation Cannot Be Sent
READ MORE
HP Announces the First Windows 11 Enabled Devices
Method #1: Restart iOS Device
Switch off the iPhone first, then turn it back on. So, if there’s a minor glitch with the calendar app, restarting your phone could fix it.
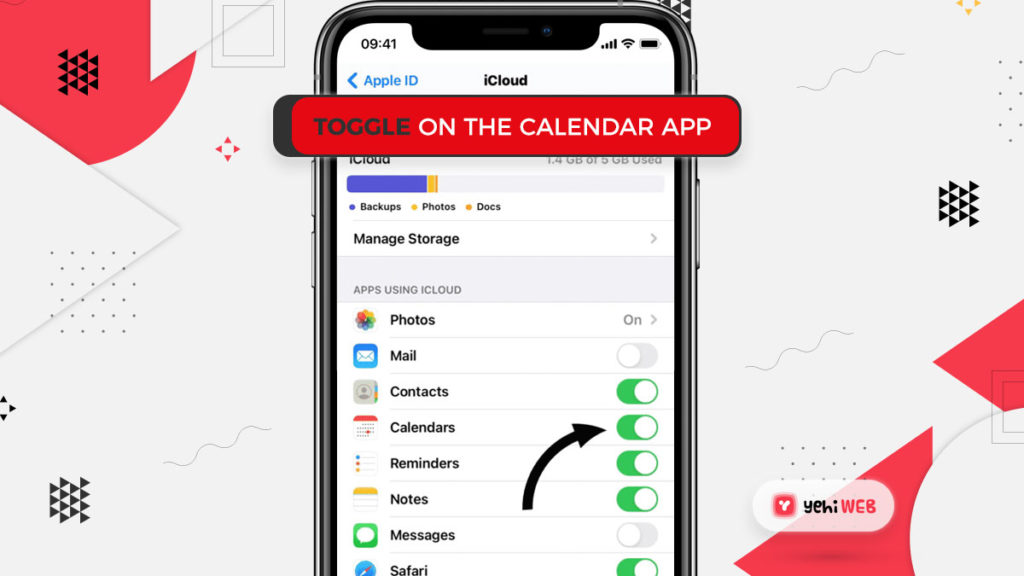
Method #2: Toggle Off Calendar App
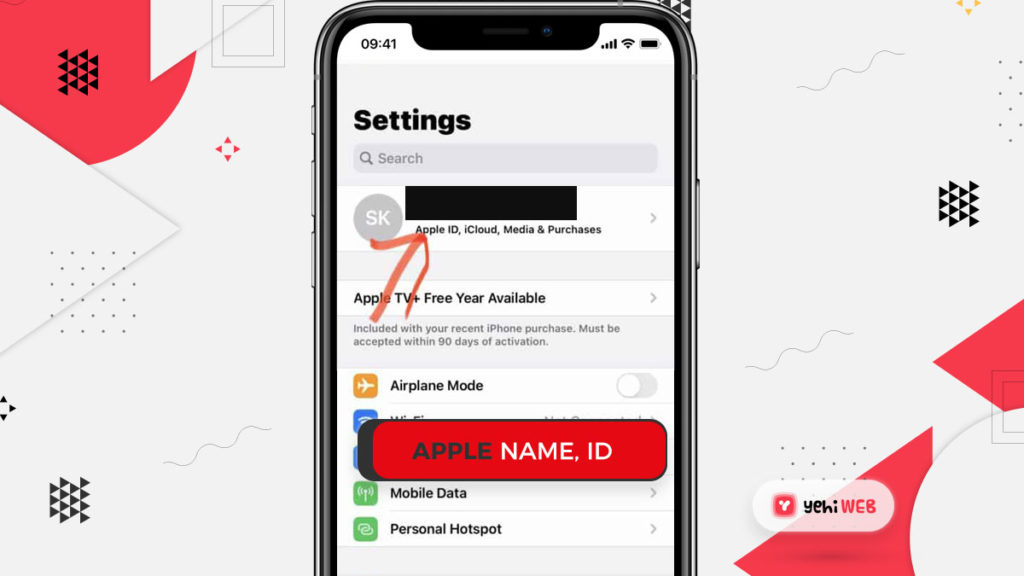
Navigate to the settings menu on your iOS device (iPhone or iPad), Tap on Your Name > Cloud
- Now, look for the calendar app and toggle it off
- Wait one minute
- And now, toggle the calendar app on
- Reboot your iPhone
Method #3: Reset Calendar App
Go to Settings on your iPhone or iPad, then to Passwords & Accounts. Then choose the user account (under the accounts section).
Note
Make sure you choose the connected account to Calendar (iCloud, Exchange, Gmail, etc.)
- Now, slide to toggle off the Calendar. You can get a warning message similar to this one, but don’t worry, your data is safe. After restarting and toggling on the Calendar, the data will be restored. You should, however, back up all of your data to iCloud. In the event of a data loss, you can restore your old data to your iPhone using iCloud.
- Restart your iPhone now.
- And open the calendar app.
- If the issue persists, repeat this procedure on all other accounts on that device.
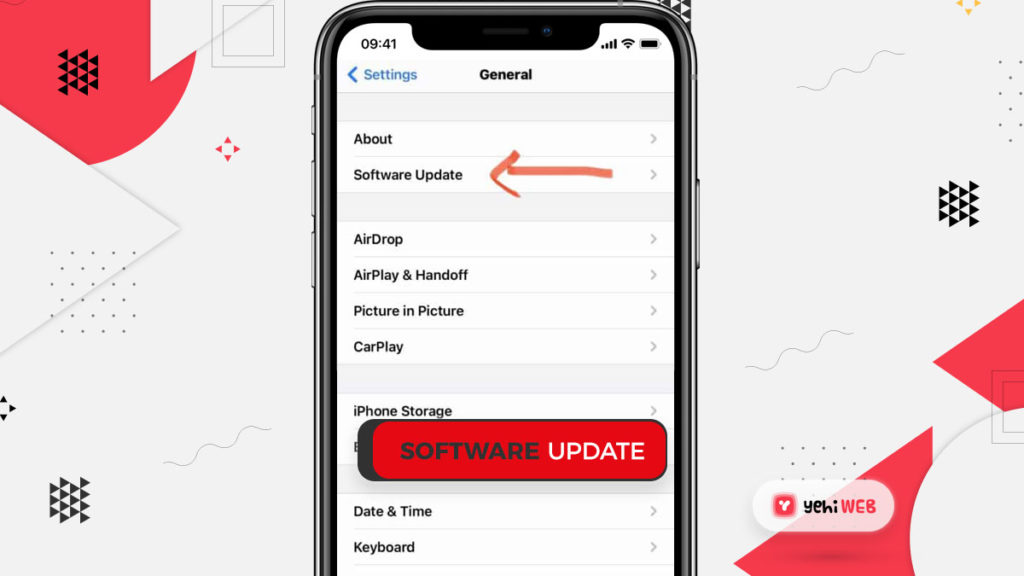
Method 4: Update Your Device’s OS
Please update your iPhone’s iOS version if it is not already up to date. This error will be resolved by updating your iPhone to the most latest version of iOS. So, if this solution seems to be able to fix the problem, try it.
Method 5: Force stop Calendar App and Reopen
Force the Calendar app on your iOS device to stop and then reopen. Follow these steps to do this.
- Simply double-click the home button on your device if one is present. You’ll also see a list of recently used apps. Then, locate the calendar app and swipe right or left to close it. If your iOS device lacks a Home button, simply swipe up from the bottom of the screen, look for the Calendar app, and then swipe up to force close it. After that, reopen it.
READ MORE
How to Install Ubuntu 20.04 Server [ Easy Installation Guide ]
Method 6: Clean up Calendar App Data
This approach is helpful if there is a data discrepancy between your Calendar app and the application server on your device. Since data is sent back and forth from the device and the server. As a result, the data process can be delayed at times, causing any response or activity that you initiate to be lost.
Here’s how to fix Calendar Invitation Cannot Be Sent On iPhone on your iPhone. To fix this, clear the data in your iPhone or iPad calendar app and sync a new copy of the data from the cloud.
Here’s how to go about it:
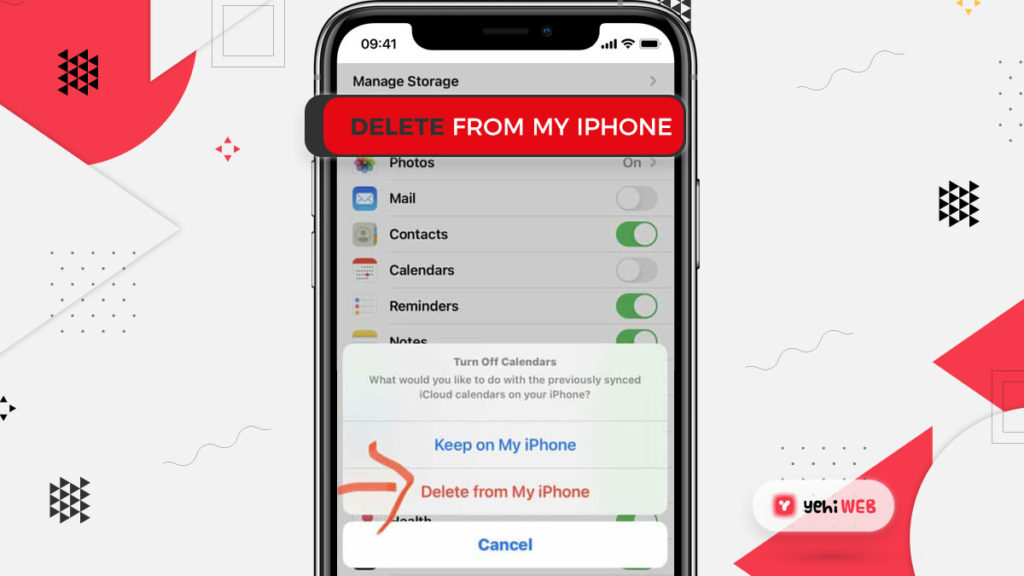
- Go to Settings, then Passwords & Accounts, or tap on your name > Cloud.
2. In this section, choose the account associated with your device’s Calendar App. If you have several accounts on your iPhone or iPad, you can repeat this process with each account. Now, on your iPhone or iPad, pick the account causing the error, and then tap the iCloud option.
3. Now, tap the Calendar App button to disable the app in that connected account. You will get a confirmation note stating, “Are you sure you want to continue?” The calendars on your iPhone will be removed” will appear. To validate the process, click Delete from My iPhone. Don’t worry about the data because it gets all from the server itself when you turn it on.
4. Return to Settings, then click on the General option, followed by the Shut Down button.
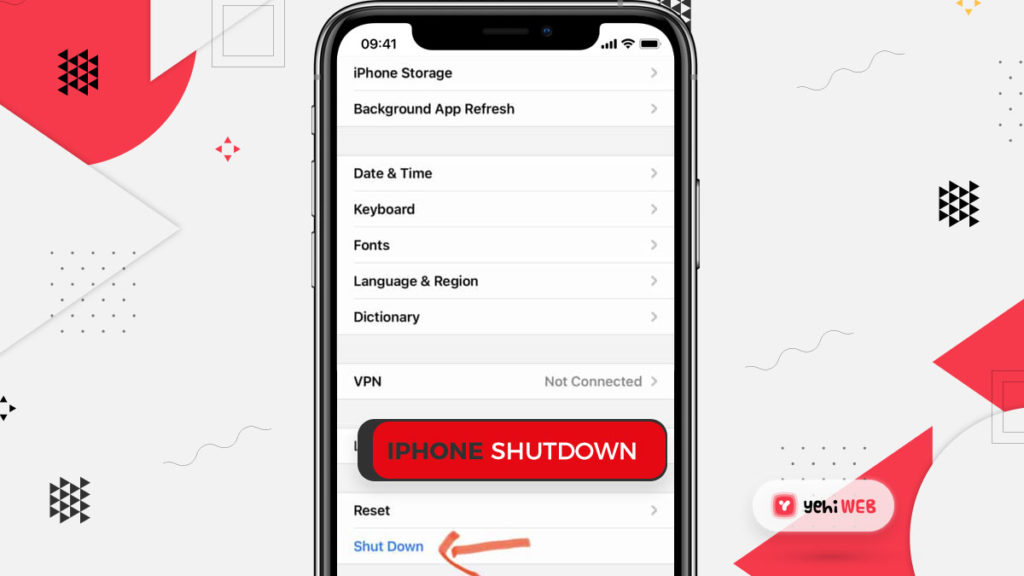
5. Start your Apple iPhone or iPad now.
6. Now is the time to open the Calendar app. To do so, go to Settings on your Apple device, then tap on Passwords & Accounts or your Name > iCloud, and then turn on the Calendar of your connected account. It will now take several minutes to sync and download all Calendar data from the cloud, depending on the scale of the data.
7. The Calendar app can now run without errors after going through these steps. If these steps don’t work, try the other approaches mentioned in this article.
Verdict
If you carefully follow these steps, you will be able to resolve the Calendar Invitation Cannot Be Sent On iPhone or iPad error on your Apple device. If this article doesn’t fix the problem, go to an Apple Store and talk to someone there about it. You can also contact Apple Customer Service for help with this error.
If you have any concerns, please leave them in the comments section below. If you can resolve this problem, please leave a comment below stating which steps you took to fix it.
Check out: Airpods are connected, but there is no sound?
Subscribe to the email newsletter, where you can email me with any issues you’re having, and I’ll respond with a solution.
READ MORE
HP Announces the First Windows 11 Enabled Devices
Share on facebook
Share on twitter
Share on linkedin
Share on pinterest
Share on reddit
Share on vk
Share on tumblr
Share on skype
Share on stumbleupon
Share on whatsapp
Share on email

DataMate Software Review: Features, Business Applications, and Alternatives
Choosing the right data management platform can make the difference between a business that reacts slowly and one that spots…