Php 8 on ubuntu
One of the most popular server-side programming languages is PHP. This guide will show you how to install PHP 8.0 on Ubuntu 18.04 / 20.04. When creating dynamic and responsive websites, it is the language of choice.
PHP empowers many major CMS Platforms like WordPress, Drupal, and Magento. Released on November 26, 2020. Php 8.0 is the latest edition at the time we wrote this guide.
- JIT Compiler
- Union Types
- Named Arguments
- Null Safe Operator
- Match Expression
- Improvements in error handling and consistency
Ubuntu 20.04 repositories are the default version of PHP 7.4 at the time of writing. From the Ondrej/PHP repository, we will install PHP.
Make sure that your apps support it before upgrading to or installing PHP 8. So, let us get started with the guide on installing and using PHP 8.0 on the Ubuntu 18.04 / 20.04 LTS Focal system.
Enable PHP Repository
PHP 7.4 was the default PHP version in Ubuntu 20.04 repositories at the time of writing. We will use the Ondrej PPA repository to install the latest release of PHP. Many PHP versions and PHP extensions are available in this repository.
But first, update your Ubuntu system packages and install certain prerequisites.
Install PHP 8.0 on Ubuntu with Apache
If you use Apache as your web server, you can install PHP as an Apache module or PHP-FPM.
Install PHP as an Apache Module
Restart Apache after installing the packages to allow the PHP module to load:
Set up Apache using PHP-FPM
PHP’s Php-FPM is a FastCGI process manager. To install the required packages, use the following command:
Install PHP 8.0 on Ubuntu with Nginx
For the Nginx server, there is no official PHP module. In that case, we will deploy PHP applications via Nginx web servers using PHP-FPM.
The above code tells Nginx to use PHP-fpm to handle all files with the “.php” extension.
Install PHP 8 Extensions
PHP extensions are libraries that extend PHP’s functionality. These extensions are available as packages and installed in the following way:
Examples include the SNMP, Memcached, and MySQL extensions installed in the following example.
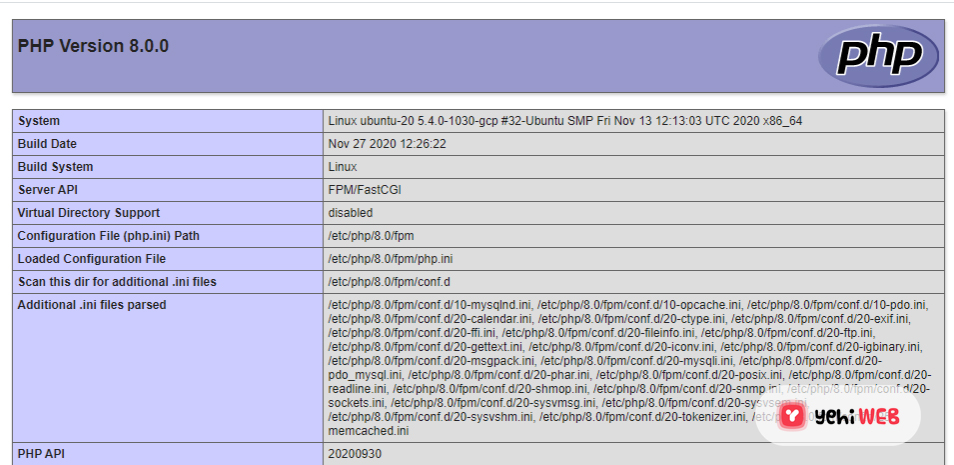
Verify Php 8 Installation
/var/www/HTML like shown: 
Switch from Default Php Version
You can switch between installed PHP versions on your system quickly. Run the following terminal command:
Conclusion
We hope you can now install PHP 8.0 and easily integrate it with either the Apache or Nginx web servers. Your feedback is much appreciated.
Bilal Shafqat
Related posts
New Articles
What is the difference between FMWhatsApp and GBWhatsApp?
In the world of messaging apps, WhatsApp reigns supreme as one of the most popular platforms for connecting with friends…

![How To Install PHP 8 on Ubuntu 18.04 / 20.04 [ Easy Guide ]](https://yehiweb.com/wp-content/uploads/2021/06/Install-PHP-8.0-on-Ubuntu-18.04-20.04-Yehiweb-1200x675.jpg)
