Canonical has released Ubuntu 20.04 Server, codenamed Focal Fossa. It is now available on both the desktop and the server. In addition, canonical offers Long-term support for your machine with this ubuntu release. In this guide, you will learn how to install Ubuntu 20.04.
Long-time support implies that security updates will be available for Ubuntu 20.04 servers till 2023. So let us look at the new features included in this edition before we start the installation process.
- Due to it being an LTS release, Canonical promises 5-year updates and support until 2025. And under UA-I subscription, it offers ten years of security.
- Two-Factor Authentication for SSH
- This version also includes a Flexible Bootloader. In previous versions, Ubuntu would only write the bootloader to a single disk. But in this release, the Ubuntu installer can now write the bootloader to more than one disk. This feature prevents a single point of failure.
- WireGuard VPN Introduction
- Automatic updates with Ubuntu Server Live Installer.
- The release also includes new Kernel 5.4
- It includes updated features like NGINX 1.17, Python 3.8, GCC 9.3, Ruby 2.7, PHP 7.4, libvirt 6.0, and QEMU 4.2.
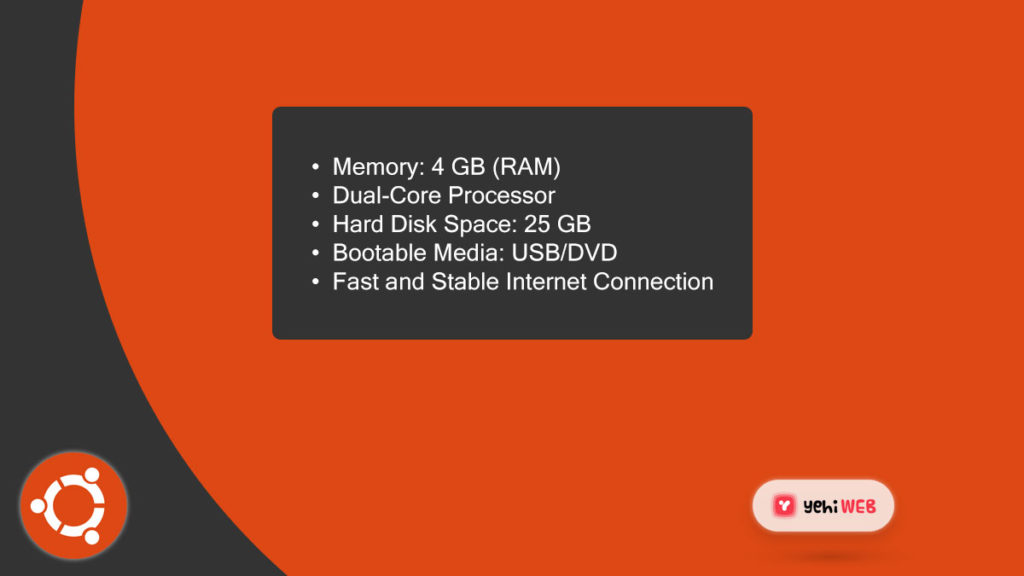
System Requirement For Install Ubuntu 20.04 Server
Install Ubuntu 20.04 LTS Server [Step-by-Step Guide]
Download the ISO file for Ubuntu 20.04 LTS Server
Use Rufus (Windows) or Startup Disk Creator & Unetbootin to create a bootable USB drive or DVD.
Use bootable media (USB / DVD) to boot the target machine
Place the bootable CD/DVD in a drive or a USB port on your system to begin the installation process. Then, by pressing your computer’s boot key, boot from it (F9, F10, F11, or F12 depending on settings).
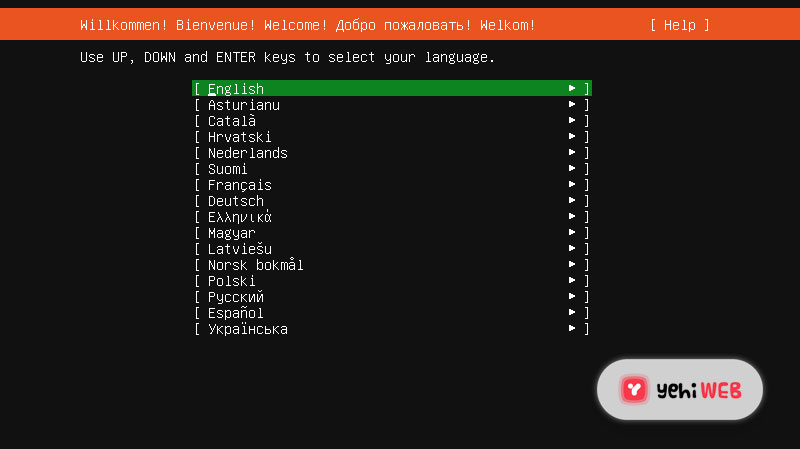
After booting up, you will arrive at the welcome window of the installer. From there, select your preferred language and hit enter to continue.
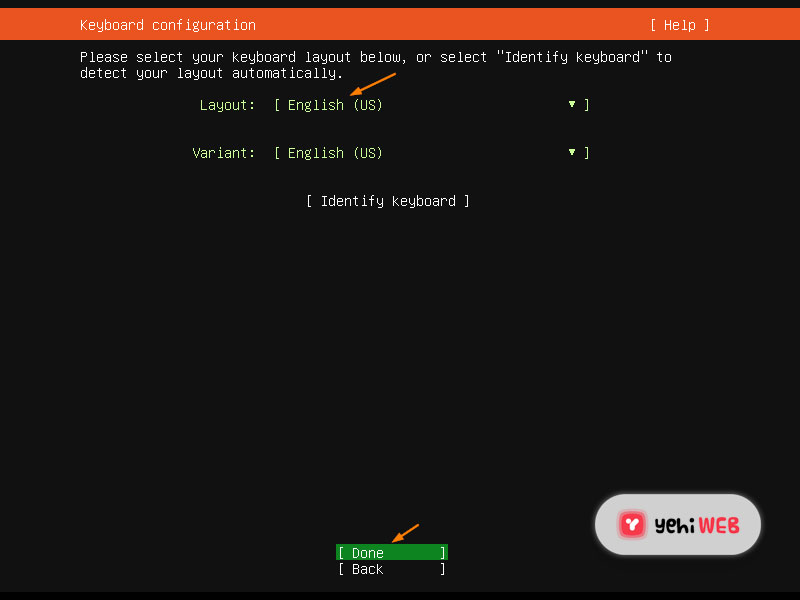
Select Keyboard Layout
Choose your preferred keyboard layout for your server, and then select “Done” and hit enter.
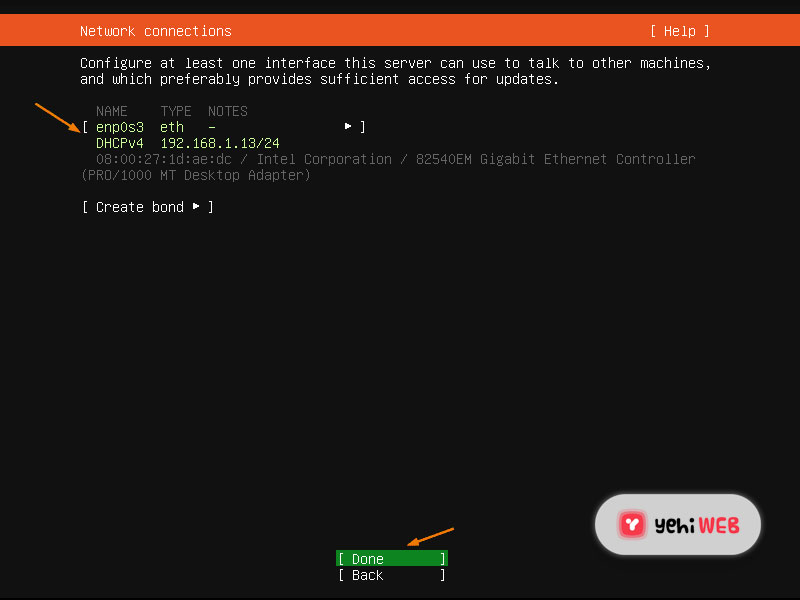
Now Configure both Network and Ubuntu Archive Mirror
Ensure that your system has a stable and fast internet connection. You will see that interface (Ethernet Card) has selected an IP address via DHCP on the next screen.
Select done and hit enter to continue.
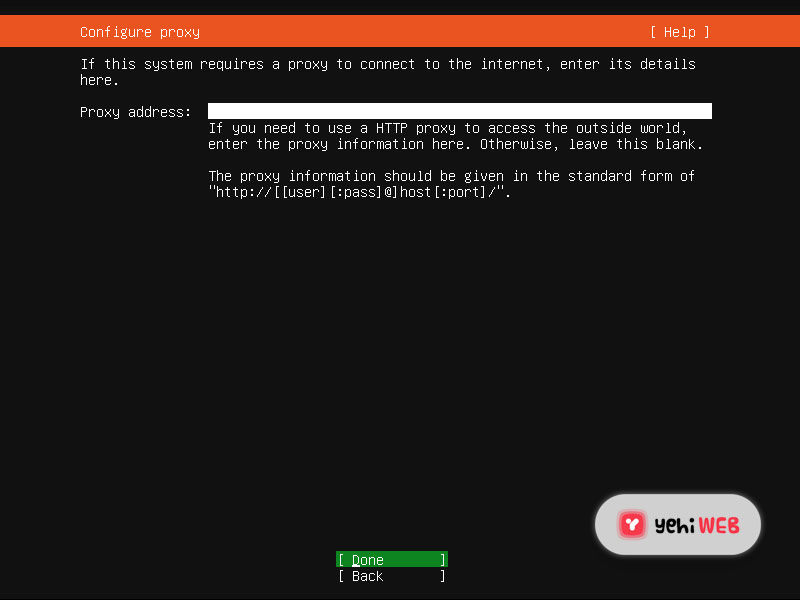
Suppose your machine has a network connection and works under the proxy server, then put in the proxy IP. Leave it as it is if the link is not running under a proxy server.
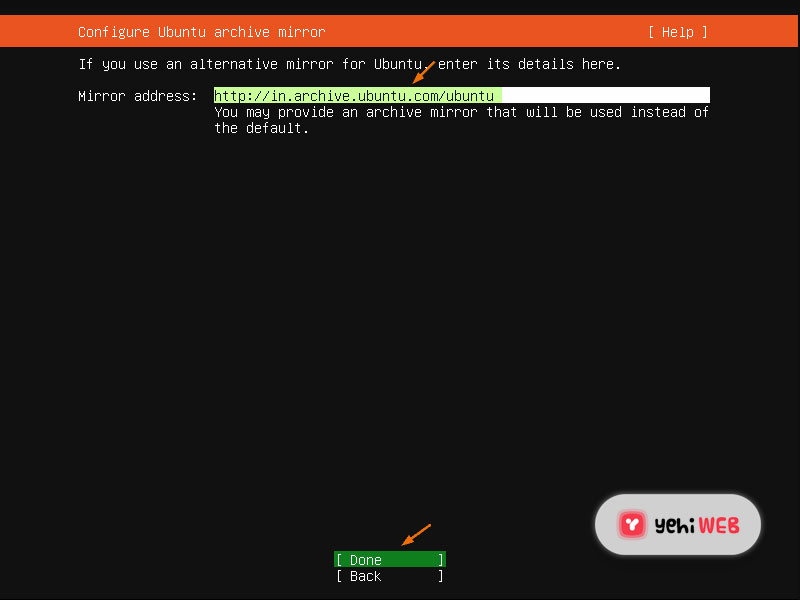
Based on the country located on the following screen. The Ubuntu installer will install the archive mirror.
Select Done and hit enter to continue.
Configure Your Storage
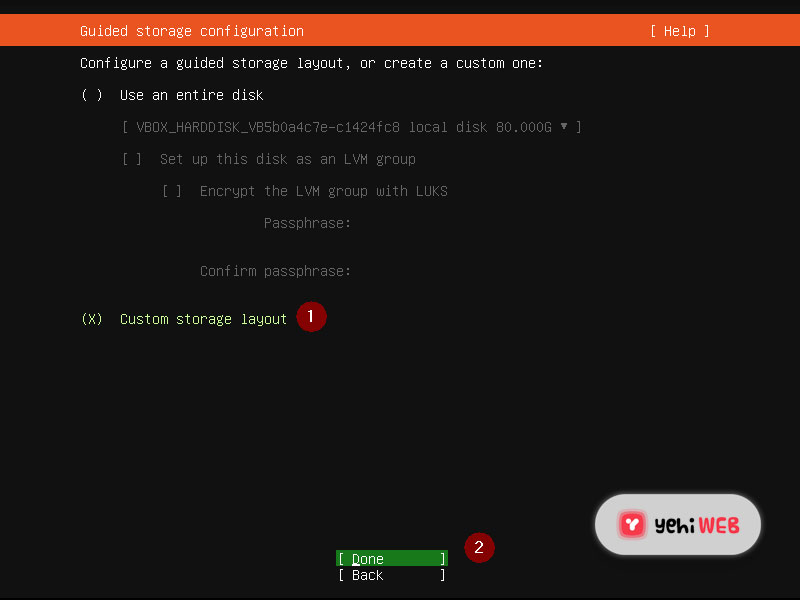
After configuring your network, on the next screen, you will see two options. You can use either one to configure your storage layout on Ubuntu 20.04 server.
Use an entire disk – Select this option if you want the installer to create partitions for you.
Custom Storage layout – Choose this option if you want to create your customized partition scheme or table.
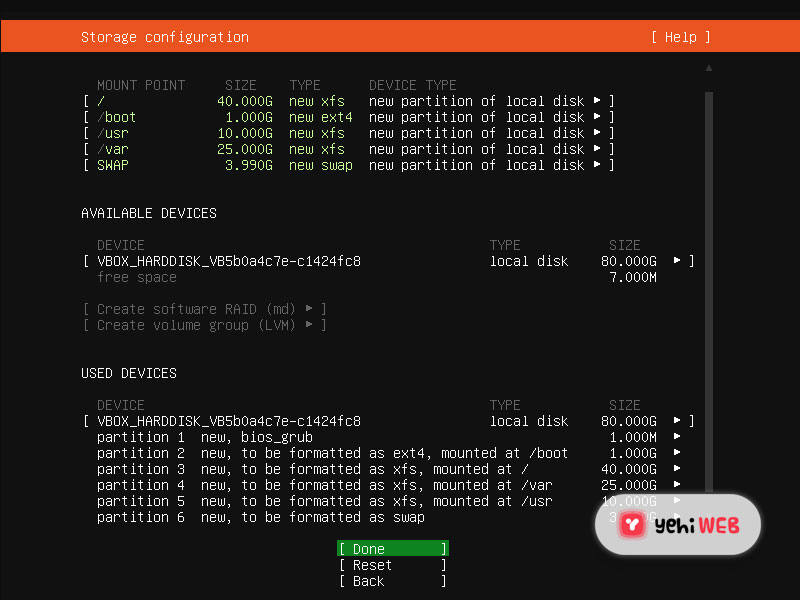
As stated earlier, we are using 80 GB of Hard Disk space for this installation guide. We will create the following partitions mentioned below:
- /boot – 1 GB (ext4 file system)
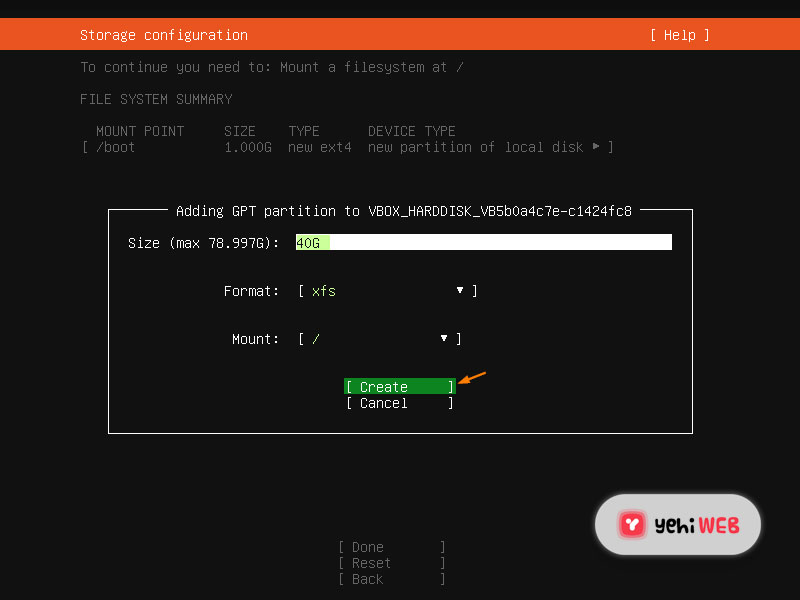
- / – 40 GB (xfs file system)
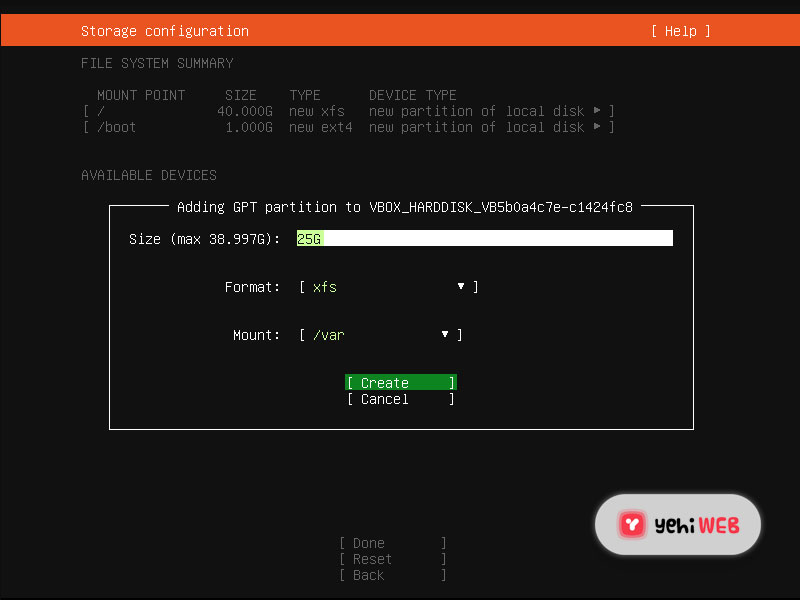
- /var – 25 GB (xfs file system)
- /usr – 10 GB (xfs file system)
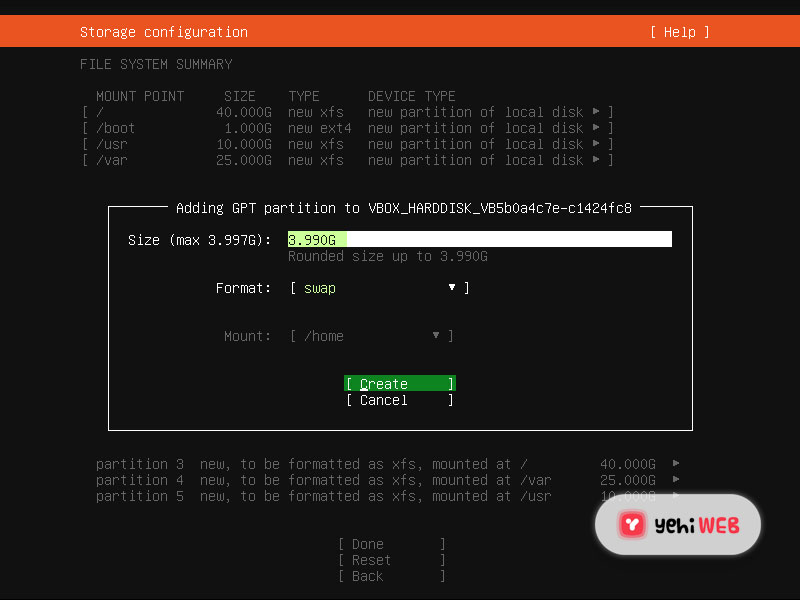
- Swap – 4 GB
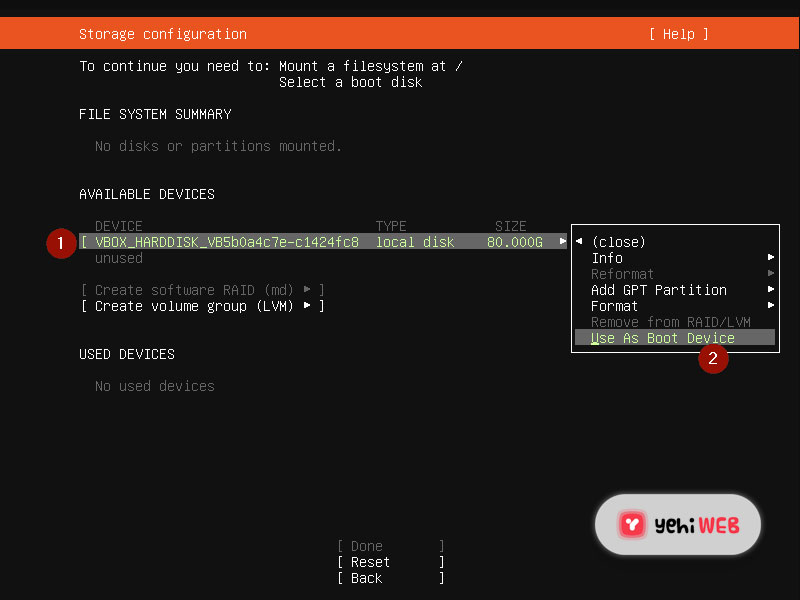
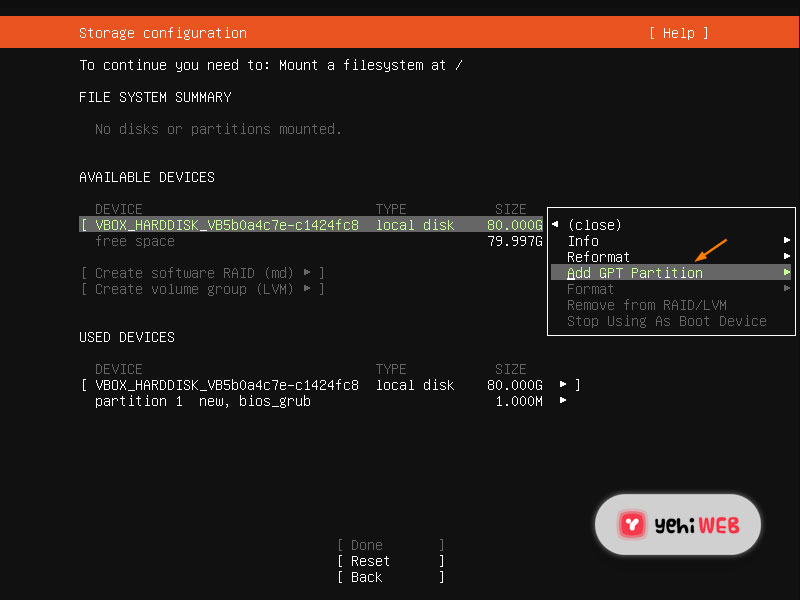
So, let us get started with partitions. Select the device or local disk, press Enter, select “Set as Boot Device,” and press Enter.
The installer will create a 1 MB partition used to hold Grub 2’s core required for GPT drives.
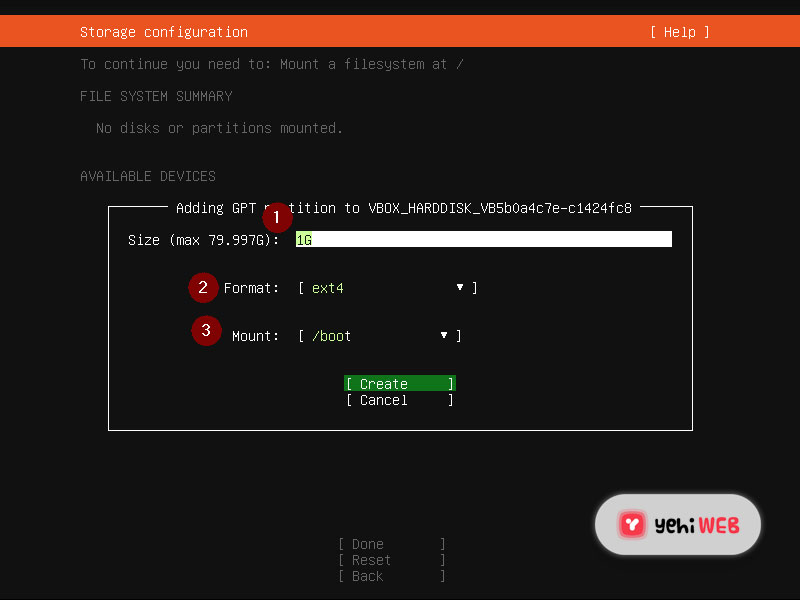
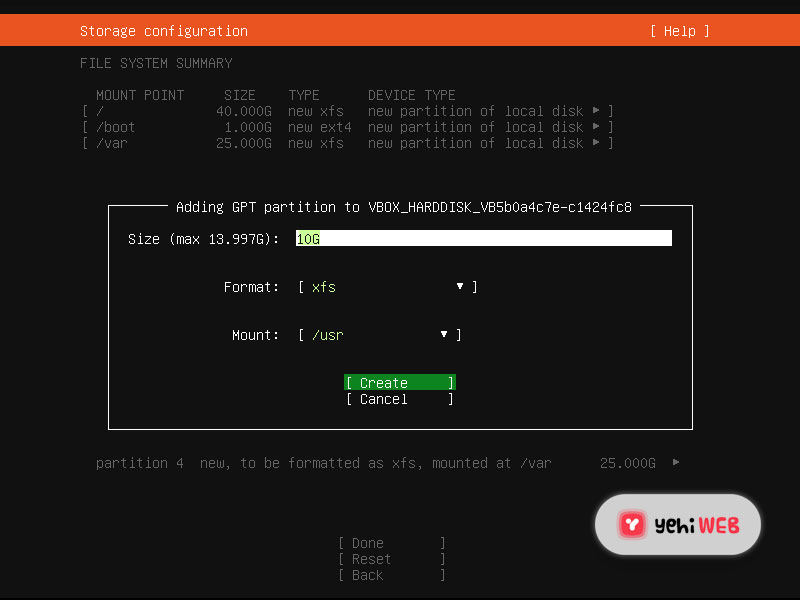
Let us now create a 1 GB /boot partition. Choose Add GPT Partition –> Press Enter –> Select the disk or device –> Press Enter.
On the next screen, set the size to 1 GB, the format (file system type) to ext4, and the mount point to /boot.
Select Create, then press Enter.
Create the following three partitions: /, /var, and /usr, each with a capacity of 40 GB, 25 GB, and 10 GB.
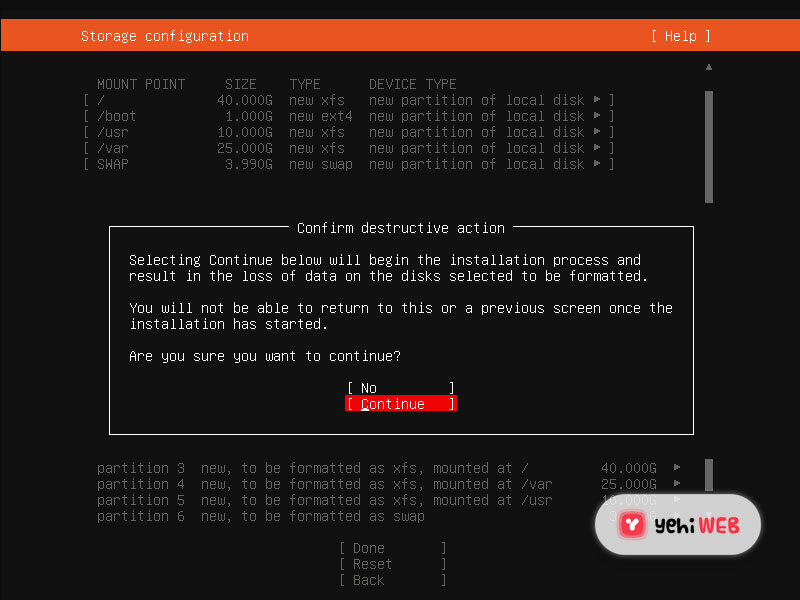
Once you have finished setting up your partitions, you will see the following screen. First, verify the partitions, then choose “Done” and press Enter.
READ MORE
How to Install Tomcat 9 on Ubuntu
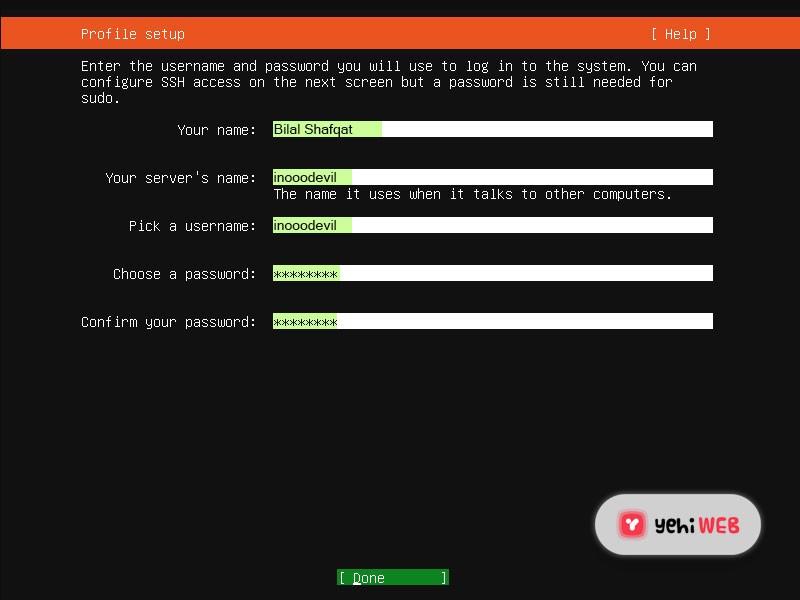
Specify the Hostname as well as the local user credentials
Select Done and press Enter to continue.
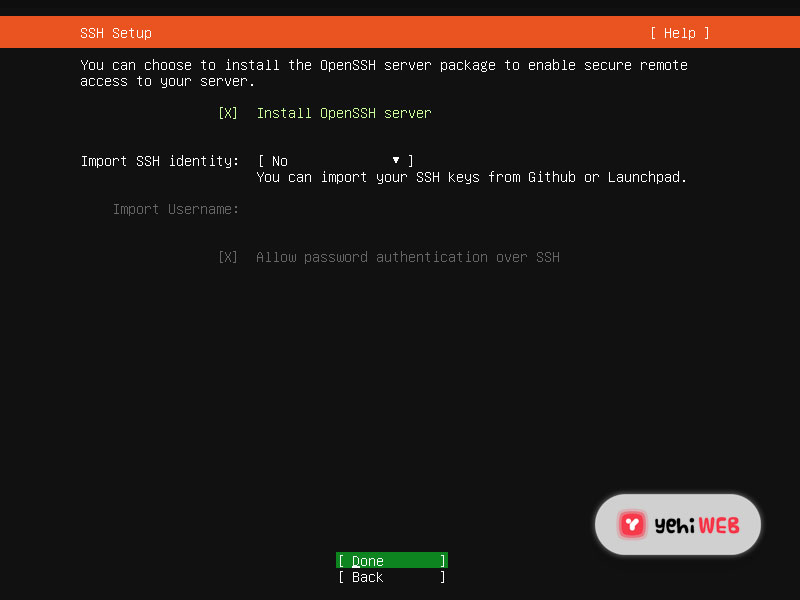
Install OpenSSH Server Package
Choose the option: Install open SSH server if you want to use ssh to connect to your server over the network.
After choosing the “Install Open SSH server” option, hit enter to continue.
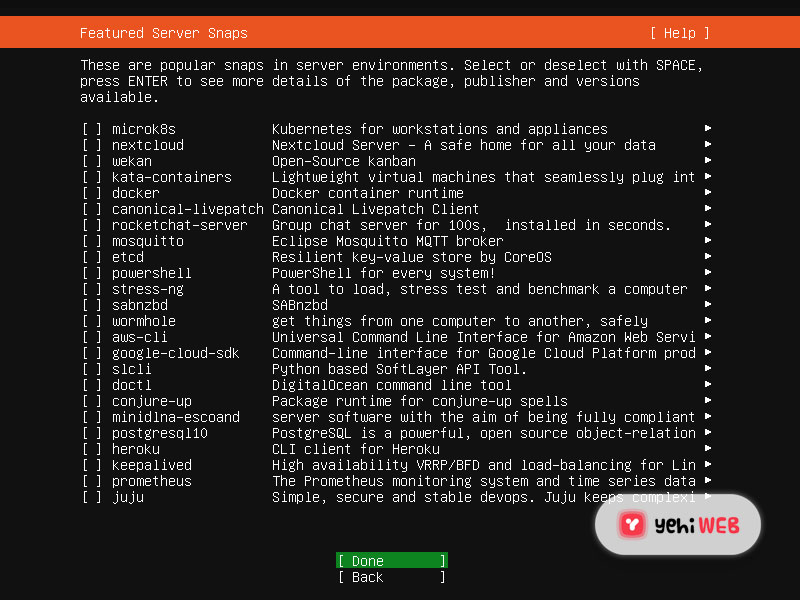
You have the option to choose the snaps for your server environment on the following page. If you don’t want to install snaps, select done and hit enter to start the installation.
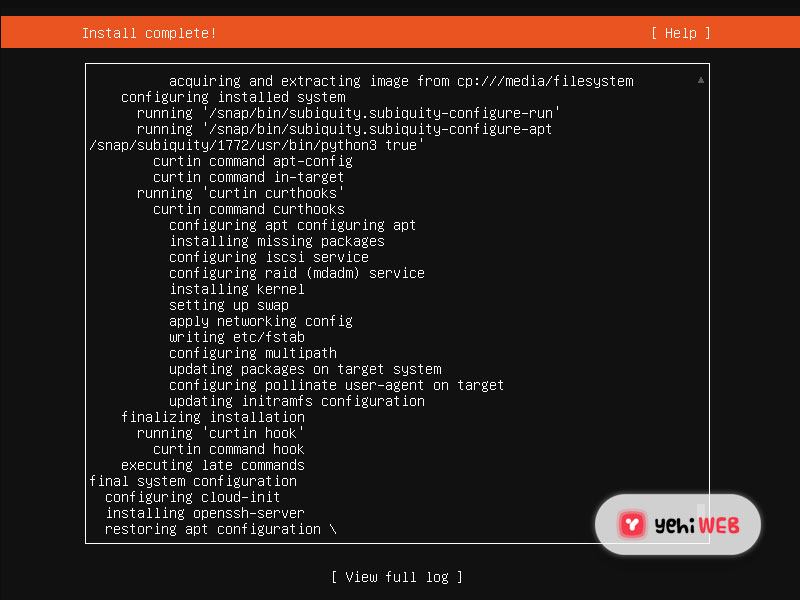
Ubuntu 20.04 Server Installation Process
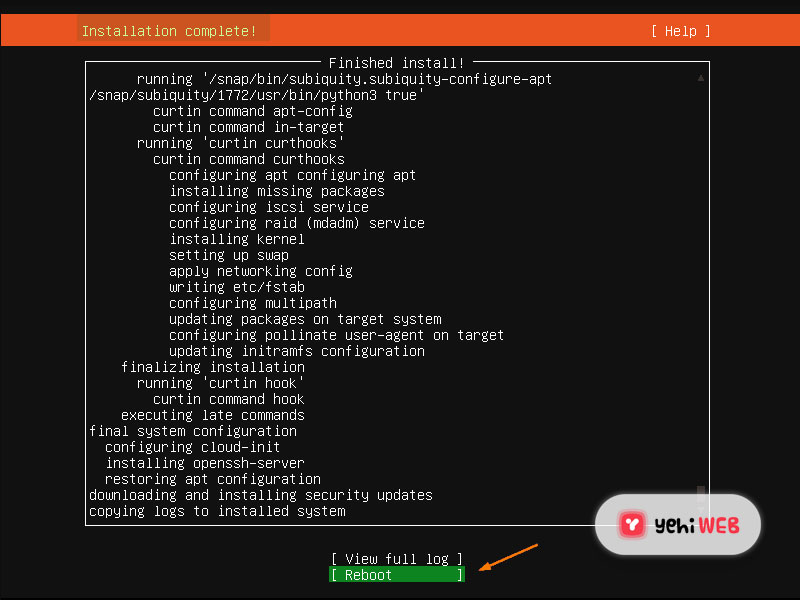
The installation of the Ubuntu 20.04 LTS server has begun and is now in progress, as shown below.
Select ‘Reboot‘ and press Enter.
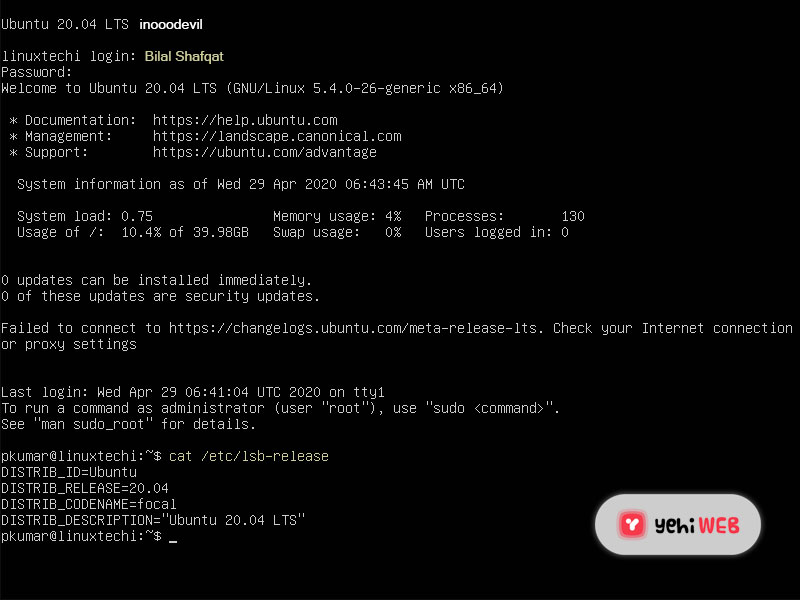
After a successful installation, log in and verify the OS version
Use the local user credentials that we created in the installer to log in once the system is up and running.
This verifies that Ubuntu 20.04 LTS server is installed on our machine.
Run the following command to install a GUI / Desktop environment on your Ubuntu 20.04 server:
Restart your server when the Gnome desktop packages is installed. You should see the login screen below.
This concludes the guide; I hope that these steps assisted you in installing Ubuntu 20.04 LTS on your machine. Please don’t hesitate to reach us with your ideas and suggestions.
Bilal Shafqat
Related posts
New Articles
How Indie Game Designers Use 6 Alternative Design Tools for Faster Prototyping
Independent game designers thrive on speed, experimentation, and creative freedom. Unlike large studios bound by corporate pipelines and layered approval…

![How to Install Ubuntu 20.04 Server [ Easy Installation Guide ]](https://yehiweb.com/wp-content/uploads/2021/06/How-to-Install-Ubuntu-20.04-Server-Installation-Guide-Yehiweb-1200x675.jpg)
