Here’s how to download and install Windows 11 without becoming a Windows Insider.
Want to know how to install Windows 11 before its release later this year? A simple solution is to signup for the Windows insider program. And download the latest build made available by Microsoft Windows Update.
But, you can only upgrade to Windows 11 from your current Windows 10 system using this method. Even so, upgrading leaves all your files, settings, and programs untouched. But it also carries over junk, broken registries, and performance issues as well.
In contrast, a clean Windows 11 installation gives you a completely fresh start. A clean installation of windows ensures that it runs as smoothly as possible. But if you want to preserve your important files and don’t lose access to Windows 10. You can opt to install Windows 11 on a spare PC or a separate partition of your hard disk.
In contrast, a clean Windows 11 installation gives you a completely fresh start. A clean installation of windows ensures that it runs as smoothly as possible. But if you want to preserve your important files and don’t lose access to Windows 10. You can opt to install Windows 11 on a spare PC or a separate partition of your hard disk.
- Check if your PC fulfill Windows 11 Requirements
- Install Windows 11 through Windows Insider Program
- Windows 11 Enabled Laptops.
Microsoft’s requirements for Windows 11 have sparked a lot of controversies. Many Processors are incompatible with the new operating system, as per requirements.
The good news is that you can install the preview release of Windows 11 despite the restrictions. And it will work for the moment at least.
In this guide, we will explain how you can install Windows 11 without an Insider program. You will also learn how to download the latest version of Windows 11 for a clean installation. And there is no need to enter a Windows product key.
Download Windows 11 Latest Build
As stated earlier official and straightforward way to test Windows 11 on your PC is by signing up for the Insider program. But this method only upgrades your Windows 10 to Windows 11. Microsoft has yet to release the ISO file for the new operating system officially.
So a clean installation of Windows 11 through the Insider Program is not possible. But you can download the ISO file of the latest preview build from a third-party website called UU Dump. The source is secure and reliable, and there is no need to create an account.
Here’s how to download the correct ISO file for your PC and do a clean installation of Windows 11:
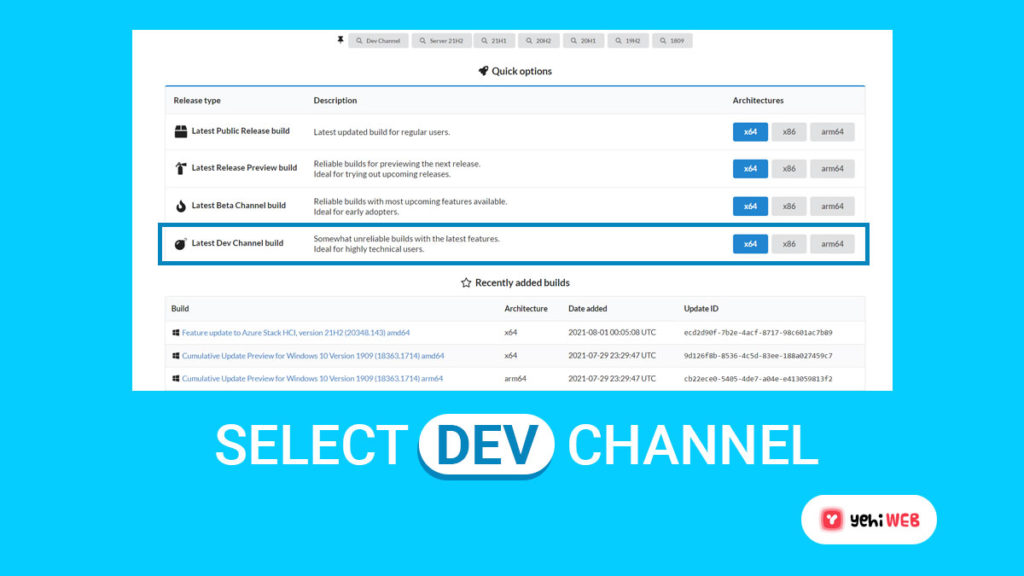
- To start, go to UU Dump and get the latest builds of various Windows versions for free. At the top of the page, click the Dev Channel link.
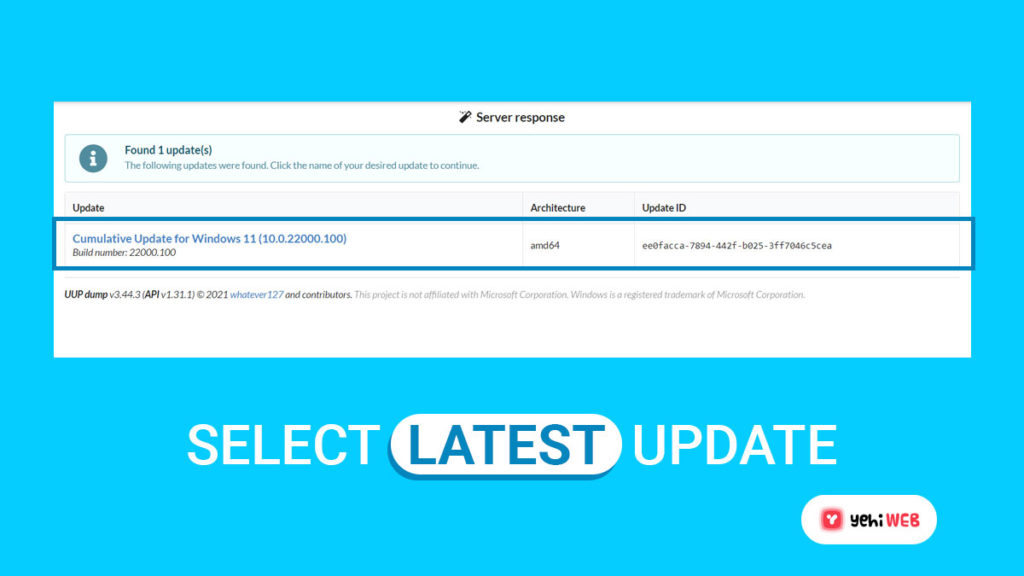
- At the top of the list of releases, choose the most recent version of Windows 11. Windows 11 (10.0.22000.100) amd64 is the Cumulative update at the time of writing.
- Select the edition of Windows 11 you want to use for a clean install. Complete the following three steps to download Windows 11 setup files.
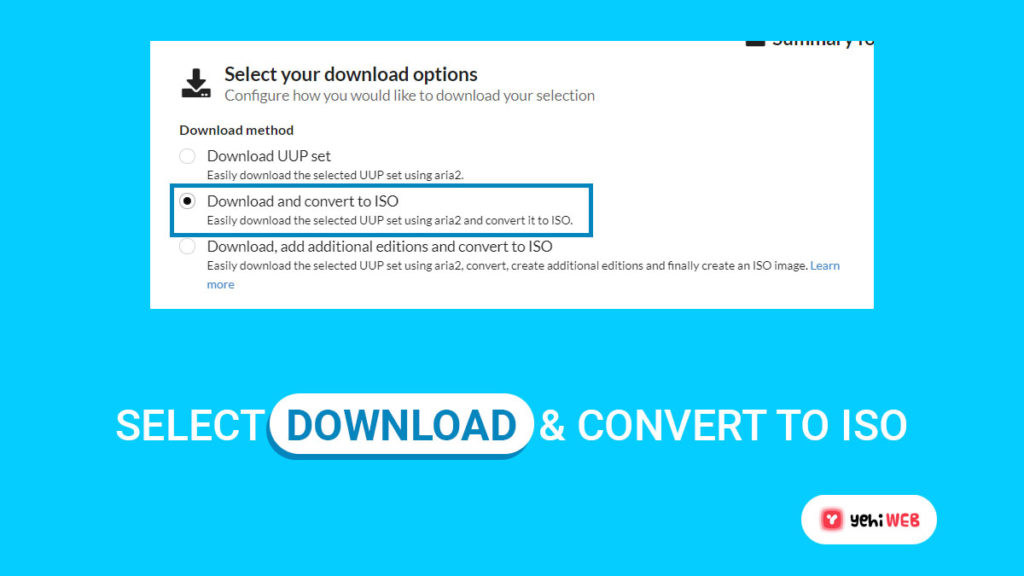
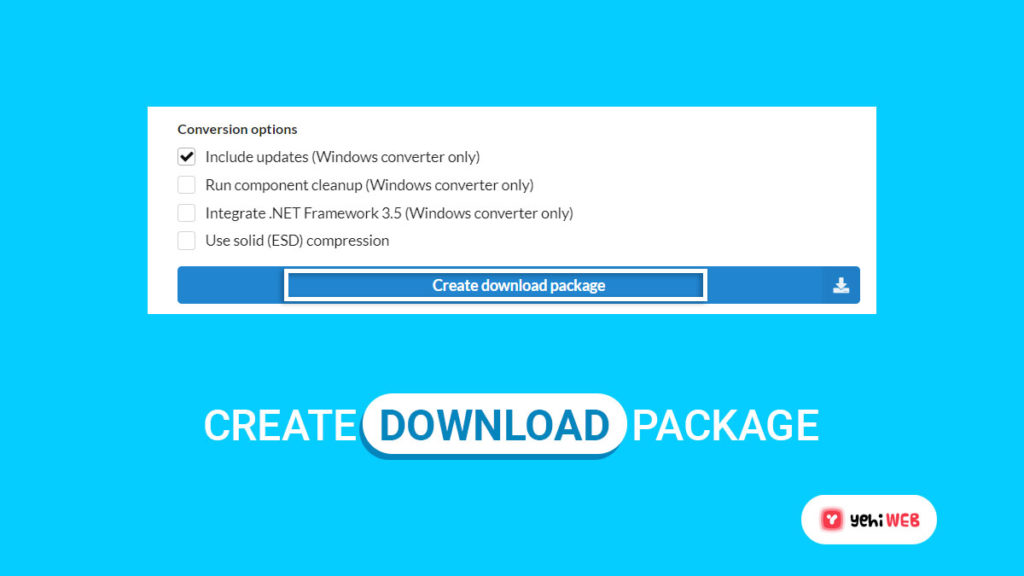
- On the third step, ensure to check the option “Download and convert to ISO.” And also, check the box associated with “Include updates” as well. Doing so will make the installation process easier.
- Download the Windows 11 setup files by clicking the “Create a Download package” button.
Create an ISO file to Clean Install Windows 11
Now that we have the latest Windows 11 build downloaded. We will need to install the required files to create an ISO image of the operating system. The package downloaded from UU Dump will take care of the hard work.
We’ll go over the ISO creation process and why you should be patient if you want a clean Windows 11 installation.
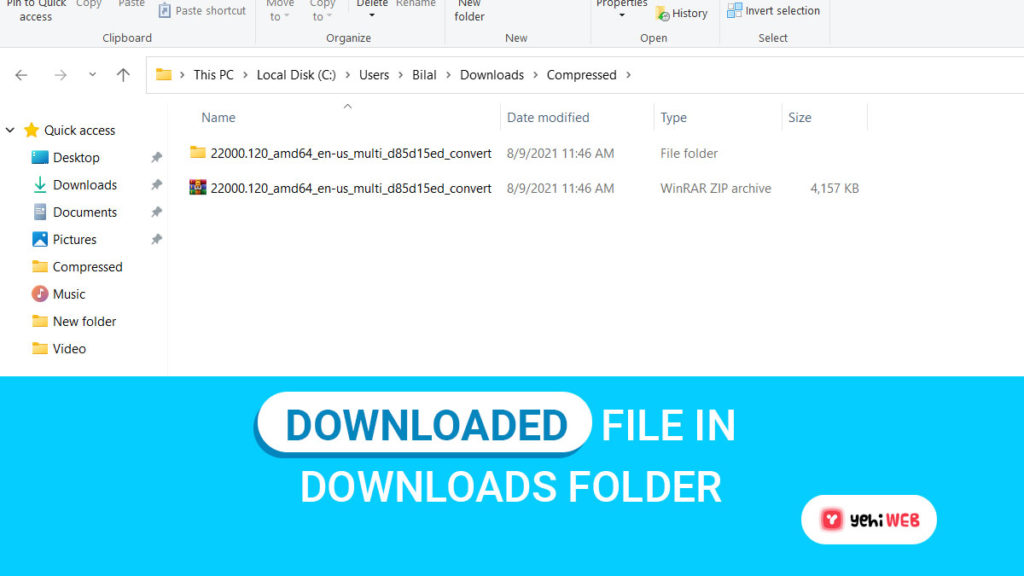
- Open the ZIP file you downloaded and extract the contents to a folder on your computer. The default folder will be in your Downloads folder and will have a very lengthy name. So, for easy access, you might want to create a dedicated folder on your Desktop.
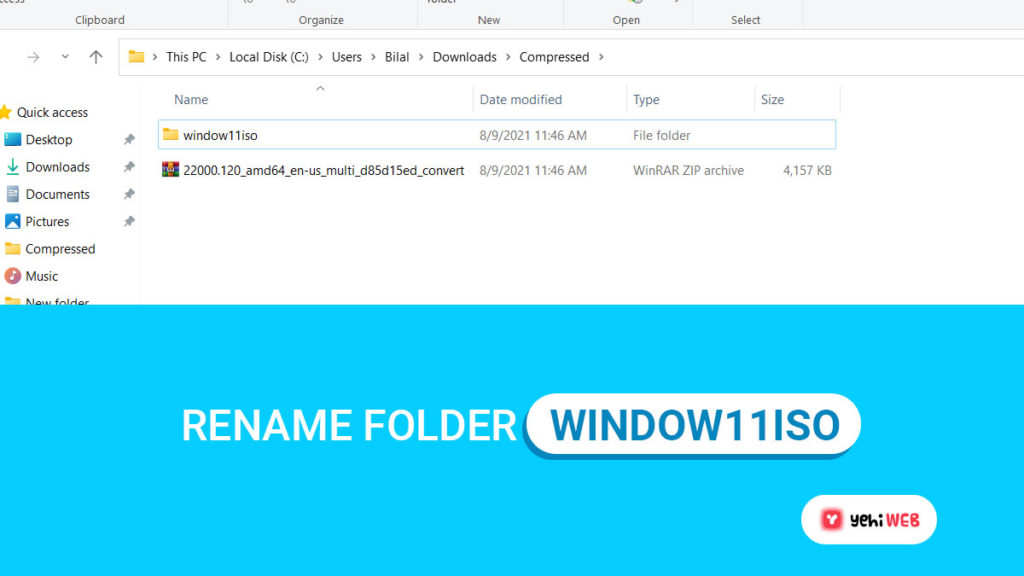
- We named our folder “window11iso.” Please make sure there are no spaces in the name of your folder because this will prevent it from installation.
- Double-click the file in the uup_download_windows folder if a SmartScreen security warning appears on Windows. Click More Info and then select Run anyway (the file is entirely safe to run.)
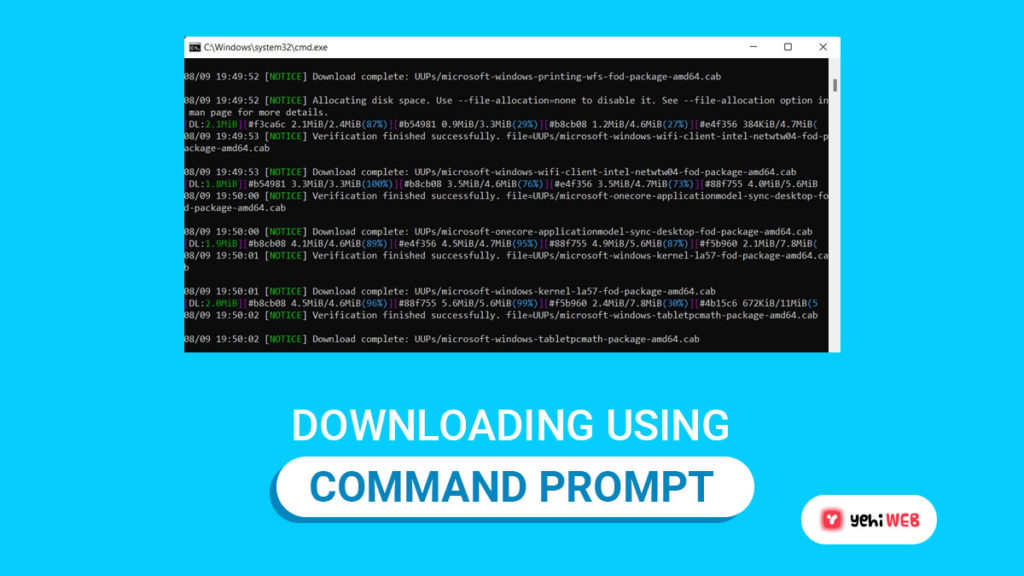
- This step will launch a command prompt and start downloading the required files. It creates the ISO file with the downloaded files.
- Please note that the process will take a long time, so be patient.
- You will have an ISO file created when the download is complete. Close the command prompt window by pressing 0 on your keyboard. Now access the setup files from step 1.
You will find the ISO image in the same folder as the uup_download_windows file.
Create Windows 11 Installation Media with Rufus
Now comes the tricky part of creating a bootable installation with a Windows 11 ISO file. For this, you’ll need a USB with at least 8GB or higher space storage on it.
We are going to use a free tool called Rufus to create bootable media for our operating system. Visit this page to download the tool, and then let’s get started.
- Insert your USB stick into your PC.
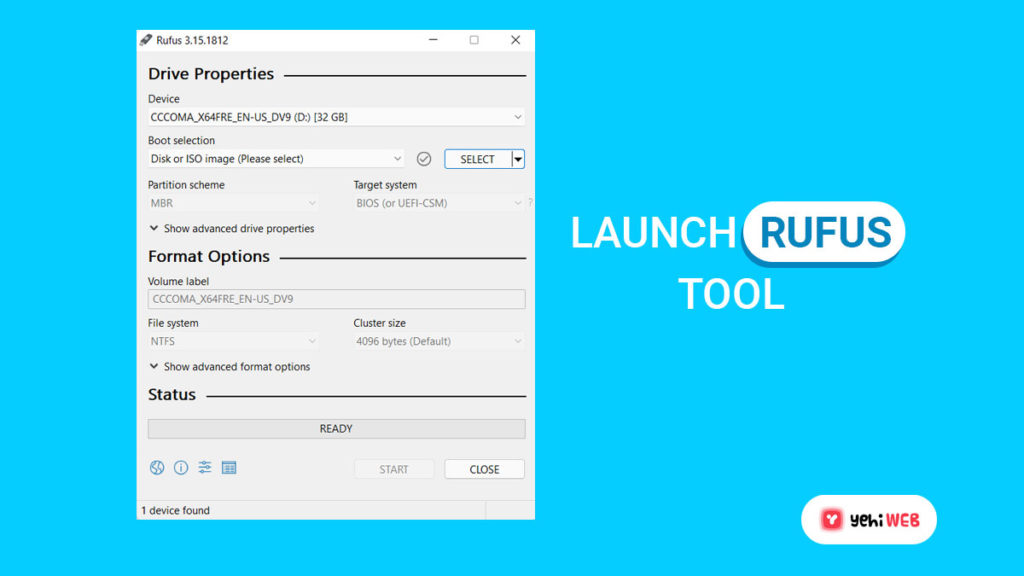
- Launch the Rufus tool from the location where you downloaded it.
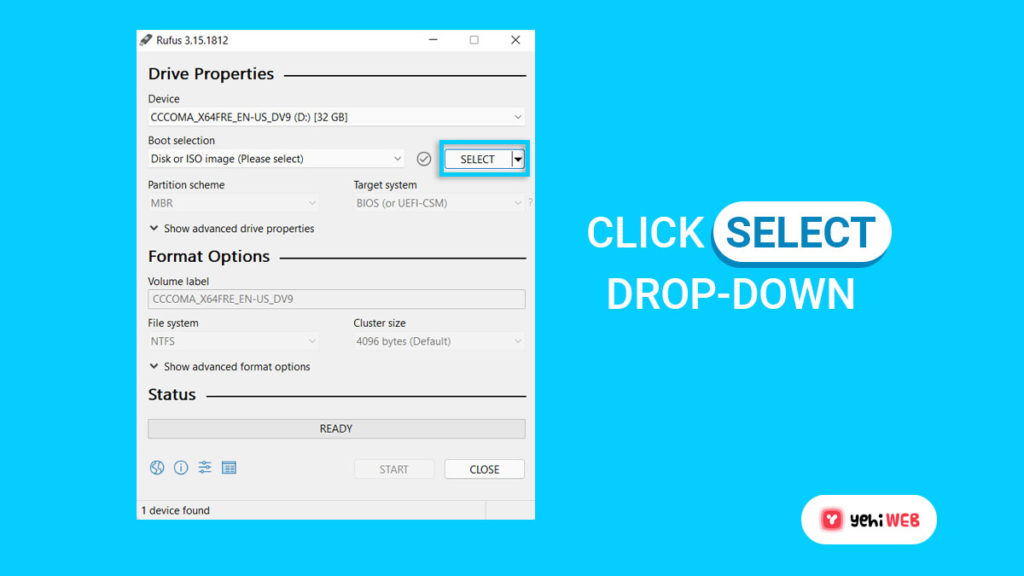
- Click on the “Select” button next to the “Boot Selection” drop-down menu.
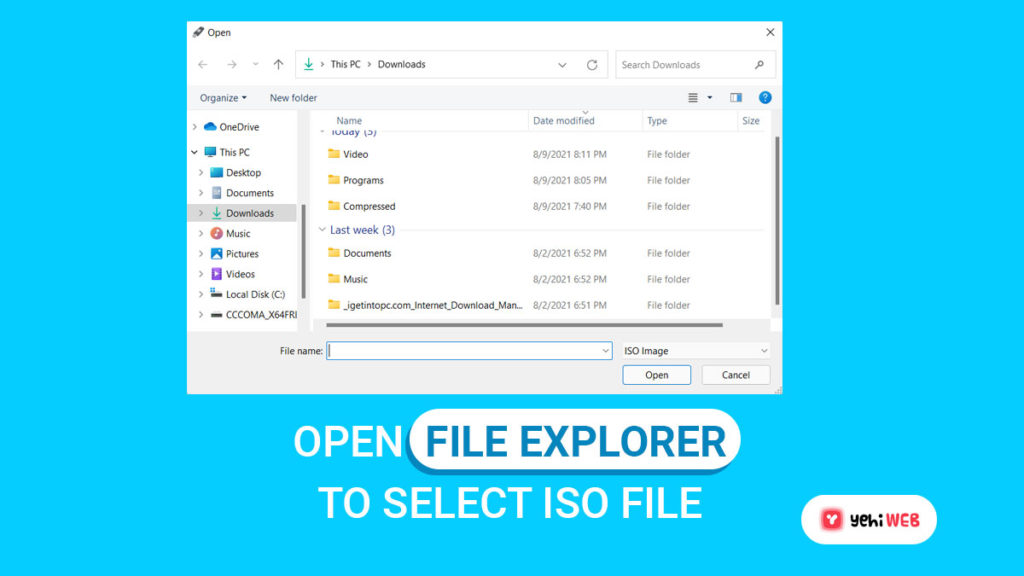
- The select button will open a file explorer window. Use it to navigate to and find the ISO file you created and select it.
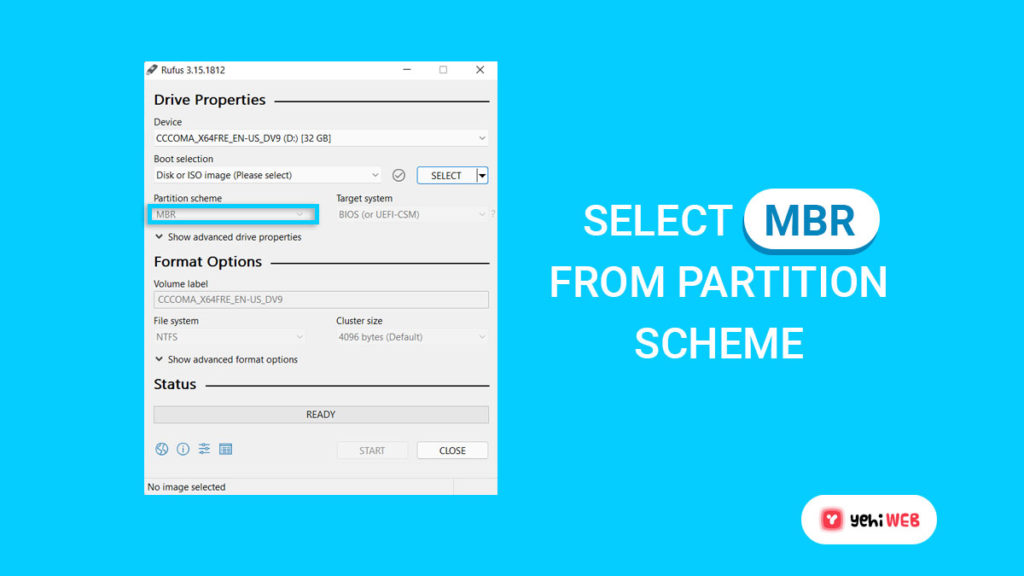
- Next, click on the “Partition scheme” drop-down menu and select MBR.
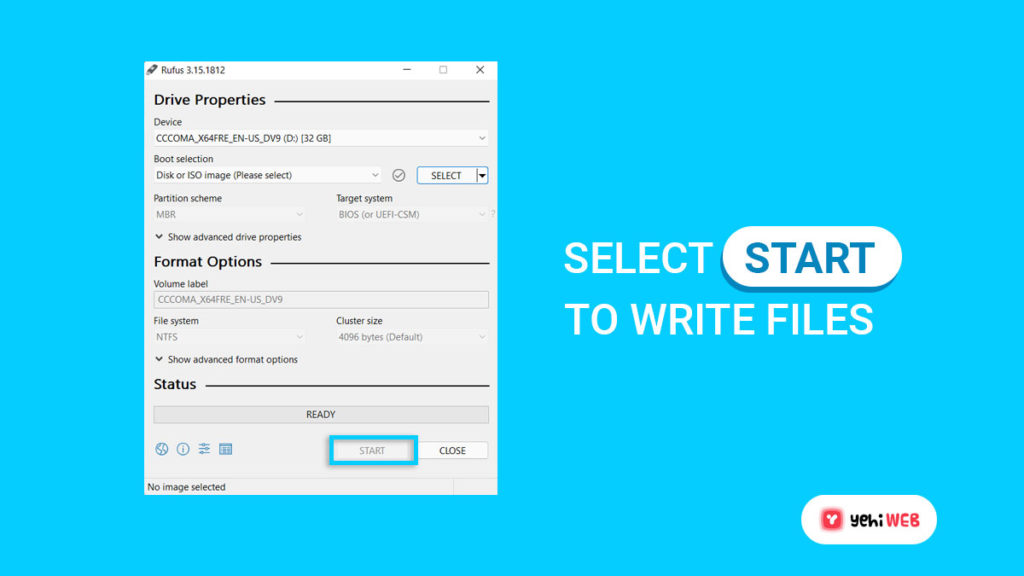
- Now Click on the start button, and Rufus will start writing the files on your USB.
- Once the process is complete, you will have bootable Windows 11 installation media.
Install Windows 11
Now that we have everything, we need to perform a clean installation of Windows 11. We can get started. But before that, we recommend tweaking your boot sequence from the Bios and give priority to USB.
Use the steps outlined below to install Windows 11 on your PC:
- Insert the Bootable installation media (USB) in your PC.
- Now restart your PC, enter the boot menu and select the installation media to boot from it.
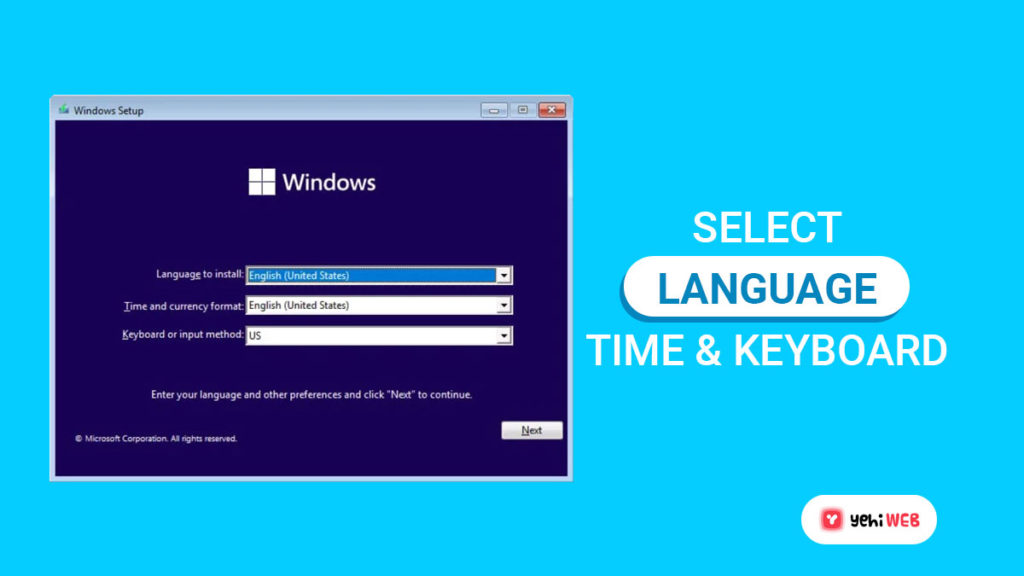
- After booting your PC from the installation media, the Windows setup screen will show up. From here, use the drop-down menu to select the following you as per your preference:
- Choose Your Preferred Language
- Time and Currency Format
- Keyboard and Input method
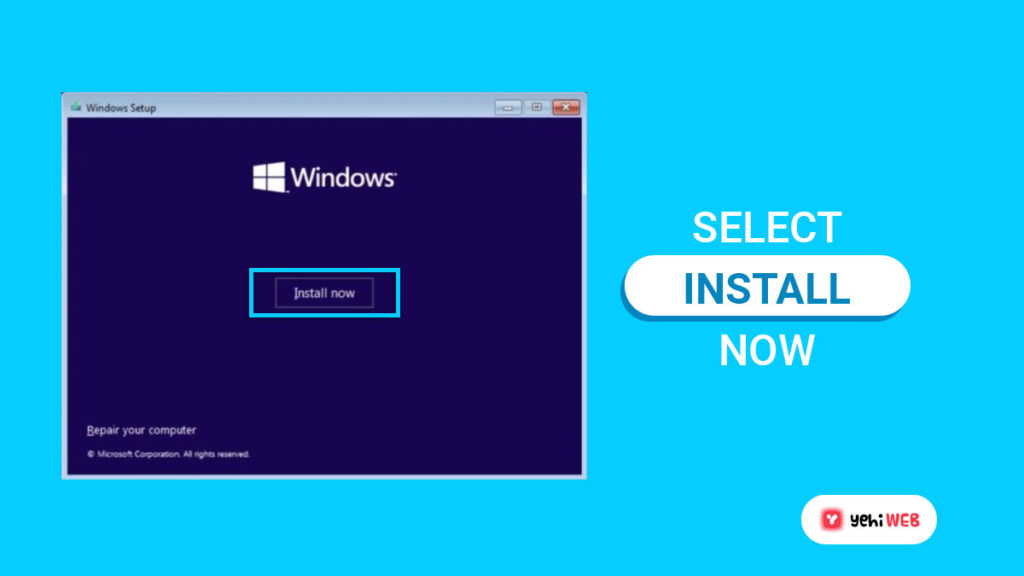
- After selecting your preferred options, click on next. Then, on the next page, select “Install Now.”
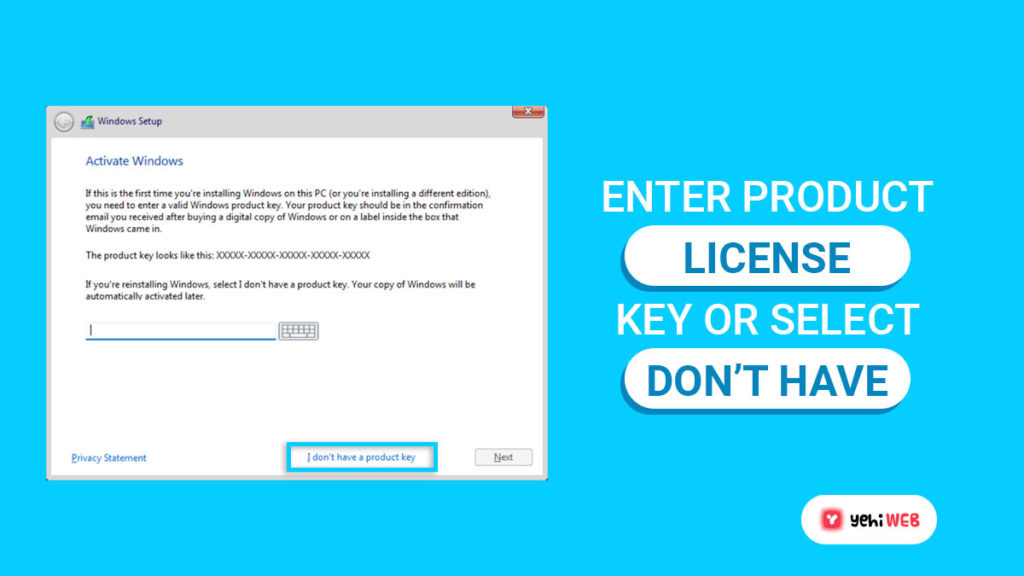
- The installation wizard will prompt you to input your Windows Product Key on the next window. Type in your Windows 10 license key if you have it. And don’t worry if you don’t have one, click on “I don’t have a product key” to skip to the next step.
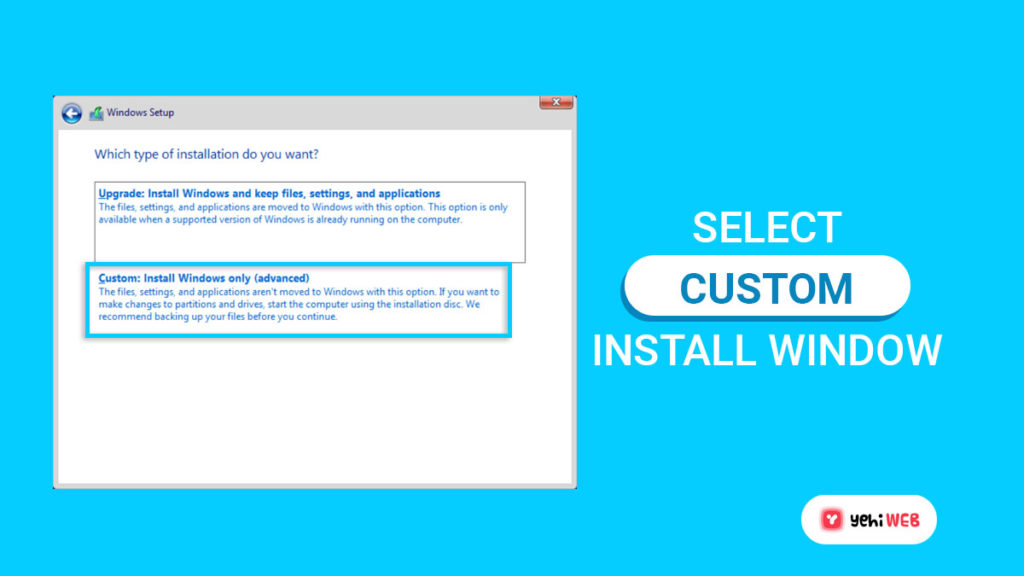
- On the next page, Windows setup will present you with two options. Select “Custom: Install Windows only (advanced)” as we want a clean installation.
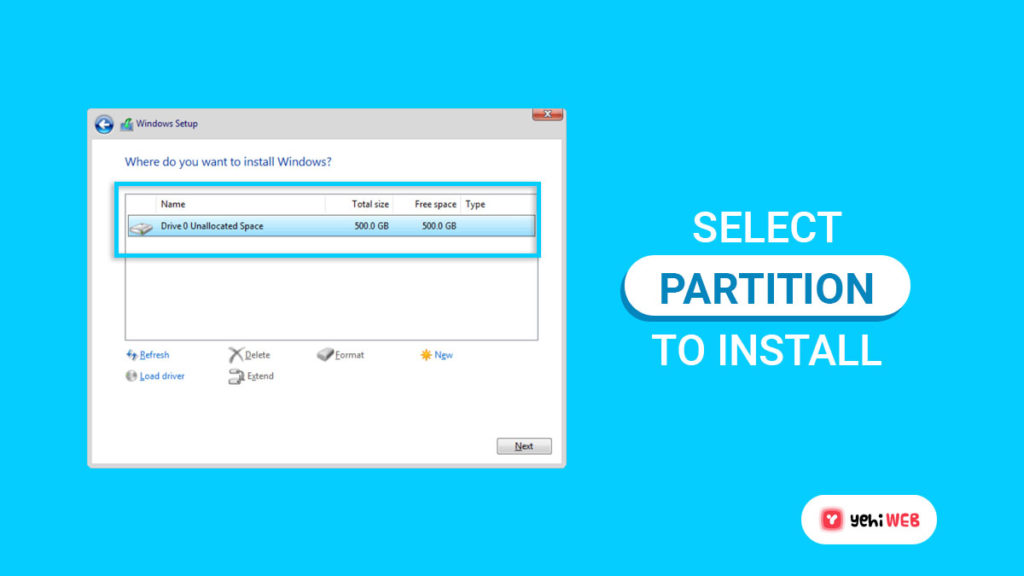
- Select your preferred drive or partition where you want to install Windows 11. Also, make sure you select the correct one to avoid overwriting important data.
- Now click on the “Next” button to start the clean installation of Windows 11. After the Windows setup completes the process, you will get a prompt to restart your PC. Now you can dive into Microsoft’s latest Operating System’s fascinating new world.
Bypass Windows 11 TPM Requirement
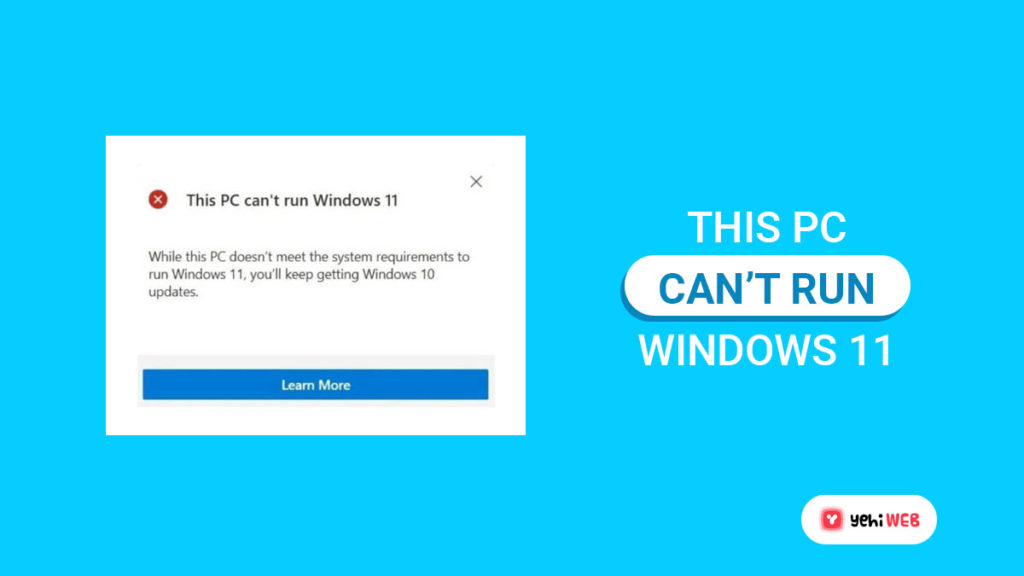
Above we stated that Windows 11 requirements had sparked a lot of controversies. When installing Windows 11, many users have reported getting the following message saying:
“This PC can’t run Windows 11.”
The message appears in case your system doesn’t have a TPM 2.0 installed or enabled. For more information on TPM, read our article What is TPM? Here’s why you will need it for Windows 11.
And don’t worry if your system doesn’t have TPM 2.0 installed or enabled on your PC because you can use a new ‘LabConfig; registry key to bypass the requirements for Windows 11.
Microsoft and OEMs use the registry key to set up a “lab” environment. It serves the purpose of testing Windows 11 on older equipment and test new features.
Follow these steps to bypass Windows 11 TPM 2.0 requirements:
- Install Windows 11 via bootable installation media we created via Rufus. If your system hardware doesn’t meet the Windows 11 requirements. You will see the following message stating:
- “This PC can’t run Windows 11.“
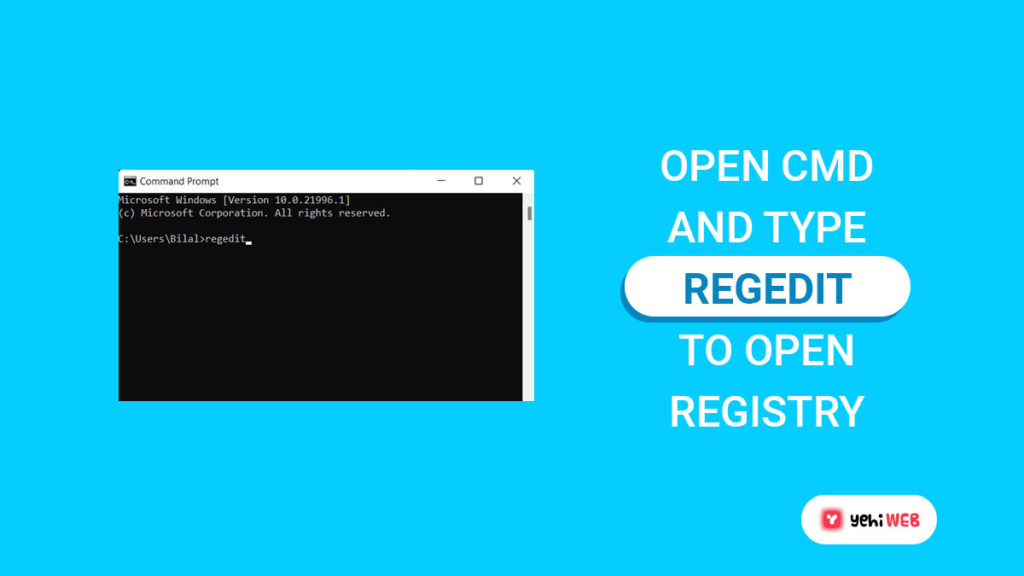
- If the above message appears on your screen when installing Windows 11. Press Shift + F10 keys on your keyboard to launch the command prompt window. Type “Regedit” in the command prompt and hit enter to launch the Windows Registry Editor.
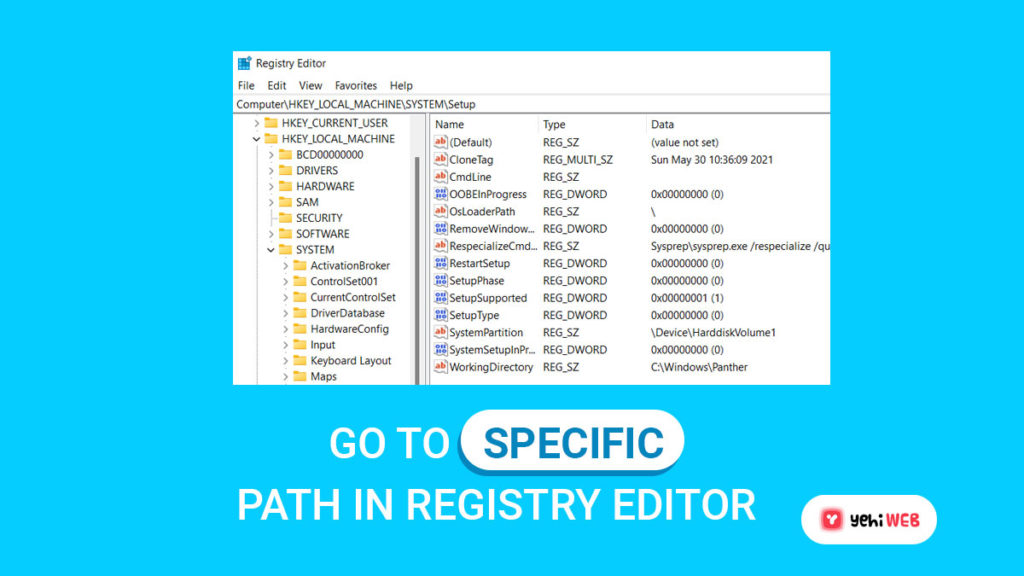
- Navigate to the following when the registry editor opens:
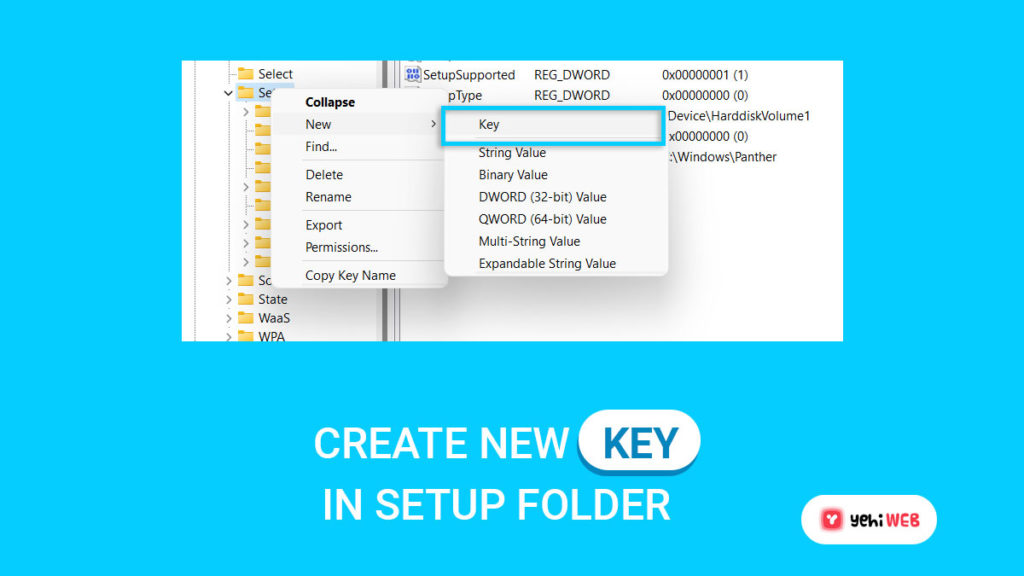
- Right-click on the setup folder, and from the submenu, select New>Key.
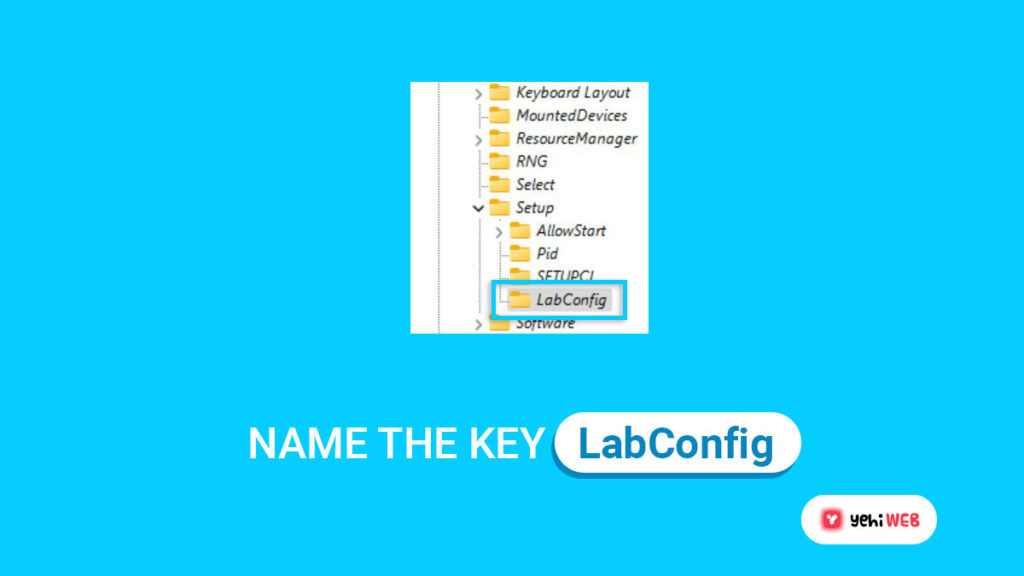
- Name the key you created “LabConfig” when prompted and hit enter.
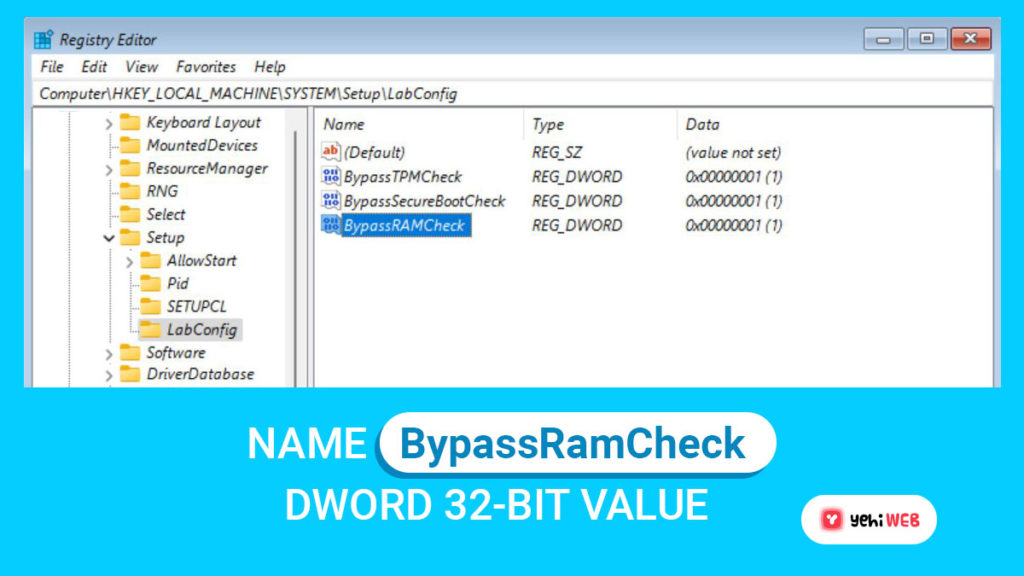
- Right-click on the LabConfig key and select New > DWORD (32-bit) value. Name the value you created BypassTPMCheck. Create two more values with the following names:
- BypassRAMCheck
- BypassSecureBootCheck
- Now double-click on each value you created and set the date to 1 for each.
- After configuring all three values under the LabConfig key, close the registry editor.
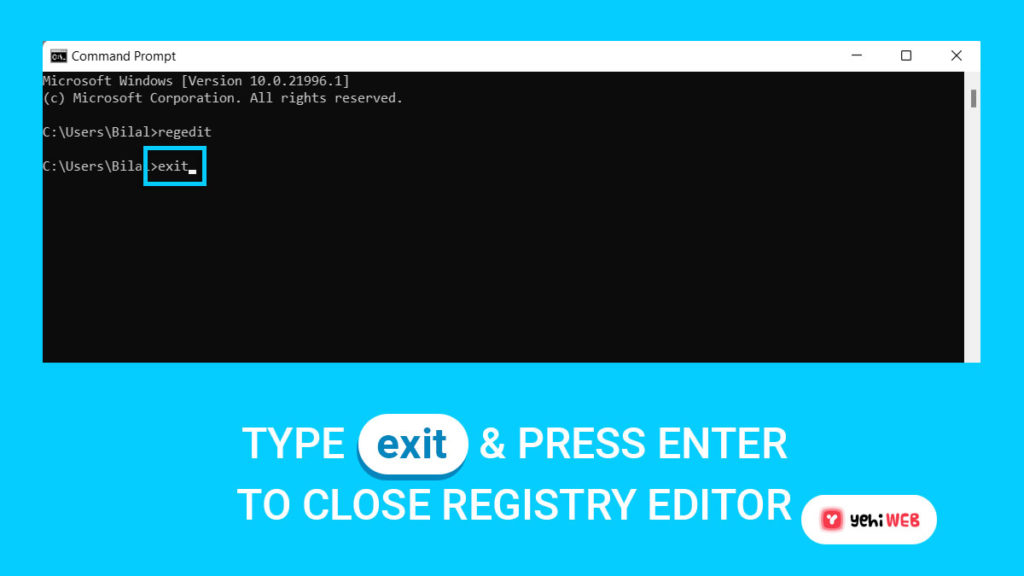
- Next, in the Command Prompt window, type “Exit” and hit enter to close the window.
- Now that you are back at the message stating, “This PC can’t run Windows 11,”. On the Windows Setup window, click the back button as shown below.
- Doing so will take you back to the screen, prompting you to select the Windows version you want to install.
- Proceed without worrying about hardware requirements and install Windows 11.
Bilal Shafqat
Related posts
New Articles
Wordle: The Puzzle That Turned Five Letters Into a Global Routine
Every morning, millions of people wake up and do the same small ritual. They grab coffee. They check their phones….

![How to Download And Install Windows 11 [A-Z Guide]](https://yehiweb.com/wp-content/uploads/2021/08/how-to-download-and-install-windows-11-yehiweb-1200x675.jpg)
