Error code 0x800f081f is one such prevalent issue that we are going to discuss today. We will not only discuss and underline the potential causes for this error to occur.
Over the past years, Microsoft, as we all know, has been working hard to bring improvements to Windows. But, we cannot deny that the operating system is still prone to errors.
And many such errors prevent users from performing computing tasks. Believe me, when I say that encountering some of these errors can be very frustrating.
But, also include solutions to fix this error on your Windows 10 machine. And after you identify the cause, you can resolve it with few clicks and prevent it from occurring again.
Cause of Error Code 0xCode 0x800F081F
Microsoft .NET Framework incompatibilities are the main cause of error code 0x800f081f. The error occurs when you try to enable .NET Framework using either of the following tools:
- Installation Wizard
- Deployment Image Servicing and Management tool (DSIM)
- Windows Powershell Commands
Three other error codes appear due to the same underlying issue as 0x800F081F. Following are all four error codes that appear if your computer is not configured right:
- 0x800F081F:
It occurs when Windows can’t find the .NET source files for the installation to proceed. - 0x800F0906:
The following factors contribute to this error:- Unable to download the .NET Source files
- Unable to connect to the internet.
- Unable to install a role, role service, or feature.
- 0x800F0907:
Following are the reasons for this error to occur:- DSIM Tool Failure
- Unable to connect to the web due to Network Policy Settings restrictions
- 0x800F0922:
- .NET advanced installed process, or generic commands failed.
Error code 0x800f081f occurs more often on the following Windows Operating systems:
- Windows 10
- Windows 8.1
- Windows 8
- Windows Server version 1709
- Windows Server 2016
- Windows Server 2012 R2
- Windows Server 2012
And when you try to enable the feature, Windows tries to get .NET Framework source files. And in case if your computer is not configured right, you may see the codes mentioned above.
How to Fix Error 0x800F081F on Windows 10?
The method to fix the first three error codes mentioned above is the same. For your convenience, we include the fixes for other error codes as well. And as we mentioned earlier, all four errors occur due to the same underlying issue.
As for the fourth Error Xx800F0922, skip to solution to DISM command section.
Method #1: Group Policy Configuration
Group policy settings can affect Windows’s ability to enable the feature. The prevention results in either of the first three error code issues occurring.
Please follow the steps outlined to resolve the issue:
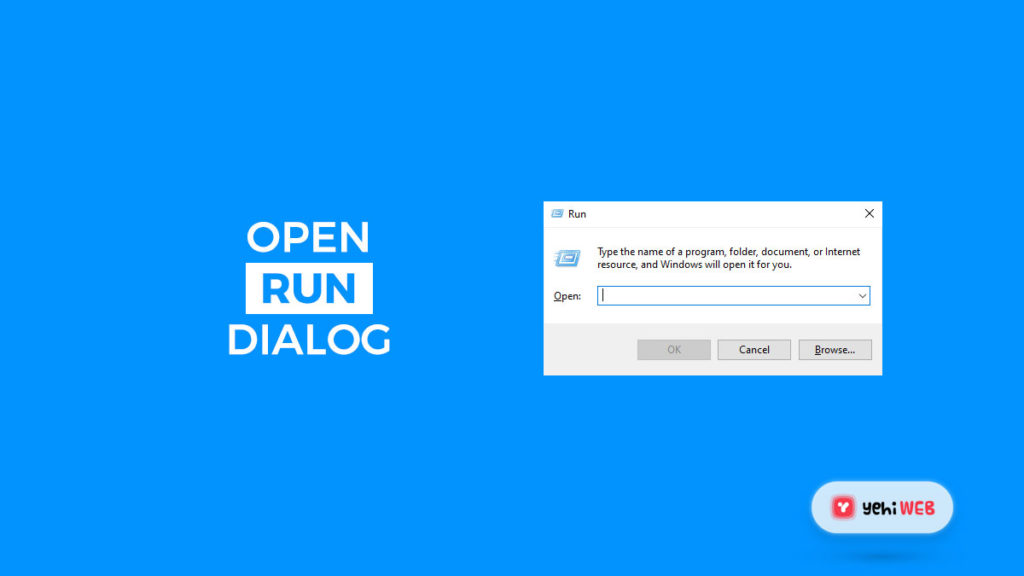
- Press Windows + R keys to launch the Run Dialog box.
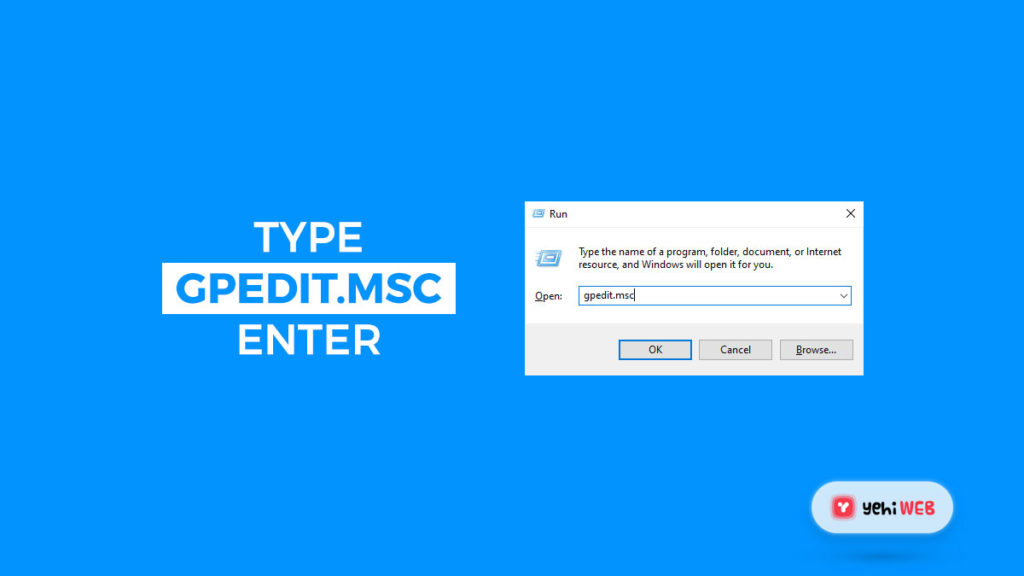
- Type gpedit.msc in the dialog search box and hit enter to open Group Policy Editor.
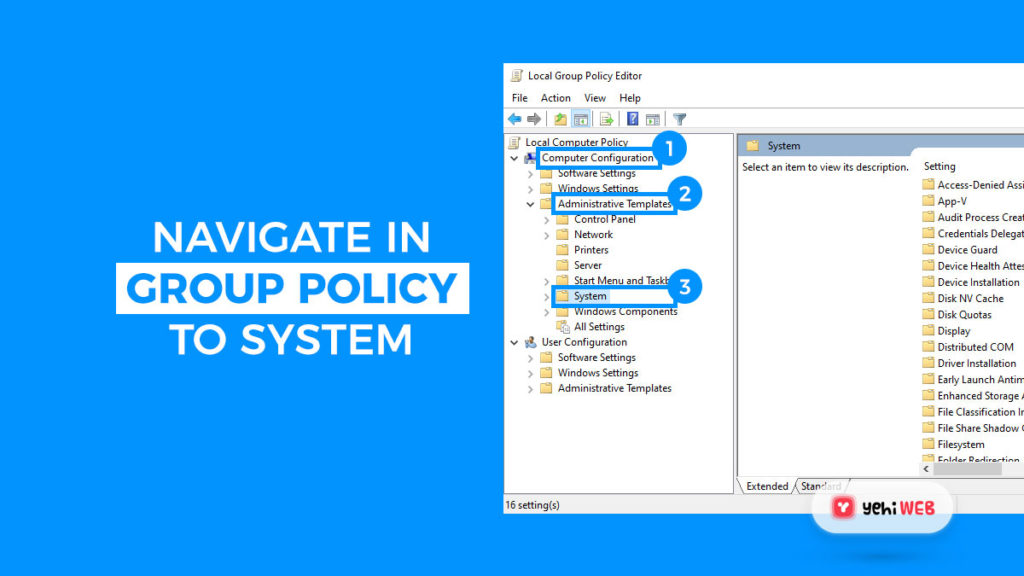
- Navigate to Computer Configuration > Administrative templates > systems from the left-hand panel.
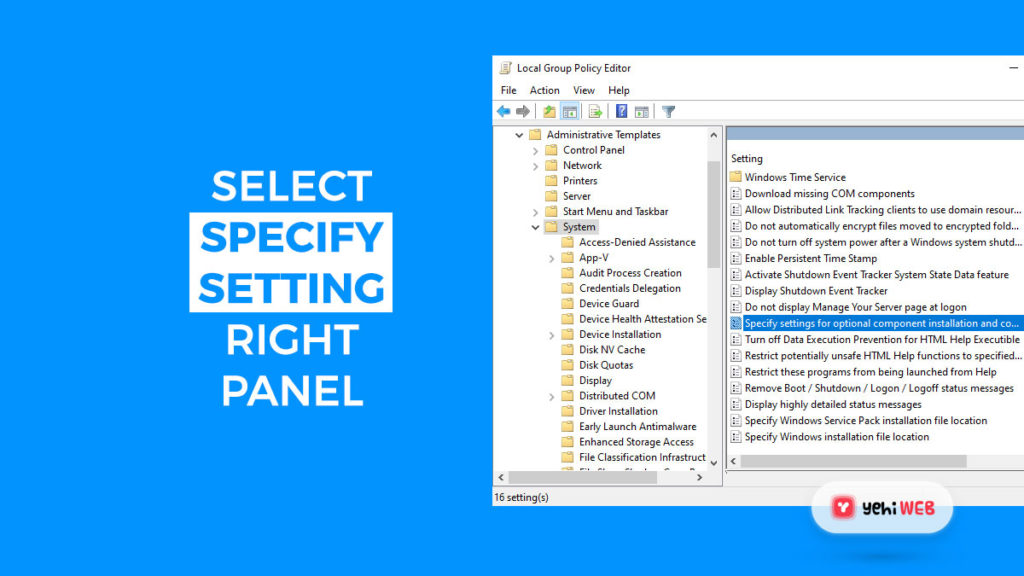
- Now move your cursor to the right panel under the settings sections.
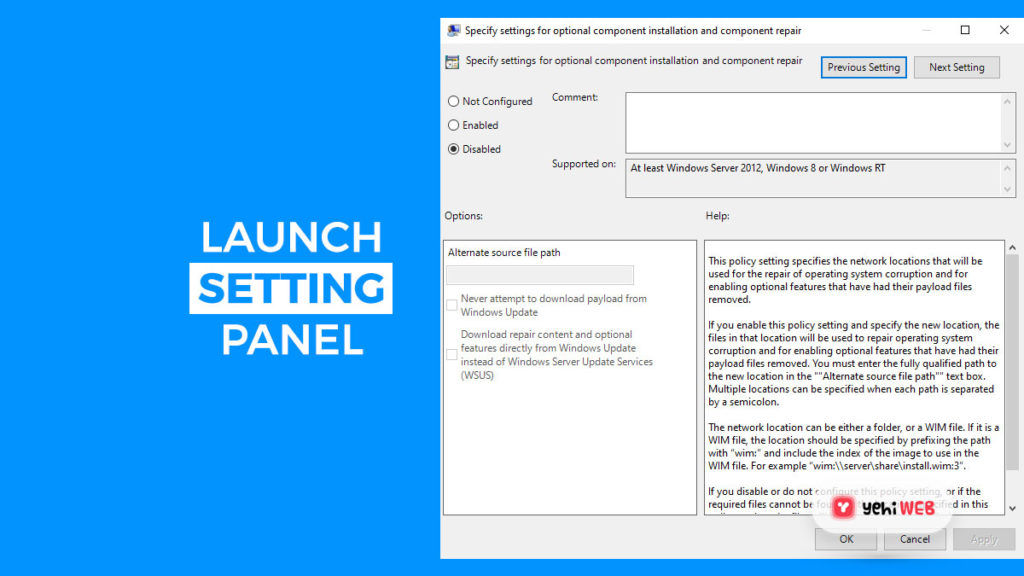
- Scroll down and locate ‘Specify settings for optional component installation and component repair’
- Launch the settings window by double-clicking on the entry.
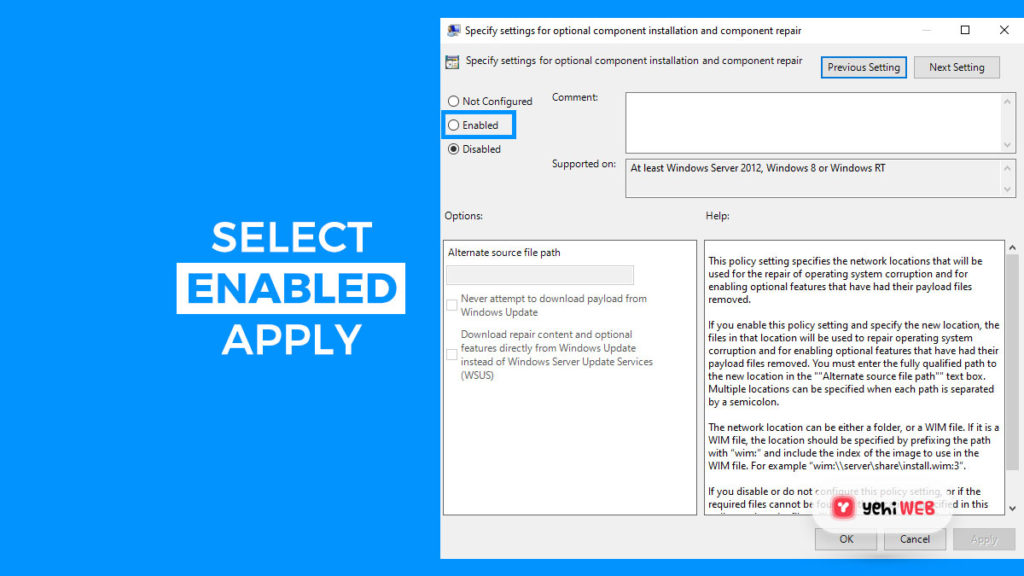
- In the settings windows, mark the checkbox next to Enabled from the left panel and click OK.
This should resolve the first three error codes issues on your Windows system.
Method# 2: Use DISM command to Enable .NET Framework
The second method necessitates the use of the DISM commands to enable the .NET Framework. And worry not, it’s not as complicated as it may sound to you.
Follow the easy step-by-step instructions given below, and you are good to go. But before we jump to the solution, ensure that you have a Bootable installation media of Windows 10.
The ISO has to match the current version of Windows installed on your machine. You can also check our guide to create a bootable USB via Rufus and Microsoft media creation tool.
Now follow the step-by-step guide once the installation media is ready:
- Insert your installation Media DVD/USB in the computer and note the Drive’s letter.
- Now press Windows + R to launch the Run Dialog box.
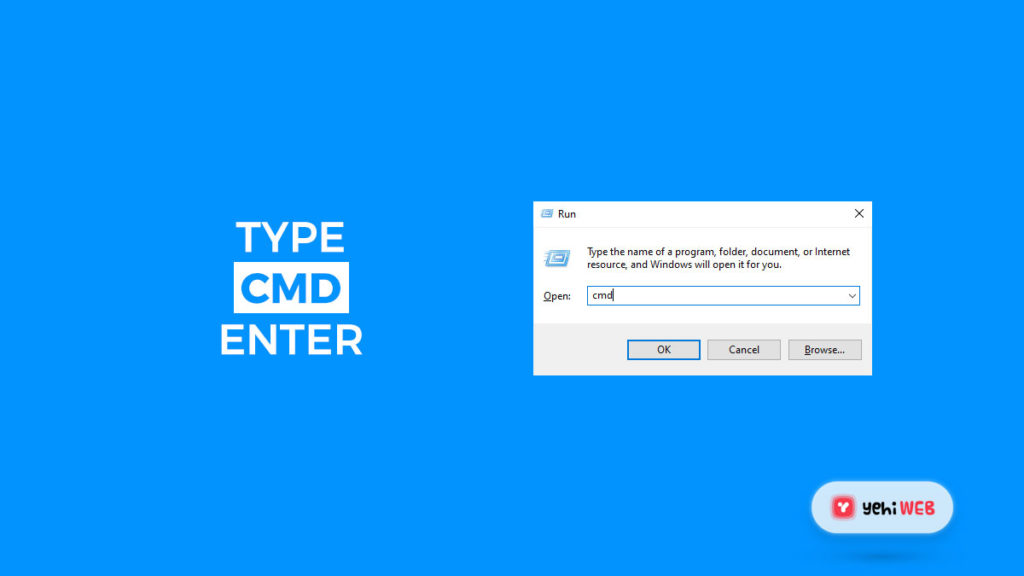
- In the dialog search box, type cmd and press CTRL + SHIFT + ENTER keys on your keyboard to launch CMD as administrator.
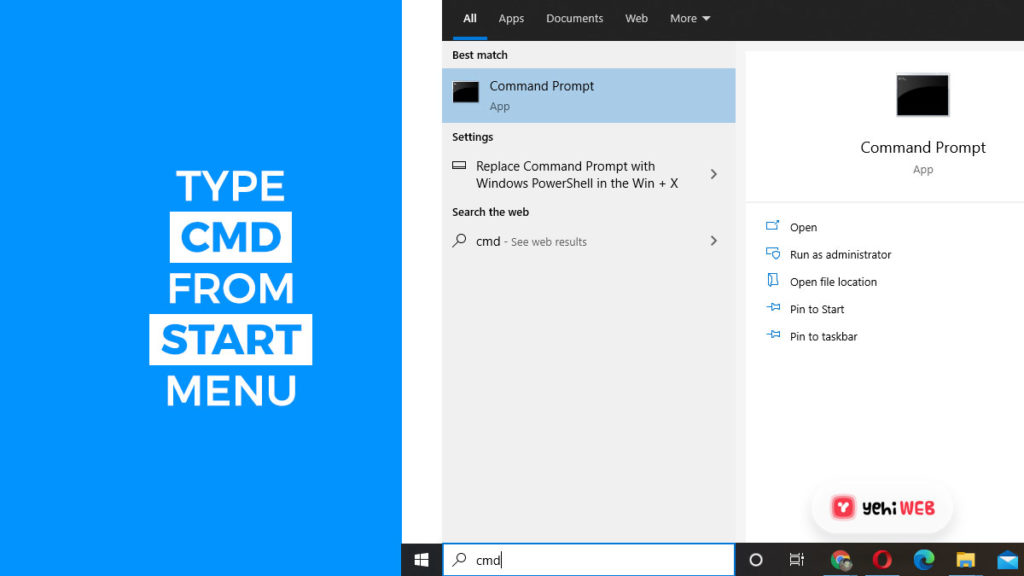
3.1 You can also access CMD from the Start Menu.
- Once you are in CMD with administrative rights, run the following command:
- Replace Drive with the letter of your installation media drive letter and hit enter.
Method #3: Reinstall Microsoft .NET Framework 3.5
Now that we have gone through the solutions to resolve all four error codes. All that’s left is to reinstall .NET Framework 3.5 and check if the error code 0x800F081F has gone or not.
Follow the instructions mentioned below to do that:
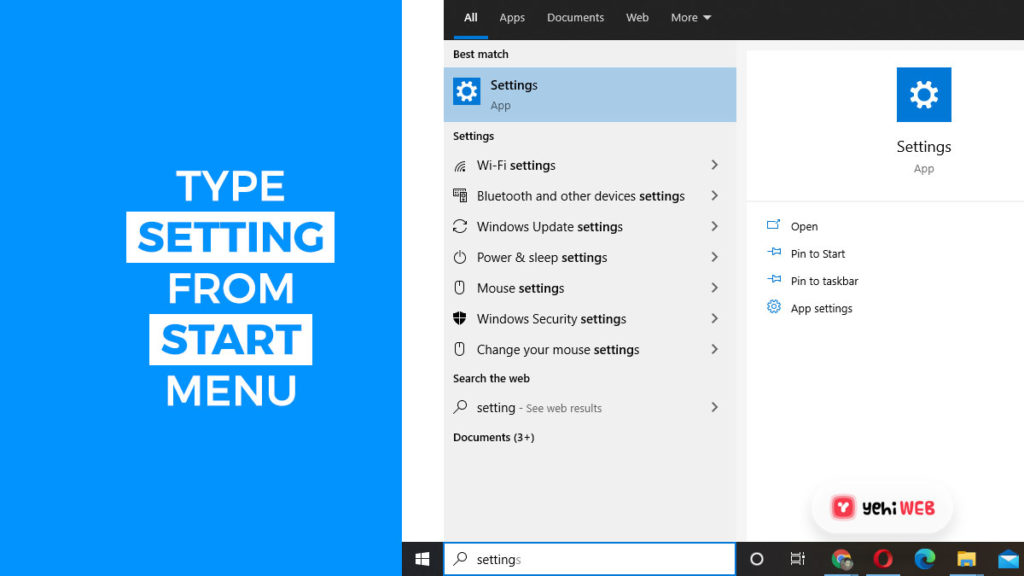
- Click on the Start Menu button, and search for settings.
- Click on the Settings icon in the search results to open the Settings app.
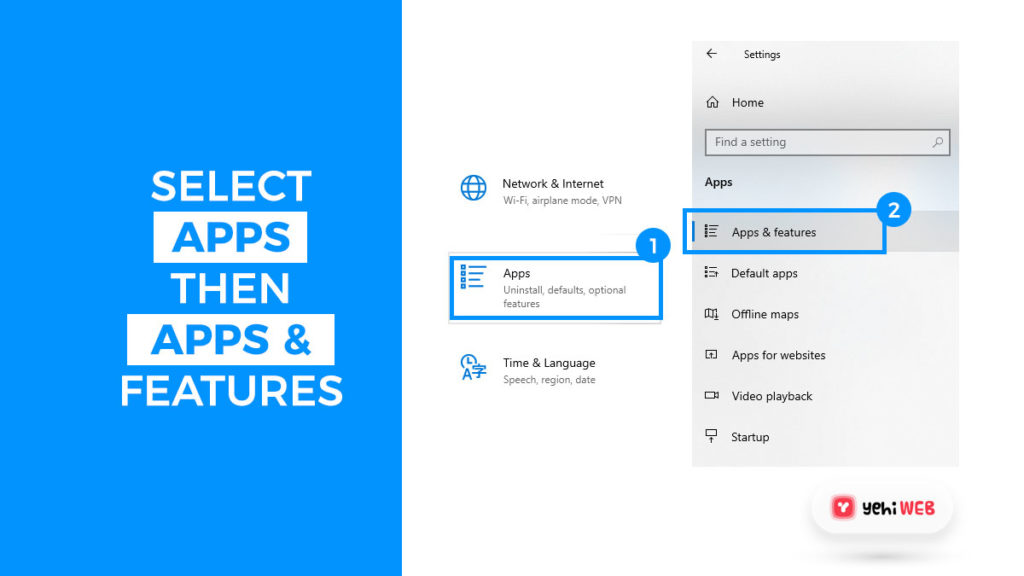
- From Settings app, navigate to Apps > Apps and Features.
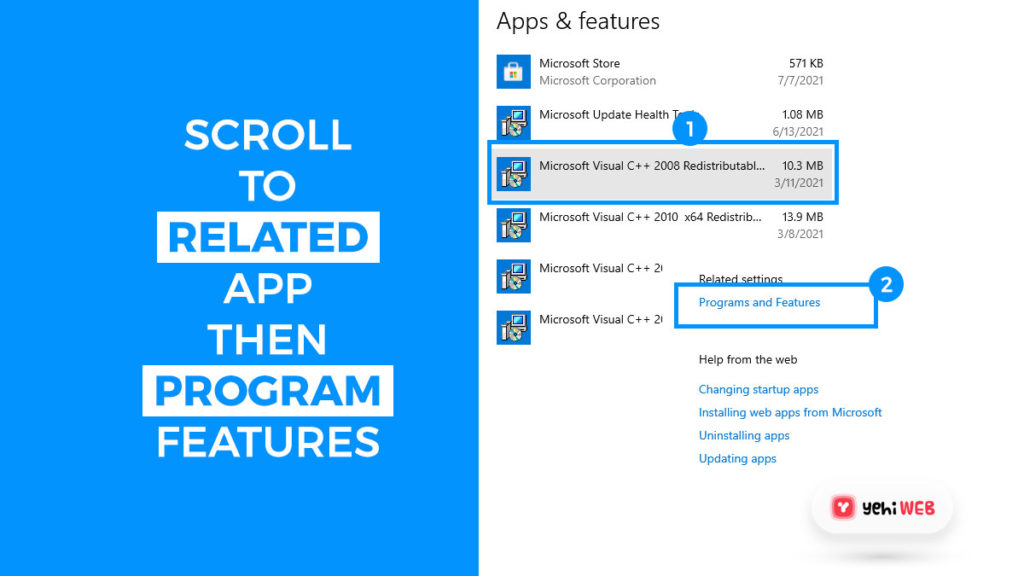
- Now scroll down to Related settings and click on Program and Features.
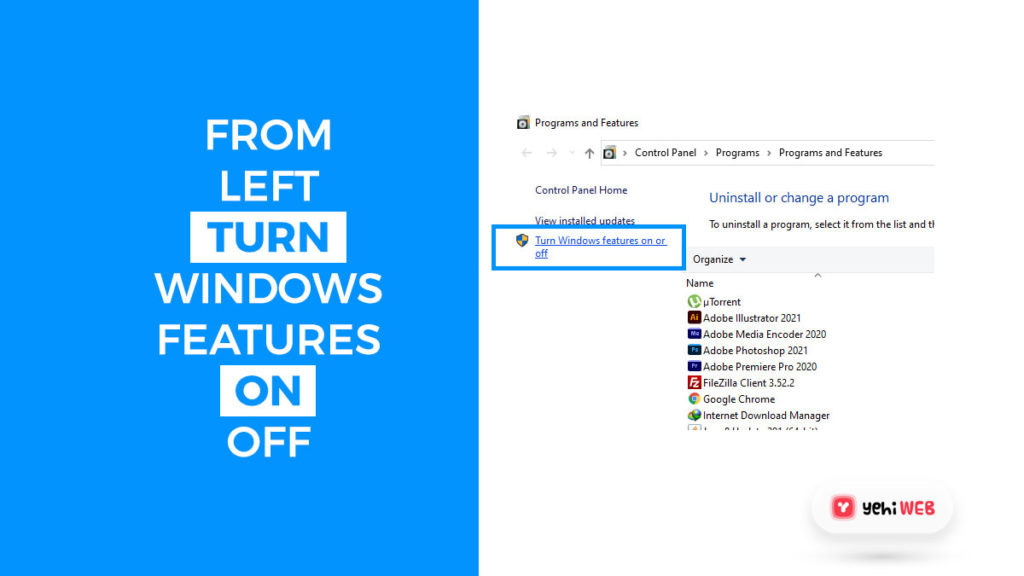
- On the next window from the upper left-hand corner, click on the Turn Windows feature on or off.
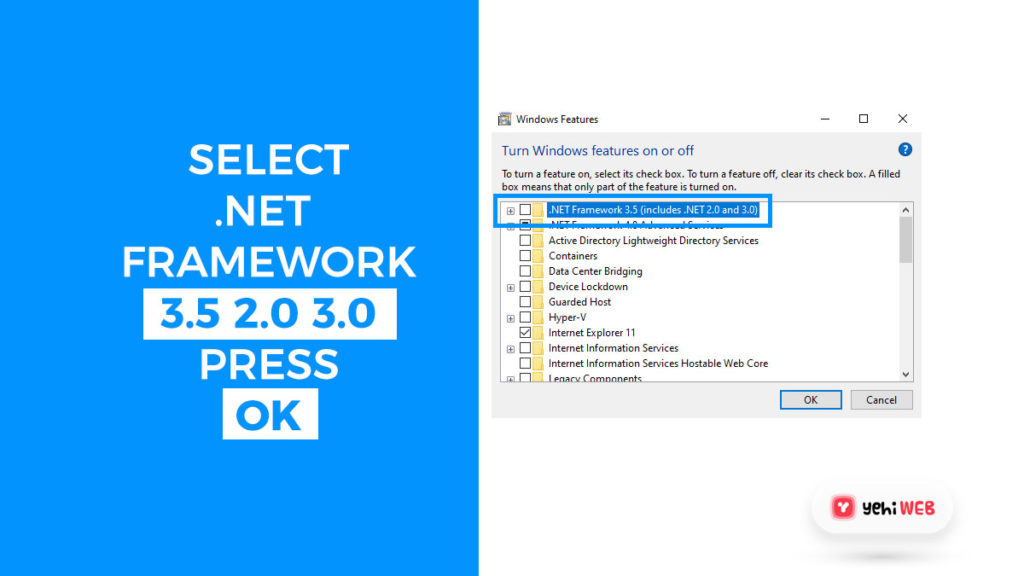
- Checkmark the box associated with .NET Framework 3.5 (includes .NET 2.0 and 3.0) and click OK.
This should start the installation process and will take a few minutes to complete. And that’s it! You just fixed the error code 0x800F081F on your system.
A Summary of How to Fix Error Code 0x800F081F?
To Fix Windows 10 error code 0x800F081F:
- Launch Group Policy Editor.
- Navigate to Computer Configuration > Administrative templates > Systems.
- Move the cursor to the right panel under the setting section.
- Scroll down and find ‘Specify settings for optional component installation and component repair.’
- Double-click on the entry to open the settings window.
- From the left panel, check-mark the box next to Enable and click OK.
In case that doesn’t work, follow the following steps:
- Create a mountable installation media of Windows 10.
- Launch Command Prompt Window with administrative rights.
- Run the following command:
- And hit enter.
Troubleshooting Windows Error is not That difficult.
We understand that the guide contains technical information not easy to understand. But, the steps given are simple to follow and assist in resolving the problem with only a few mouse clicks.
To launch a troubleshooter, navigate to Settings App > Update and Security. In the Update and Security window, click on Troubleshoot. The program will find the cause of the error and, in most cases, fix it for you.
Saad Shafqat
Related posts
New Articles
What is the difference between FMWhatsApp and GBWhatsApp?
In the world of messaging apps, WhatsApp reigns supreme as one of the most popular platforms for connecting with friends…

![Fix: Error Code 0x800F081F in Windows 10 [ Ultimate Guide ]](https://yehiweb.com/wp-content/uploads/2021/07/Fix-Error-Code-0x800F081F-in-Windows-10-yehiweb-1200x675.jpg)
