You will learn how to disable Windows 10 automatic updates in this guide.
Windows 10 is set to downloads and installs updates when Microsoft releases them. Although, these updates enhance performance and provide security updates to patch vulnerabilities. It is, in fact, one of the most controversial features.
Windows updates disrupt the user workflow by prompting users to restart their computers. So, for some users, updates may not bring benefits but cause more issues. And may want to disable windows 10 automatic updates once and for all.
You can disable windows 10 automatic updates either through the settings app or Group policy. In this guide for Windows 10, you will learn to disable the automatic update feature. And prevent Windows from downloading and installing updates on your computer.
How to Disable Windows 10 Automatic Updates in Settings?
You do not have to disable Windows Update permanently if you wish to skip a particular update. Instead, you should wait until the following Patch Tuesday before downloading updates. On Windows 10 Home and Pro, the Settings app allows you to disable system updates for up to 35 days.
Follow these steps to disable automatic updates temporarily:
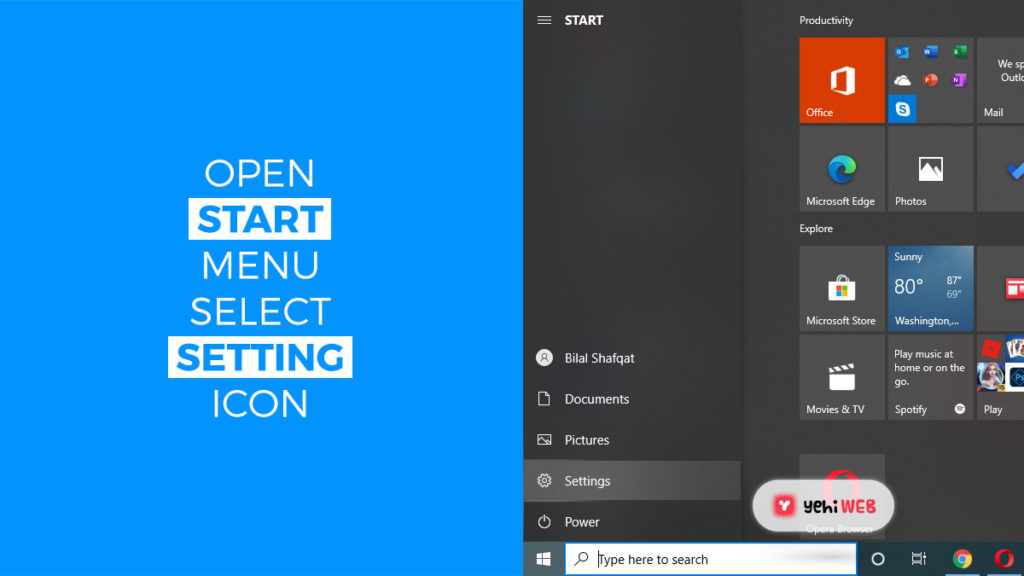
- Click on the Start menu and select Settings Icon to launch the settings app.
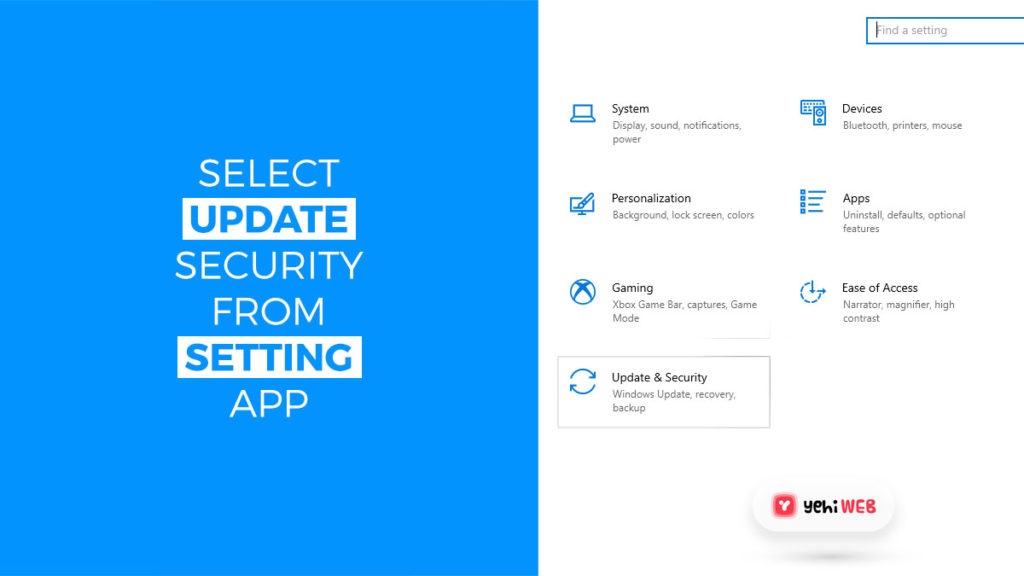
- Once in Settings, click on Update & Security.
- Next, click on Windows Update.
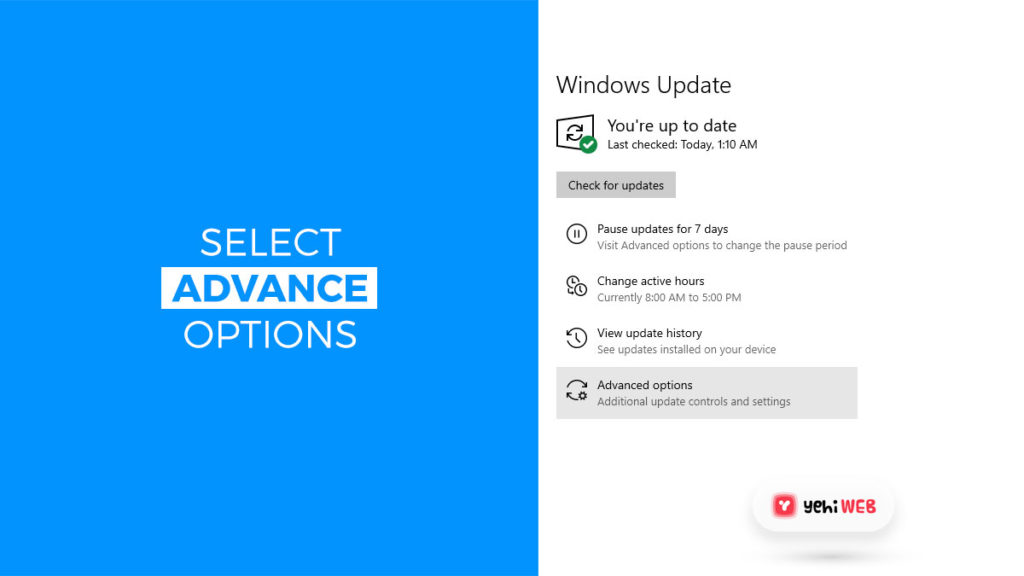
- In the Windows Update window, click on the Advanced Options button.
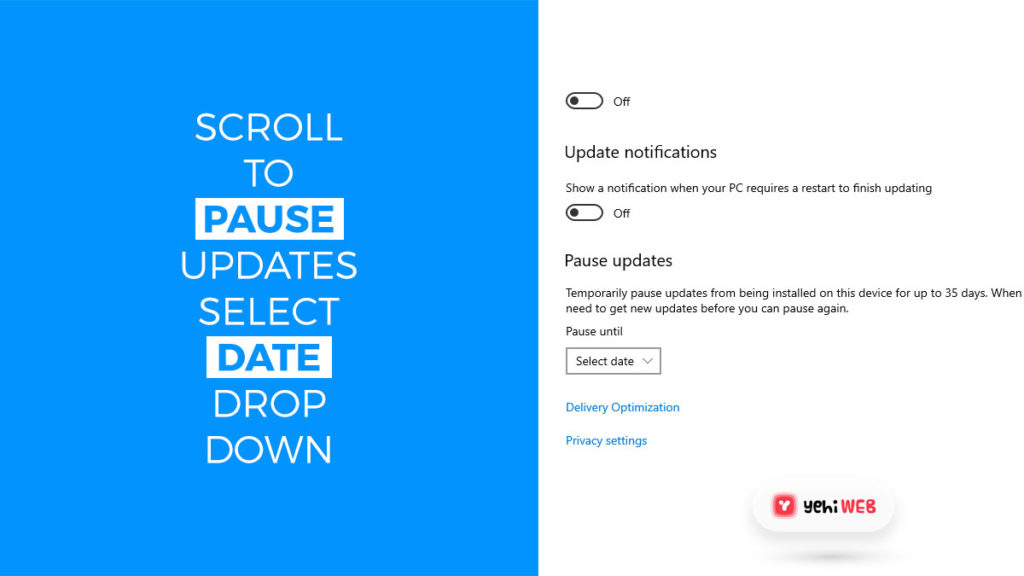
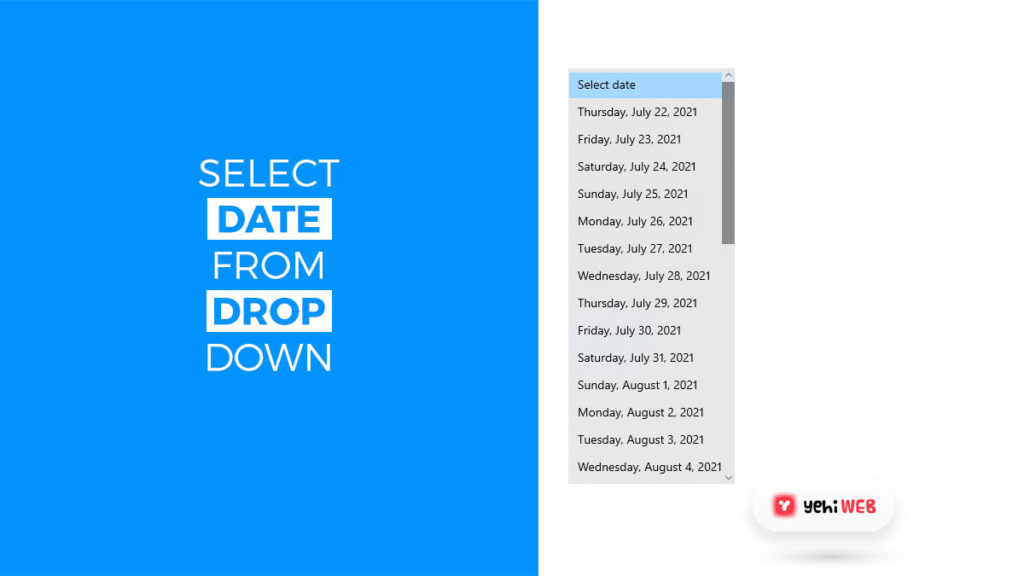
- Scroll down to the “Pause Updates” sections and click on the Select date drop-down menu.
- Select a date for how long you want to disable the updates.
Doing this will prevent Windows from downloading updates until the date you specified.
READ MORE
Fix: Mic Not Working On Discord
How to Disable Windows 10 Automatic Updates with Group Policy?
In case you don’t want automatic updates on your Windows 10 Operation system at all. You can use Local Group Policy Editor policies to disable automatic updates altogether.
Permanently Disable Updates
Follow these steps to completely disable Windows 10 automatic updates:
- Click on the Start menu button.
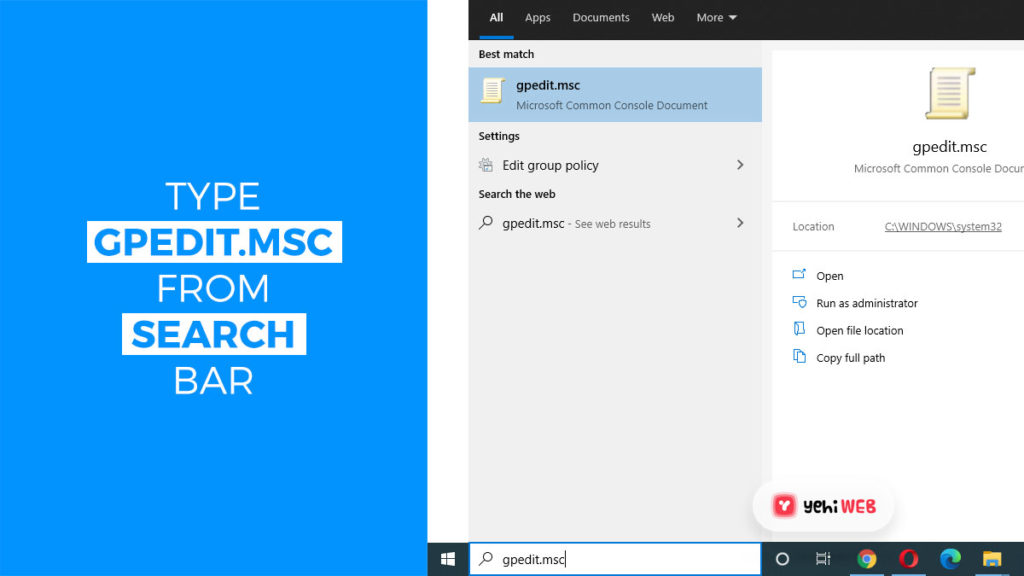
- Type gpedit.msc into the search bar, then select Local Group Policy Editor from the results.
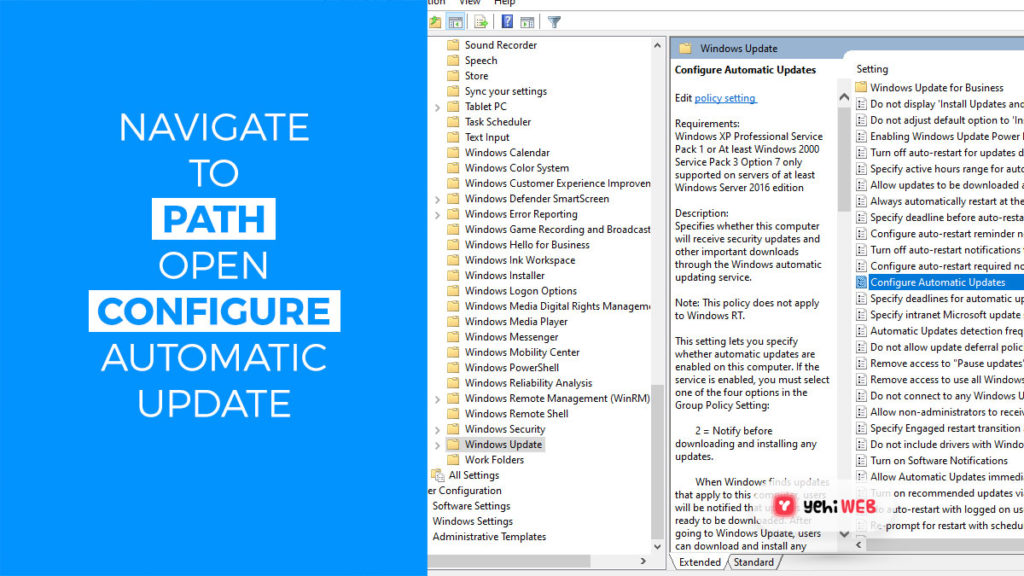
- Next, Navigate to Computer Configuration > Administrative Templates > Windows Components > Windows Update
- Now, under the settings section, find and double-click on Configure Automatic Updates.
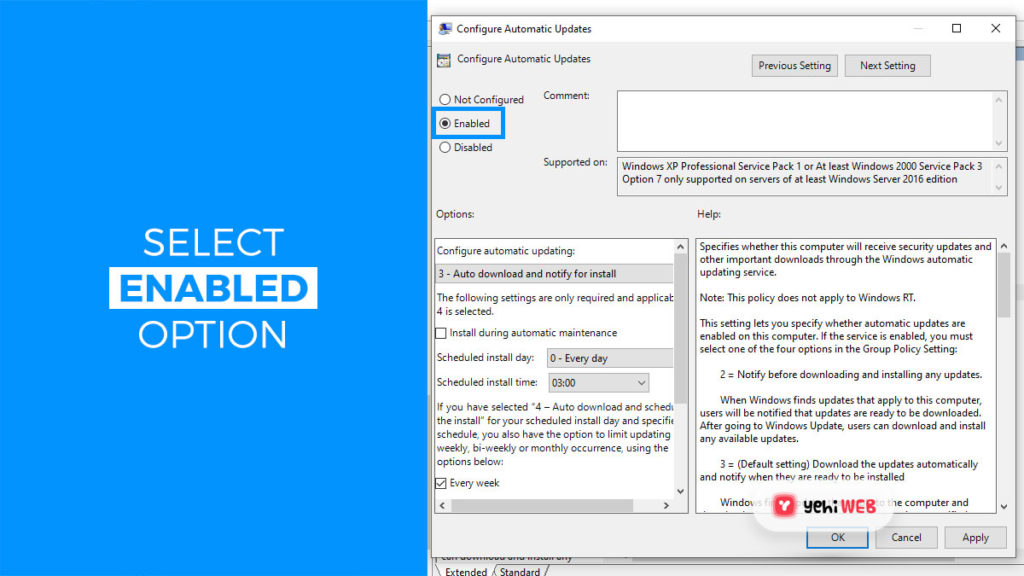
- On the Configure Automatic Updates window, check the disabled option and click OK.
The method will disable Windows 10 automatic updates on your system permanently. But, the option to manual update will still be available for you.
You can still check for updates by navigating to Settings > Update & Security > Windows Update. From here, click on Check for updates to download the latest patch available here.
And in case you want to revert the changes made to disable automatic updates. You can repeat the steps mentioned above to resume automatic updates.
Manage Updates
Group Policy Editor policies also let manage Windows automatic updates. In case you want to control if you wish to download and install an update available.
Group Policy Editor lets you configure the feature to notify you when a patch is available. And decide whether you want to download and install an update or not.
Follow the steps mentioned below to manage automatic updates with Group Policy Editor:
- In the search bar, type gpedit.msc after clicking the start menu button.
- Click on Group Policy Editor from the search results.
- On Policy Editor, Navigate to Computer Configuration > Administrative Templates > Windows Components > Windows Update
- Find and double-click on Configure Automatic Updates policy from the right pane.
- Turn on Configure Automatic Updates policy by checking the enable option.
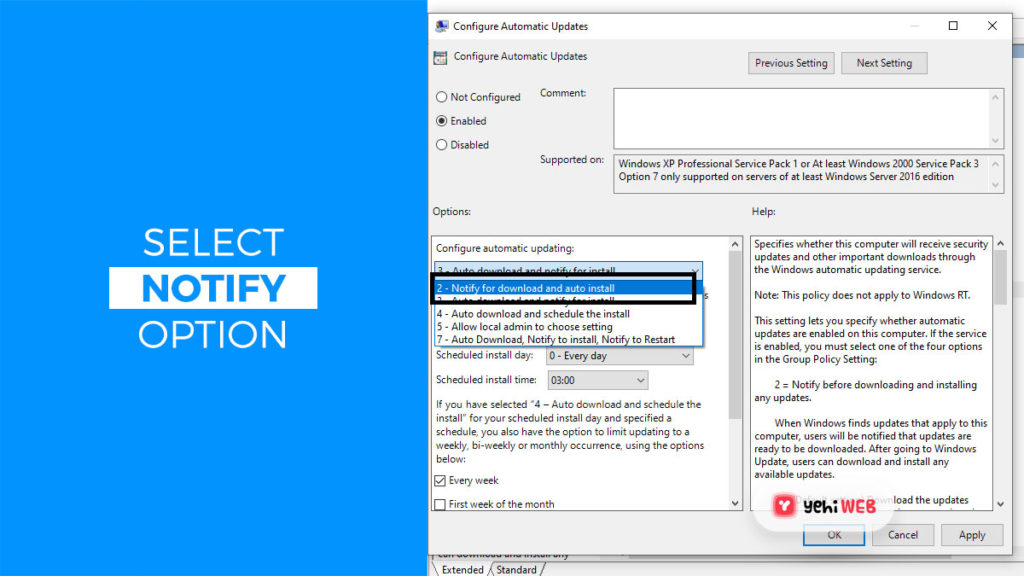
- Next, move down to the section “Options.” Click on the drop-down menu list under configure automatic updates.
- Select ‘notify for download and auto install’ from the drop-down list.
- To save the changes, click Apply and then OK.
The solution mentioned above will disable automatic updates on your Windows 10 system.
How to Disable Windows 10 Automatic Updates with Registry Editor?
You can disable windows 10 automatic updates using Registry editor as well. Like Group Policy Editor, we will outline at least two different ways for you to do that.
Disable Automatic Updates
Follow these steps to permanently disable Windows 10 automatic updates:
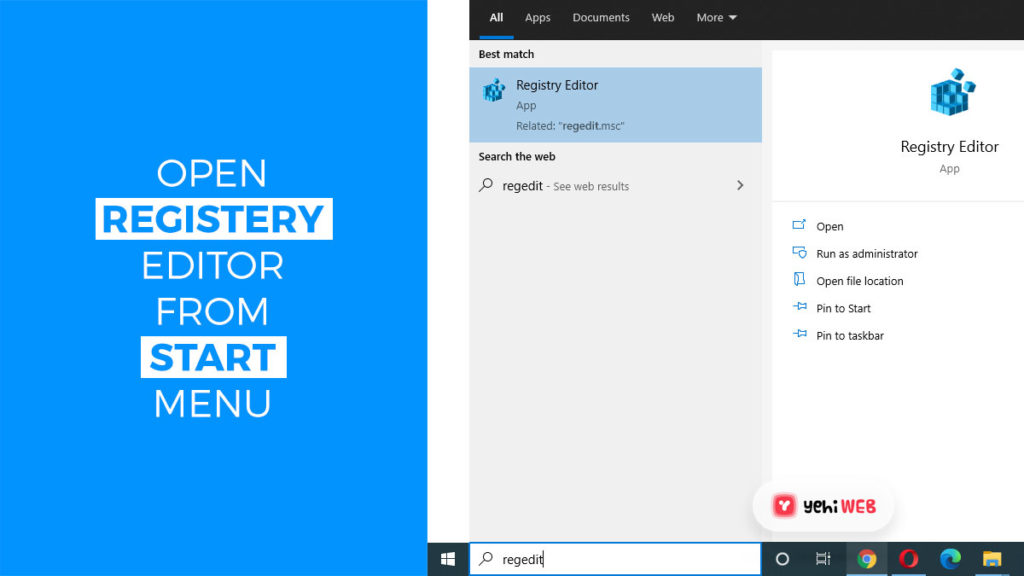
- In the Start menu search bar, type Regedit.
- From the search result, click on the Registry Editor.
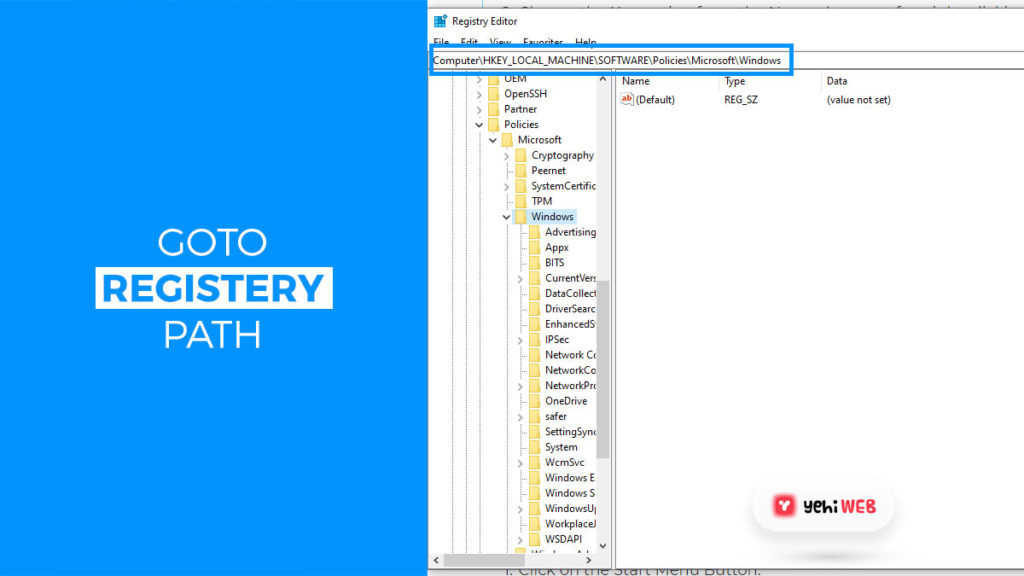
- From the Registry Editor Window Navigate to the following path:
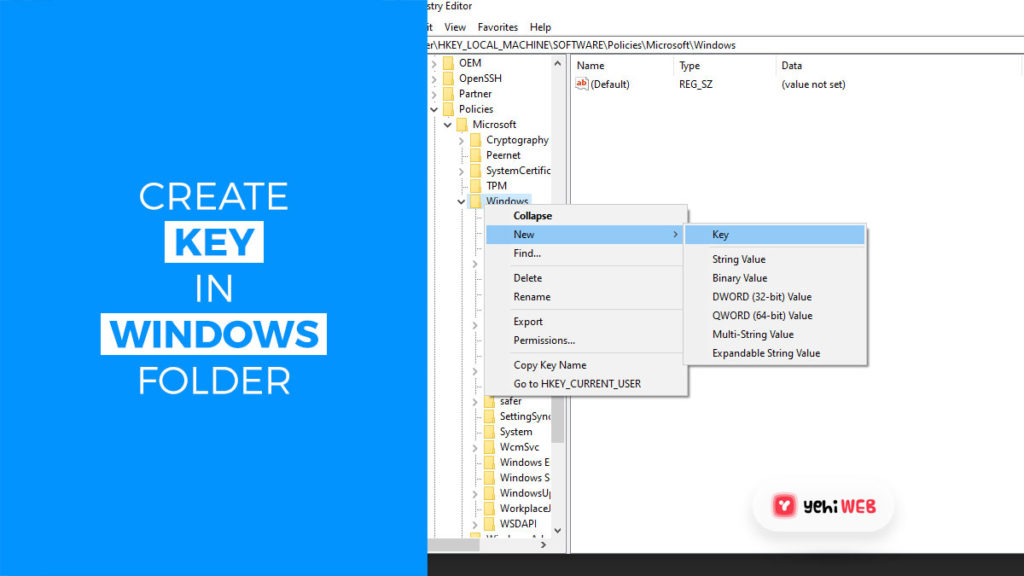
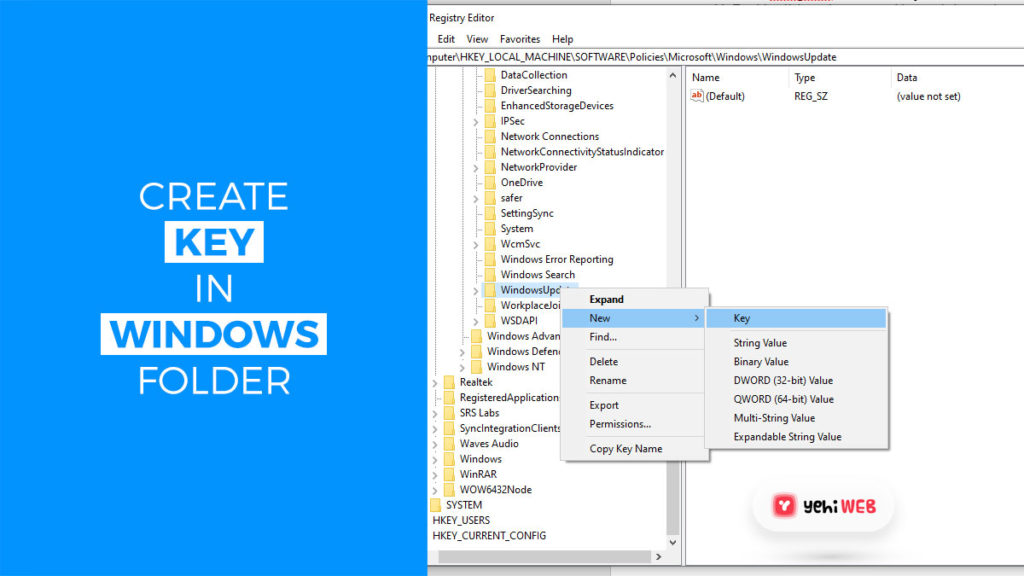
- Right-click on the Windows folder from the left pane, hover your cursor over new to get its submenu and click on Key.
- Enter WindowsUpdate as the new key’s name.
- Choose the Key option from the New submenu after right-clicking the generated key.
- Enter AU as the new key’s name.
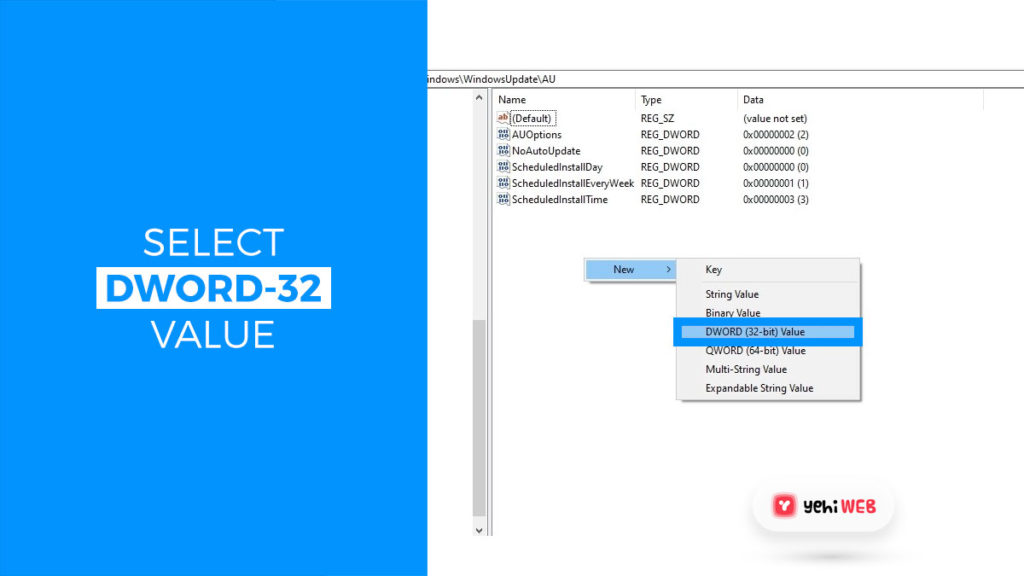
- Select the DWORD (32-bit) Value option from the New submenu after right-clicking the AU key.
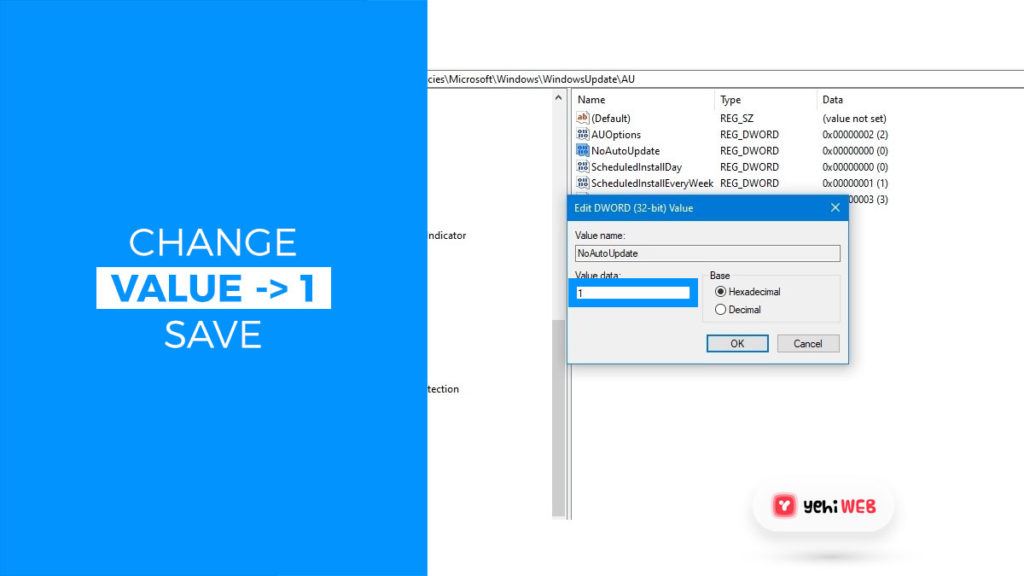
- Enter the name NoAutoUpdate for the new key.
- Change the value of the newly generated key from 0 to 1 by double-clicking it.
- Then press the OK button.
- Close all windows restart your windows.
The steps mentioned above will permanently disable windows 10 automatic updates. But again, you can download and install the latest updates from the Windows update page.
You may also undo the changes by using the same procedures as before. But make sure to delete the WindowsUpdate key that you generated from step No.4. After that, restart your windows to apply the changes.
Manage Automatic Updates
Like Group Policy, you can use Registry Editor to manage Windows updates as well.
Follow these steps to configure Registry Editor to manage Windows updates:
- Click on the Start Menu Button.
- Type Regedit in the search bar then picks Registry Editor from the list of results.
- Next, in Registry Editor, navigate to the following path:
- Select the Key option from the New submenu after right-clicking the Windows file.
- Enter WindowsUpdate as the new key’s name.
- Choose the Key option from the New submenu after right-clicking the generated key.
- Enter AU as the new key’s name.
- Select the DWORD (32-bit) Value option from the New submenu after right-clicking the AU key.
- Name AUOptions for the new key and click Enter.
- Double-click on the generated key and change the value (number only) to:
- 2 — Notification for downloading and installing updates.
- 3 — Download updates automatically and notify for install.
- 4 — Schedule Auto downloading and installation.
- 5 — Schedule Auto downloading and installation.
- 7 — Schedule Auto downloading and installation.
- Next, click OK to close the window.
- Finally, restart your computer.
After performing the steps mentioned above, Windows 10 will stop downloading updates. But, it will still notify you when a new patch or an update is available.
Again, repeat the same steps to revert the changes made to enable the feature. But make sure to delete the WindowsUpdate key generated in the registry editor.
Although, there are valid reasons to disable them on occasion. But keep in mind that updates are essential whether you use Windows 10 or other Windows versions. Not only do they improve the user experience, but they also give security updates.
But, when you want total control over system updates, for example. You want to reduce the odds of encountering problems as a result of a buggy release.
Employing solutions like the one we provided above has become a necessity for some. Especially true for those who have critical apps and equipment installed.
Bilal Shafqat
Related posts
New Articles
How to Adjust Ken Burns Effect in Filmora
If you’ve ever marveled at the subtle zooming and panning effects often seen in documentaries and cinematic slide shows, chances…

![How to disable windows 10 Automatic Updates [ Ultimate Guide ]](https://yehiweb.com/wp-content/uploads/2021/07/how-to-disable-windows-10-automatic-updates-yehiweb-1200x675.jpg)
